流程分析
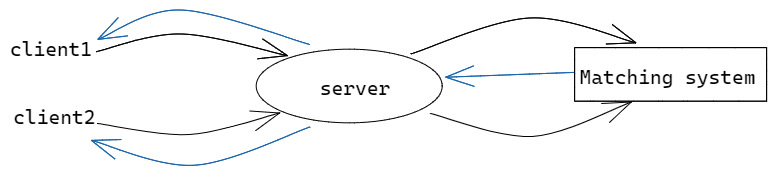
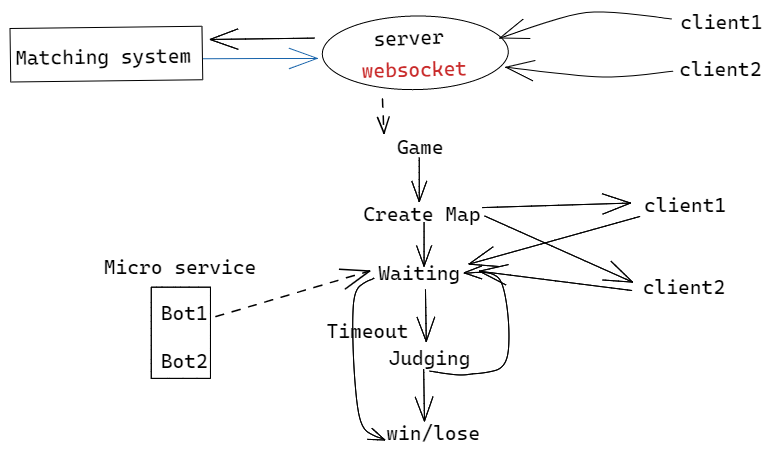
整个匹配的过程是异步过程,也就是在Matching system中执行匹配的过程,会执行一个未知的时间,当出现符合条件的匹配结果时,才会立即将结果返回给前端。这种流程很难用之前的Http来达到预期效果(http为请求一次返回一次,且一般立即响应)。对于匹配系统,请求一次,返回的时间位置,而且可能多次返回。
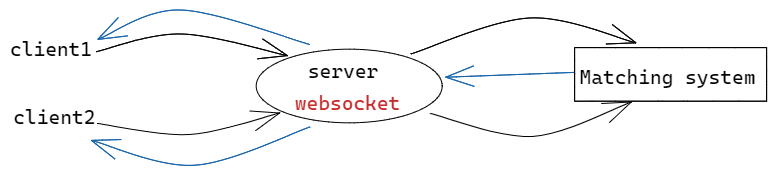
用websocket协议,不仅客户端可以向服务器主动发送请求,服务器也可以主动向客户端发送请求,是一种对称的通信方式。
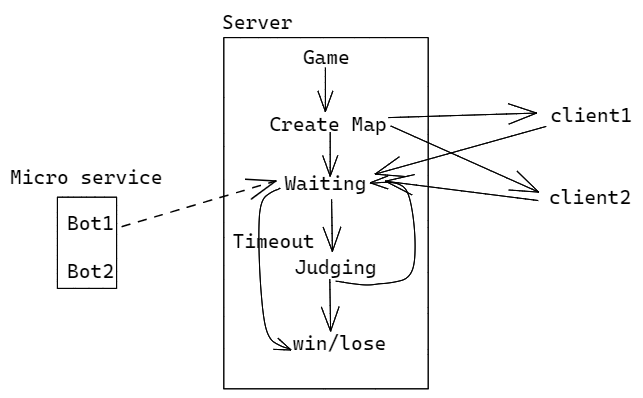
之前的地图生成方式,是在用户本地(浏览器中)随机生成,如果两名玩家都在本地实现地图,地图就会产生冲突。因此,需要将生成地图的整个过程,由服务器统一完成。此外,判断游戏是否失败的逻辑(蛇撞击),如果在用户本地(浏览器)中实现,就可能会导致用户作弊。所以,不仅是生成地图,而是整个游戏的过程(蛇的移动、判定),都要做服务器端统一完成,服务器端的相关参数、判定结果返回给前端,前端只用来渲染画面,不做任何判定逻辑。
websocket原理
将前端建立的每个websocket连接在后端维护起来
添加consumer.WebSocketServer类
1
2
3
4
5
6
7
8
9
10
11
12
13
14
15
16
17
18
19
20
21
22
23
24
25
26
27
28
29
30
31
| package com.kob.backend.consumer;
import org.springframework.stereotype.Component;
import javax.websocket.*;
import javax.websocket.server.PathParam;
import javax.websocket.server.ServerEndpoint;
@Component
@ServerEndpoint("/websocket/{token}")
public class WebSocketServer {
@OnOpen
public void onOpen(Session session, @PathParam("token") String token) {
}
@OnClose
public void onClose() {
}
@OnMessage
public void onMessage(String message, Session session) {
}
@OnError
public void onError(Session session, Throwable error) {
error.printStackTrace();
}
}
|
在用户开始匹配的时候,每个client向后端发送一个请求,就会在后端开辟一个线程,创建并维护一个websocket连接(实际上就是new一个WebSocketServer类的实例)
1
2
| WebSocketServer client1 = new WebSocketServer();
WebSocketServer client2 = new WebSocketServer();
|
后端接收到请求之后,将信息发送给匹配系统。
集成WebSocket
1)在pom.xml文件中添加依赖:
spring-boot-starter-websocketfastjson
2)添加config.WebSocketConfig配置类:
1
2
3
4
5
6
7
8
9
10
11
12
13
14
15
| package com.kob.backend.config;
import org.springframework.context.annotation.Bean;
import org.springframework.context.annotation.Configuration;
import org.springframework.web.socket.server.standard.ServerEndpointExporter;
@Configuration
public class WebSocketConfig {
@Bean
public ServerEndpointExporter serverEndpointExporter() {
return new ServerEndpointExporter();
}
}
|
3)添加consumer.WebSocketServer类
1
2
3
4
5
6
7
8
9
10
11
12
13
14
15
16
17
18
19
20
21
22
23
24
25
26
27
28
29
30
| package com.kob.backend.consumer;
import org.springframework.stereotype.Component;
import javax.websocket.*;
import javax.websocket.server.PathParam;
import javax.websocket.server.ServerEndpoint;
@Component
@ServerEndpoint("/websocket/{token}")
public class WebSocketServer {
@OnOpen
public void onOpen(Session session, @PathParam("token") String token) {
}
@OnClose
public void onClose() {
}
@OnMessage
public void onMessage(String message, Session session) {
}
@OnError
public void onError(Session session, Throwable error) {
error.printStackTrace();
}
}
|
上面最核心的一个函数是onMessage,负责Server从Client接收消息时处理相关逻辑。那如何在通过后端,向前端client发送信息呢?
定义Session对象,每个连接本质上是通过Session维护
1
| private Session session = null;
|
新增sendMessage函数,用于后端向当前连接发送信息
1
2
3
4
5
6
7
8
9
10
| public void sendMessage(String message){
synchronized (this.session){
try{
this.session.getBasicRemote().sendText(message);
}catch (IOException e){
e.printStackTrace();
}
}
}
|
另外还需要存储下每个connection对应的用户是谁,这样才能清楚哪两个用户之间发生了匹配,用户信息也要存储到Session中。并且需要根据用户的ID,找到相应的WebSocketServer连接是哪一个,所以将两者的映射关系存储在ConcurrentHashMap中,ConcurrentHashMap是一个线程安全的哈希表
1
2
3
| private User user;
private static ConcurrentHashMap<Integer,WebSocketServer>
userConnectionInfo = new ConcurrentHashMap<>();
|
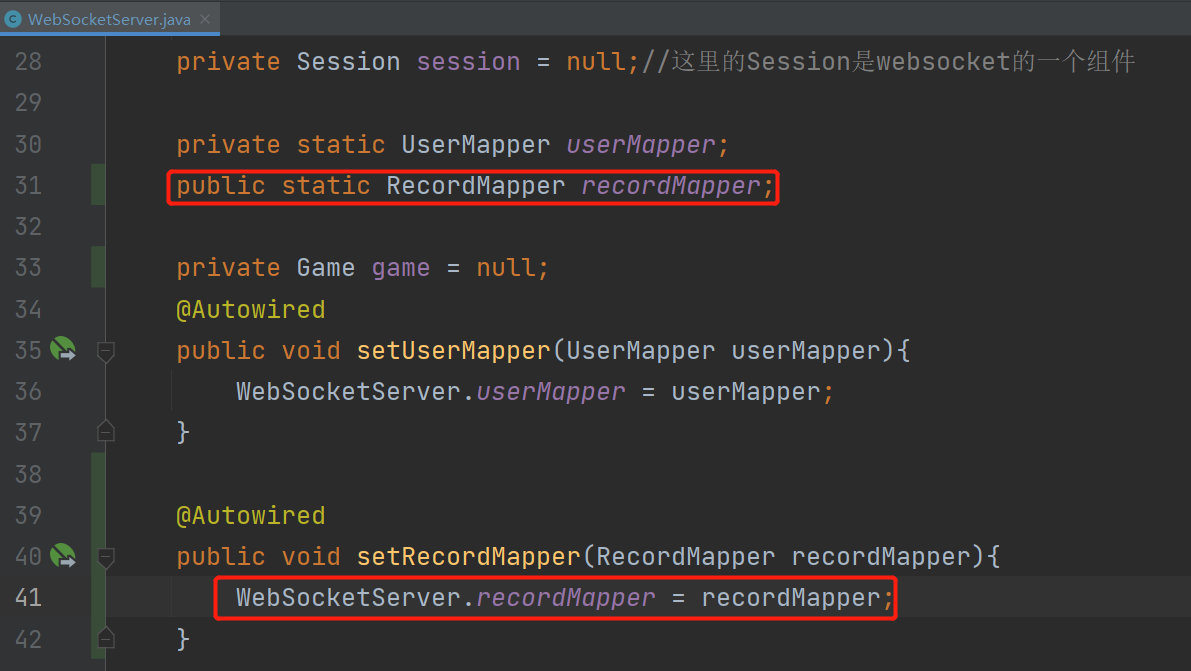
由于WebSocket不属于Spring的一个组件,不是单例模式,因此,注入mapper的方式有些区别
1
2
3
4
5
6
| private static UserMapper userMapper;
@Autowired
public void setUserMapper(UserMapper userMapper){
WebSocketServer.userMapper = userMapper;
}
|
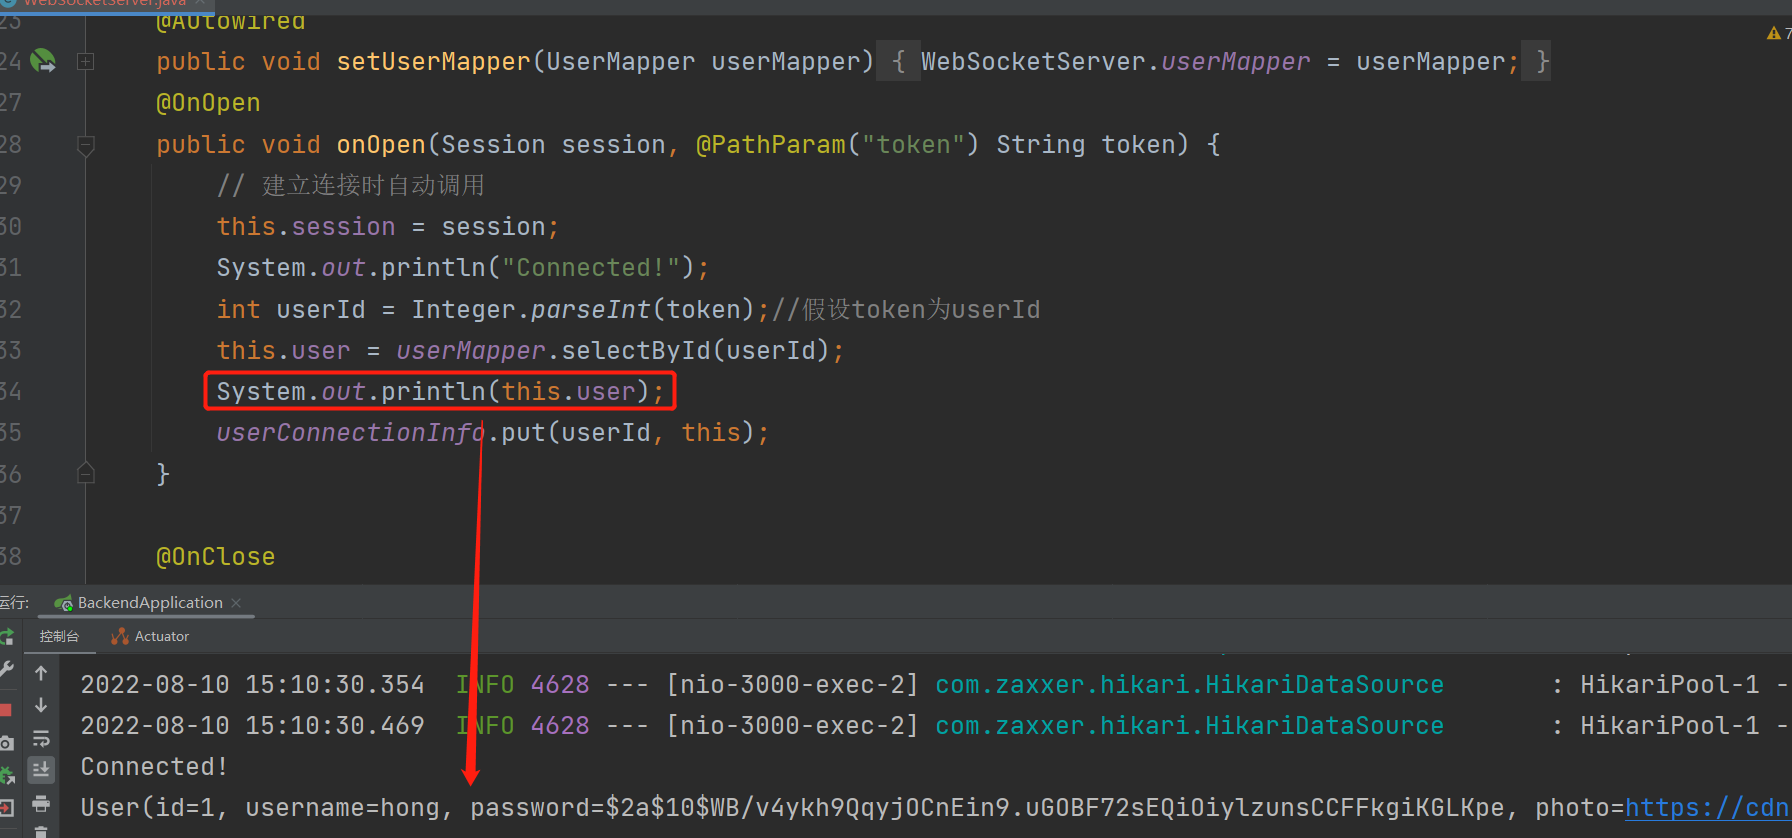
在建立连接时,需要建立用户ID与WebSocketServer实例的映射
1
2
3
4
5
6
7
8
9
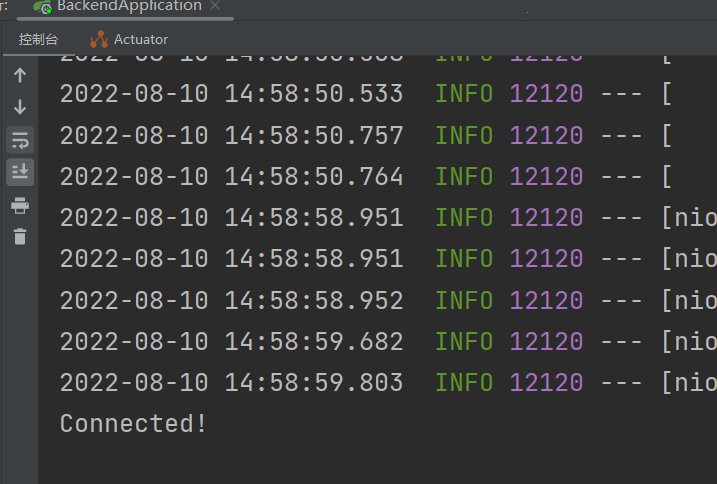
| @OnOpen
public void onOpen(Session session, @PathParam("token") String token) {
this.session = session;
System.out.println("Connected!");
int userId = Integer.parseInt(token);
this.user = userMapper.selectById(userId);
userConnectionInfo.put(userId, this);
}
|
在关闭连接时,删除这种映射
1
2
3
4
5
6
7
8
| @OnClose
public void onClose() {
System.out.println("Disconnected!");
if(this.user != null){
userConnectionInfo.remove(this.user.getId());
}
}
|
此时的WebSocketServer.java为:
1
2
3
4
5
6
7
8
9
10
11
12
13
14
15
16
17
18
19
20
21
22
23
24
25
26
27
28
29
30
31
32
33
34
35
36
37
38
39
40
41
42
43
44
45
46
47
48
49
50
51
52
53
54
| @Component
@ServerEndpoint("/websocket/{token}")
public class WebSocketServer {
private User user;
private static ConcurrentHashMap<Integer,WebSocketServer>
    userConnectionInfo = new ConcurrentHashMap<>();
private Session session = null;
private static UserMapper userMapper;
@Autowired
public void setUserMapper(UserMapper userMapper){
WebSocketServer.userMapper = userMapper;
}
@OnOpen
public void onOpen(Session session, @PathParam("token") String token) {
this.session = session;
System.out.println("Connected!");
int userId = Integer.parseInt(token);
this.user = userMapper.selectById(userId);
userConnectionInfo.put(userId, this);
}
@OnClose
public void onClose() {
System.out.println("Disconnected!");
if(this.user != null){
userConnectionInfo.remove(this.user.getId());
}
}
@OnMessage
public void onMessage(String message, Session session) {
System.out.println("Receive message!");
}
@OnError
public void onError(Session session, Throwable error) {
error.printStackTrace();
}
public void sendMessage(String message){
synchronized (this.session){
try{
this.session.getBasicRemote().sendText(message);
}catch (IOException e){
e.printStackTrace();
}
}
}
}
|
4)配置config.SecurityConfig,将/websocket/{token}一类的url链接全部放行
1
2
3
4
| @Override
public void configure(WebSecurity web) throws Exception {
web.ignoring().antMatchers("/websocket/**");
}
|
接口调试
我们在views\pk\PkIndexView.vue中对WebSocket进行测试
期望在当前组件被加载成功之后,建立一个连接。
需要引入vue的两个与生命周期有关的函数
onMounted是当组件被挂载完成之后执行的函数onUnmounted是当组件被卸载之后执行的函数
同时,需要将WebSocket存储到全局变量中,在store中开一个新的module用于存储所有和pk相关的全局变量
src\store\pk.js
1
2
3
4
5
6
7
8
9
10
11
12
13
14
15
16
| export default ({
state: {
status:"matching",
socket:null,
opponent_username:"",
opponent_photo:"",
},
mutations: {
},
actions: {
},
modules: {
}
})
|
由于在成功创建连接之后,需要将连接信息,存储到全局变量中
所以需要在src\store\pk.js实现几个辅助函数
1
2
3
4
5
6
7
8
9
10
11
12
13
14
15
16
17
18
19
20
21
22
23
24
25
| export default ({
state: {
status:"matching",
socket:null,
opponent_username:"",
opponent_photo:"",
},
mutations: {
updateSocket(state, socket){
state.socket = socket;
},
updateOpponent(state, opponent){
state.opponent_username = opponent.username;
state.opponent_photo = opponent.photo;
},
updateStatus(state, status){
state.status = status;
}
},
actions: {
},
modules: {
}
})
|
然后在views\pk\PkIndexView.vue引入全局变量useStore
在当前组件被挂载的时候(可以简单理解为页面被打开的时候),也就是onMounted执行的时候,我们需要创建connection,在onUnmounted执行的时候,关闭连接。
1
2
3
4
5
6
7
8
9
10
11
12
13
14
15
16
17
18
19
20
21
22
23
24
25
26
27
28
| export default {
components:{
PlayGround
},
setup() {
const store = useStore();
const socketUrl = `ws://127.0.0.1:3000/websocket/${store.state.user.id}`;
let socket = null;
onMounted(() => {
socket = new WebSocket(socketUrl);
socket.onopen = () => {
console.log("connected!");
store.commit("updateSocket",socket);
}
socket.onmessage = msg =>{
const data = JSON.parse(msg.data);
console.log(data);
}
socket.onclose = () =>{
console.log("disconnected!");
}
});
onUnmounted(()=>{
socket.close();
})
}
}
|
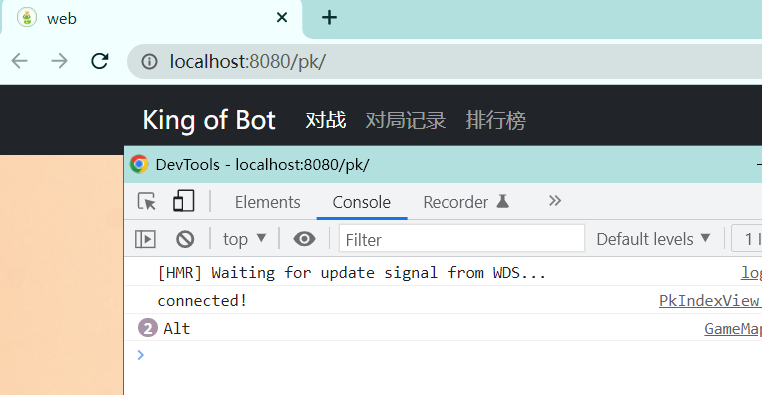
建立连接
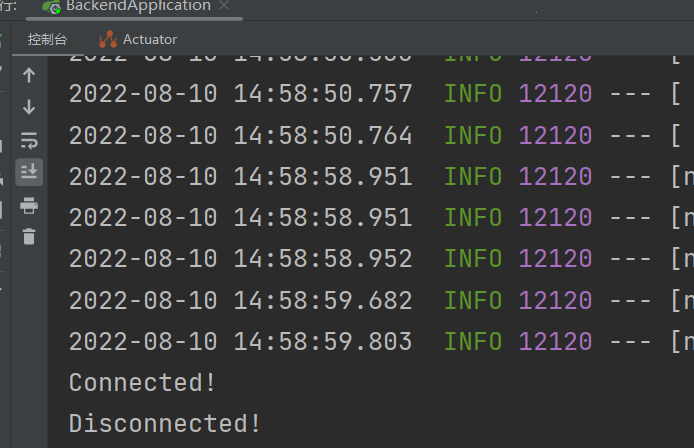
当进入到对战页面时,可以在后端和浏览器的控制台中看到连接成功的输出
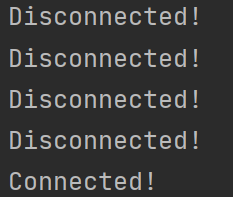
此时如果切换到其他页面,又会断开连接
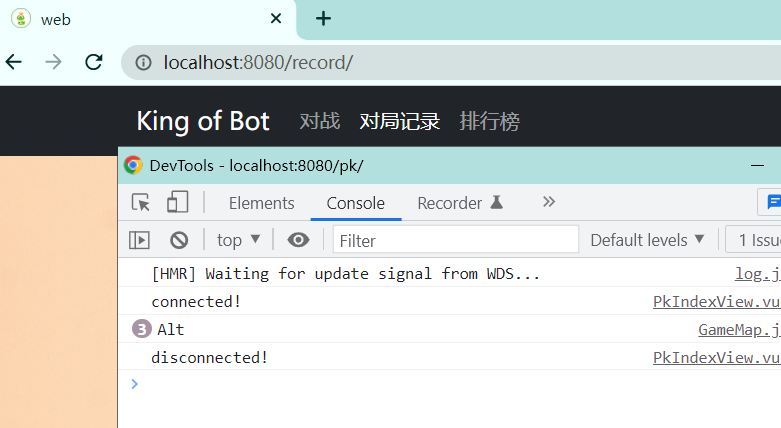
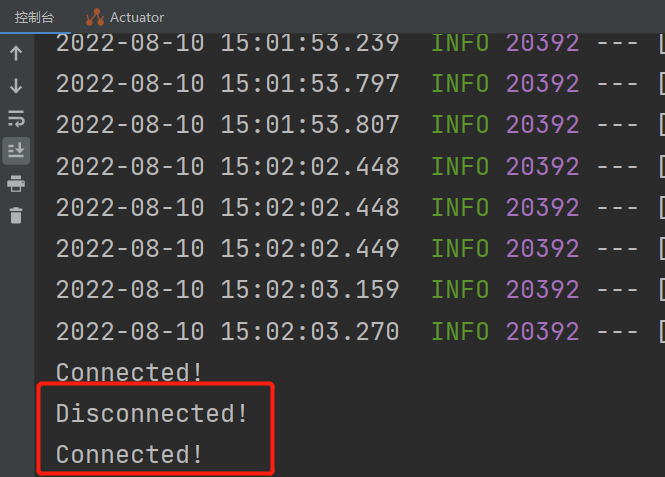
注意如果刷新页面,就会先断开连接,后建立连接
而且,必须要在页面卸载时,关闭连接
1
2
3
| onUnmounted(()=>{
socket.close();
})
|
否则,切换到其他页面的时候,没有关闭连接,但是在每一次进来的时候,又会创建连接
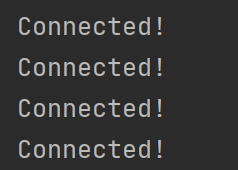
刷新或者关闭时,会关闭所有的连接,从输出看出不止一个
所以,如果不进行正常关闭,在切换到其他页面时,旧连接不会关闭,因此会产生很多冗余的连接。
在成功连接后,后端输出获取到的用户信息如下:
此时建立连接时,是直接将用户的ID传输过来,但这样显然是不安全的,因为前端可以通过修改{token}的方式,伪装成任意一个用户的身份建立连接,因此需要添加验证,这里仍然是使用Jwt进行验证
Jwt验证
前端直接将jwt-token传过去
1
| const socketUrl = `ws://127.0.0.1:3000/websocket/${store.state.user.token}`;
|
后端验证的方式,在config.filter.JwtAuthenticationTokenFilter已经给出
那就是就是如果能从token中解析出userId就认为是合法的,否则就是不合法
1
2
3
4
5
6
7
8
| String userid;
try {
Claims claims = JwtUtil.parseJWT(token);
userid = claims.getSubject();
} catch (Exception e) {
throw new RuntimeException(e);
}
|
为了日后方便,将这段代码提出,放在一个单独的工具类consumer.utils.JwtAuthentication中
1
2
3
4
5
6
7
8
9
10
11
12
13
14
15
16
17
| package com.kob.backend.consumer.utils;
import com.kob.backend.utils.JwtUtil;
import io.jsonwebtoken.Claims;
public class JwtAuthentication {
public static Integer getUserId(String token){
int userId = -1;
try {
Claims claims = JwtUtil.parseJWT(token);
userId = Integer.parseInt(claims.getSubject());
} catch (Exception e) {
throw new RuntimeException(e);
}
return userId;
}
}
|
此时WebSocketServer.java中onOpen函数体更新为
1
2
3
4
5
6
7
8
9
10
11
12
| @OnOpen
public void onOpen(Session session, @PathParam("token") String token) throws IOException {
this.session = session;
System.out.println("Connected!");
int userId = JwtAuthentication.getUserId(token);
this.user = userMapper.selectById(userId);
if(this.user != null)
userConnectionInfo.put(userId, this);
else
this.session.close();
}
|
这样就能够成功实现jwt验证
前端实现
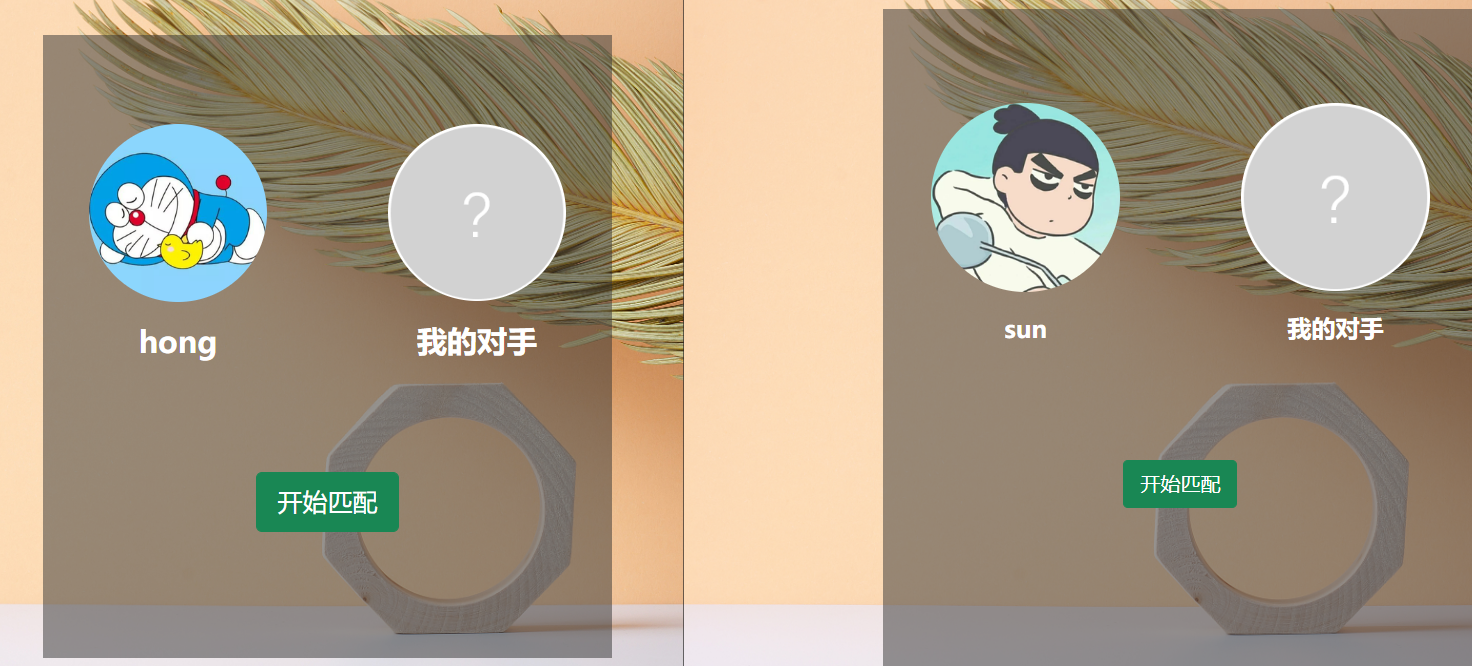
此时前端还只有对战界面,并没有匹配界面,我们需要实现匹配界面,以及匹配界面和对战界面的切换
与切换有关的全局变量,就是在pk.js中定义的status, matching表示匹配界面,playing表示对战界面
那就需要当status为playing的时候再显示对战页面
1
2
3
| <template>
<PlayGround v-if="$store.state.pk.status === 'playing'"/>
</template>
|
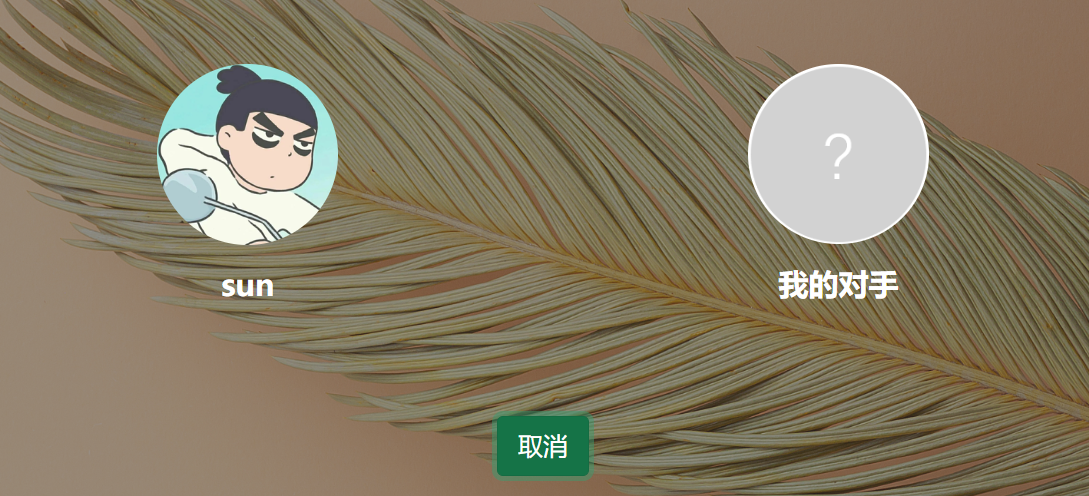
并且需要创建一个新的组件MatchGround.vue,用于表示匹配界面
1
2
3
4
5
6
7
8
9
10
11
12
13
14
15
16
17
18
19
20
21
22
23
24
25
26
27
| <template>
<div class="matchground">
<div class="row">
<div class="col-6">
<div class="user_photo">
<img :src="$store.state.user.photo" alt="">
</div>
<div class="user_username">
{{ $store.state.user.username }}
</div>
</div>
<div class="col-6">
<div class="user_photo">
<img :src="$store.state.pk.opponent_photo" alt="">
</div>
<div class="user_username">
{{ $store.state.pk.opponent_username }}
</div>
</div>
</div>
<div class="row">
<div class="col-12" style="text-align:center; padding-top:12vh">
<button @click="click_match_btn" class="btn btn-success btn-lg">{{match_btn_info}}</button>
</div>
</div>
</div>
</template>
|
为按钮绑定一个click_match_btn触发函数,当点击”开始匹配”,使用WebSocket的sentAPI向后端发送包含event:"start-matching"的字符串(注意,JSON.stringify是将JSON格式处理为字符串,后续还可以恢复JSON格式)
1
2
3
4
5
6
7
8
9
10
11
12
13
14
15
16
17
18
19
20
21
22
23
24
25
26
27
28
| <script>
import { ref } from 'vue'
import { useStore } from 'vuex';
export default {
setup(){
const store = useStore();
let match_btn_info = ref("开始匹配");
const click_match_btn = () =>{
if(match_btn_info.value === "开始匹配"){
match_btn_info.value = "取消";
store.state.pk.socket.sent(JSON.stringify({
event:"start-matching",
}));
}else{
match_btn_info.value = "开始匹配";
store.state.pk.socket.sent(JSON.stringify({
event:"stop-matching",
}));
}
};
return{
match_btn_info,
click_match_btn,
}
}
}
</script>
|
后端收到请求时,就会将message字符串解析为JSON格式,然后根据event值来分配给不同的任务
1
2
3
4
5
6
7
8
9
10
11
12
13
14
15
16
17
18
| private void startMatching(){
System.out.println("start matching!");
}
private void stopMatching(){
System.out.println("stop matching!");
}
@OnMessage
public void onMessage(String message, Session session) {
System.out.println("Receive message!");
JSONObject data = JSONObject.parseObject(message);
String event = data.getString("event");
if("start-matching".equals(event)){
startMatching();
} else if ("stop-matching".equals(event)) {
stopMatching();
}
}
|
在后端需要建立一个线程安全的Set作为匹配池
1
2
| private static CopyOnWriteArraySet<User>
matchpool = new CopyOnWriteArraySet<>();
|
然后在相应的时间添加和删除
1
2
3
4
5
6
7
8
9
10
11
12
13
14
15
16
17
18
| @OnClose
public void onClose() {
System.out.println("Disconnected!");
if(this.user != null){
userConnectionInfo.remove(this.user.getId());
matchpool.remove(this.user);
}
}
private void startMatching(){
System.out.println("start matching!");
matchpool.add(this.user);
}
private void stopMatching(){
System.out.println("stop matching!");
matchpool.remove(this.user);
}
|
由于现在还没有实现微服务,暂时先实现一个傻瓜式的匹配,也就是匹配池中大于等于两个用户的时候,就实现两两匹配,也就是两个用户user1和user2,并通过两个用户自己的连接,告诉前端匹配成功的相关消息
1
2
3
4
5
6
7
8
9
10
11
12
13
14
15
16
17
18
19
20
21
22
23
24
25
26
27
| private void startMatching(){
System.out.println("start matching!");
matchpool.add(this.user);
while (matchpool.size() >= 2){
Iterator<User> iterator = matchpool.iterator();
User user1 = iterator.next();
User user2 = iterator.next();
matchpool.remove(user1);
matchpool.remove(user2);
JSONObject resp1 = new JSONObject();
resp1.put("event","start-matching");
resp1.put("opponent_username",user2.getUsername());
resp1.put("opponent_photo",user2.getPhoto());
WebSocketServer webSocketServer1 = userConnectionInfo.get(user1.getId());
webSocketServer1.sendMessage(resp1.toJSONString());
JSONObject resp2 = new JSONObject();
resp2.put("event","start-matching");
resp2.put("opponent_username",user1.getUsername());
resp2.put("opponent_photo",user1.getPhoto());
WebSocketServer webSocketServer2 = userConnectionInfo.get(user2.getId());
webSocketServer2.sendMessage(resp2.toJSONString());
}
}
|
在前端的PkIndexView.vue中,当接收到后端发送的消息之后,相关逻辑的实现在onmessage函数中
如果匹配成功,就要更新对手信息
匹配测试
注意,需要两个用户进行测试的话,必须在两个不同的浏览器中。一个浏览器只能允许同时登录一个用户,因为在Local Storage中会共用一个jwt_token
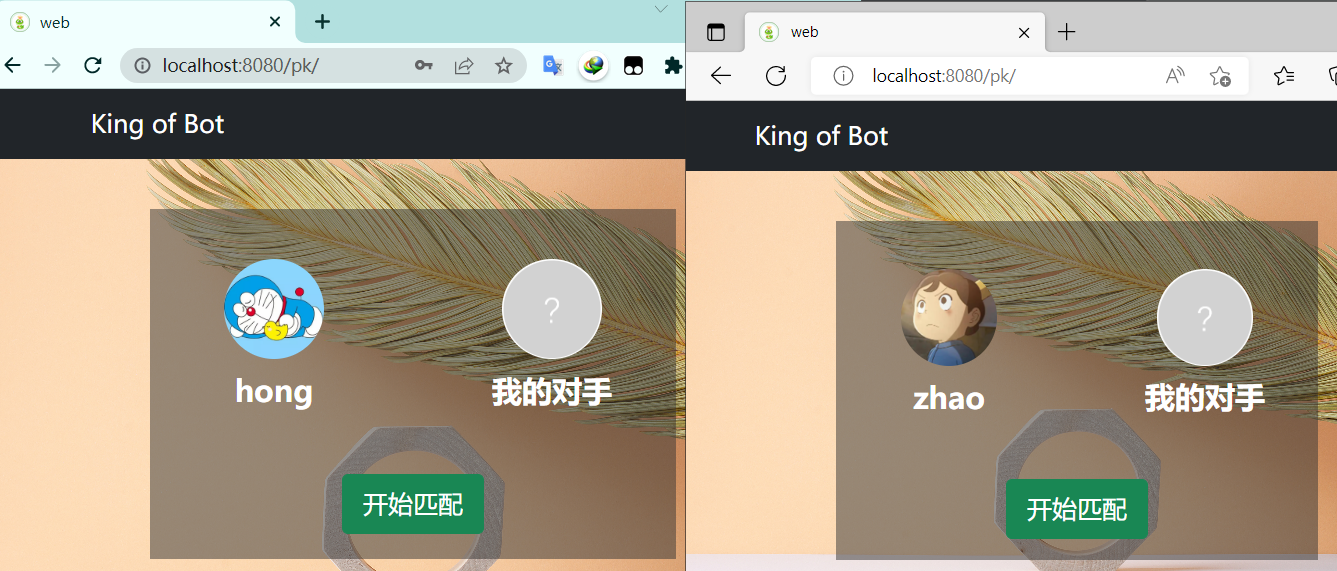
前端如何匹配成功,就更新对手的用户名和头像。
1
2
3
4
5
6
7
8
9
10
11
12
13
14
15
16
17
18
19
20
21
22
23
24
25
26
27
28
29
30
31
32
33
34
35
36
37
38
39
40
41
42
43
44
45
46
47
| import PlayGround from '../../components/PlayGround.vue'
import MatchGround from '../../components/MatchGround.vue'
import { onMounted } from 'vue'
import { onUnmounted } from 'vue'
import { useStore } from 'vuex'
export default {
components:{
PlayGround,
MatchGround
},
setup() {
const store = useStore();
const socketUrl = `ws://127.0.0.1:3000/websocket/${store.state.user.token}`;
let socket = null;
onMounted(() => {
store.commit("updateOpponent",{
username:"我的对手",
photo:"https://cdn.acwing.com/media/article/image/2022/08/09/1_1db2488f17-anonymous.png",
});
socket = new WebSocket(socketUrl);
socket.onopen = () => {
console.log("connected!");
store.commit("updateSocket",socket);
}
socket.onmessage = msg =>{
const data = JSON.parse(msg.data);
console.log(data);
if(data.event === "start-matching"){
store.commit("updateOpponent",{
username:data.opponent_username,
photo:data.opponent_photo
});
}
}
socket.onclose = () =>{
console.log("disconnected!");
}
});
onUnmounted(()=>{
socket.close();
})
}
}
|

然后在匹配成功之后,设置延迟两秒显示,然后跳转到对战页面

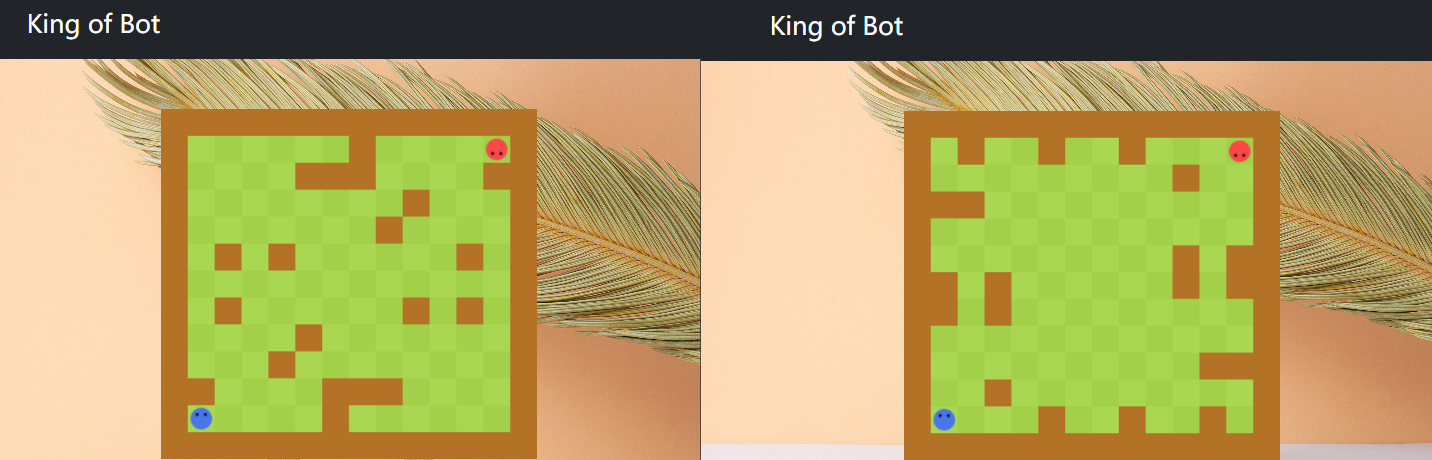
如果切换其他页面再切换回来的时候,地图又发生了变化,期望点击其他页面的时候自动放弃,再切换回来的时候,重新回到匹配页面。
那就需要在卸载页面(onUnmounted)的时候,不仅需要断开连接,同时还要将状态切换为matching状态。
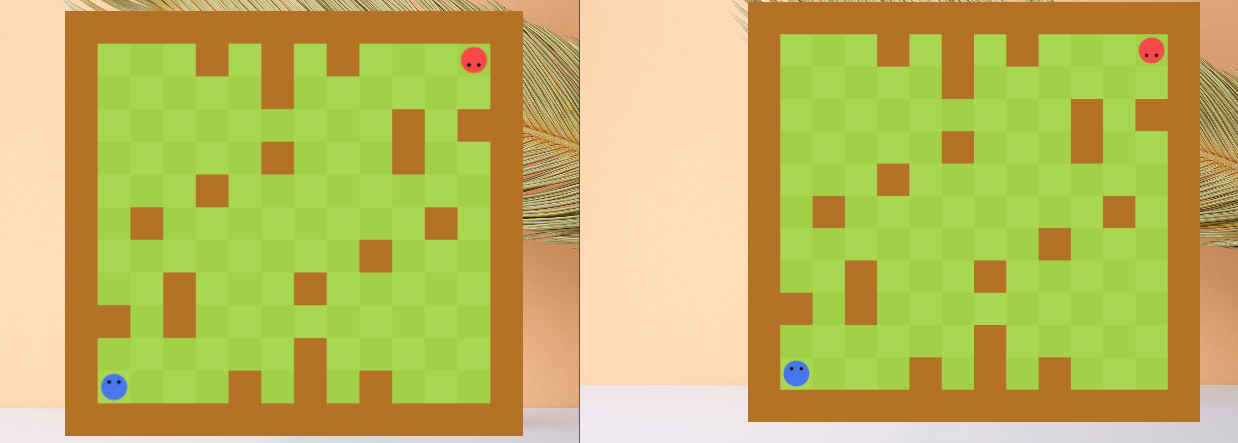
但此时有一个很大的问题,就是两个人的游戏地图不一致。这是因为地图是在浏览器本地生成,为了解决同步问题,需要由服务器统一接管。
地图同步
接下来需要在服务器端实现之前分析的Game流程
添加consumer.utils.Game.java,用于管理整个游戏流程
参考assets\scripts\GameMap.js
画地图参考GameMap.js中create_walls()函数
1
2
3
4
5
6
7
8
9
10
11
12
13
14
15
16
17
18
19
20
21
22
23
24
25
26
27
28
29
30
31
32
33
34
35
36
37
38
39
40
41
42
43
44
45
46
47
48
49
50
51
52
53
54
55
56
57
58
59
60
61
62
63
64
65
66
67
68
69
70
71
72
73
74
75
76
77
78
79
80
81
| import java.util.Random;
public class Game {
final private Integer rows;
final private Integer cols;
final private Integer inner_walls_count;
final private int[][] g;
final private static int[] dx = {-1,0,1,0};
final private static int[] dy = {0,1,0,-1};
public Game(Integer rows, Integer cols, Integer inner_walls_count) {
this.rows = rows;
this.cols = cols;
this.inner_walls_count = inner_walls_count;
this.g = new int[rows][cols];
}
public int[][] getG() {
return g;
}
private boolean check_connectivity(int sx, int sy,int tx, int ty){
if (sx == tx && sy == ty)
return true;
g[sx][sy] = 1;
for(int i = 0; i < 4; i++){
int x = sx + dx[i];
int y = sy + dy[i];
if(x >= 0 && x < this.rows && y >= 0 && y < this.cols && g[x][y] == 0){
if(check_connectivity(x, y, tx, ty)){
g[sx][sy] = 0;
return true;
}
}
}
g[sx][sy] = 0;
return false;
}
private boolean draw(){
for (int i = 0; i < this.rows; i++) {
for (int j = 0; j < this.cols; j++) {
g[i][j] = 0;
}
}
for(int r = 0; r < this.rows; r++){
g[r][0]=1;
g[r][this.cols-1]=1;
}
for(int c = 0; c < this.cols; c++){
g[0][c] = g[this.rows-1][c] = 1;
}
Random random = new Random();
for(int i = 0; i < this.inner_walls_count / 2; i++){
for (int j = 0; j < 1000; j++) {
int r = random.nextInt(this.rows);
int c = random.nextInt(this.cols);
if(g[r][c] == 1 || g[this.rows - 1 - r][this.cols - 1 - c] == 1)
continue;
if(r == this.rows - 2 && c == 1 || r == 1 && c == this.cols-2)
continue;
g[r][c] = g[this.rows - 1 - r][this.cols - 1 - c] = 1;
break;
}
}
return check_connectivity(this.rows-2,1,1,this.cols-2);
}
public void createMap(){
for (int i = 0; i < 1000; i++) {
if(draw())
break;
}
}
}
|
然后在WebSocketServer.java
当开始匹配的时候,实例化一个Game对象用于生成地图,并将生成的地图返回给连接中的两个用户。
当然,最终的地图应该是保存在webSocket中,也就是只对当前匹配的两个用户可见,对其他连接的用户不可见,这一点放在后面实现。
1
2
3
4
5
6
7
8
9
10
11
12
13
14
15
16
17
18
19
20
21
22
23
24
25
26
27
28
29
| private void startMatching(){
System.out.println("start matching!");
matchpool.add(this.user);
while (matchpool.size() >= 2){
Iterator<User> iterator = matchpool.iterator();
User user1 = iterator.next();
User user2 = iterator.next();
matchpool.remove(user1);
matchpool.remove(user2);
Game game = new Game(13,14,20);
game.createMap();
JSONObject resp1 = new JSONObject();
resp1.put("event","start-matching");
resp1.put("opponent_username",user2.getUsername());
resp1.put("opponent_photo",user2.getPhoto());
resp1.put("gamemap",game.getG());
WebSocketServer webSocketServer1 = userConnectionInfo.get(user1.getId());
webSocketServer1.sendMessage(resp1.toJSONString());
JSONObject resp2 = new JSONObject();
resp2.put("event","start-matching");
resp2.put("opponent_username",user1.getUsername());
resp2.put("opponent_photo",user1.getPhoto());
resp2.put("gamemap",game.getG());
WebSocketServer webSocketServer2 = userConnectionInfo.get(user2.getId());
webSocketServer2.sendMessage(resp2.toJSONString());
}
}
|
此时后端可以返回地图,前端写好接收地图的逻辑
src\store\pk.js
1
2
3
4
5
6
7
8
9
10
11
12
13
14
15
16
17
18
19
20
21
22
23
24
25
26
27
28
29
| export default ({
state: {
status:"matching",
socket:null,
opponent_username:"",
opponent_photo:"",
gamemap:null
},
mutations: {
updateSocket(state, socket){
state.socket = socket;
},
updateOpponent(state, opponent){
state.opponent_username = opponent.username;
state.opponent_photo = opponent.photo;
},
updateStatus(state, status){
state.status = status;
},
updayeGamemap(state, gamemap){
state.gamemap = gamemap;
}
},
actions: {
},
modules: {
}
})
|
src\views\pk\PkIndexView.vue
1
2
3
4
5
6
7
8
9
10
11
12
13
14
15
16
| socket.onmessage = msg => {
const data = JSON.parse(msg.data);
console.log(data);
if (data.event === "start-matching") {
store.commit("updateOpponent", {
username: data.opponent_username,
photo: data.opponent_photo
});
setTimeout(() => {
store.commit("updateStatus", "playing")
}, 2000);
store.commit("updateGamemap",data.gamemap)
}
}
|
后端获取gamemap并更新到全局变量之后,要将获取到的gamemap渲染到画布上
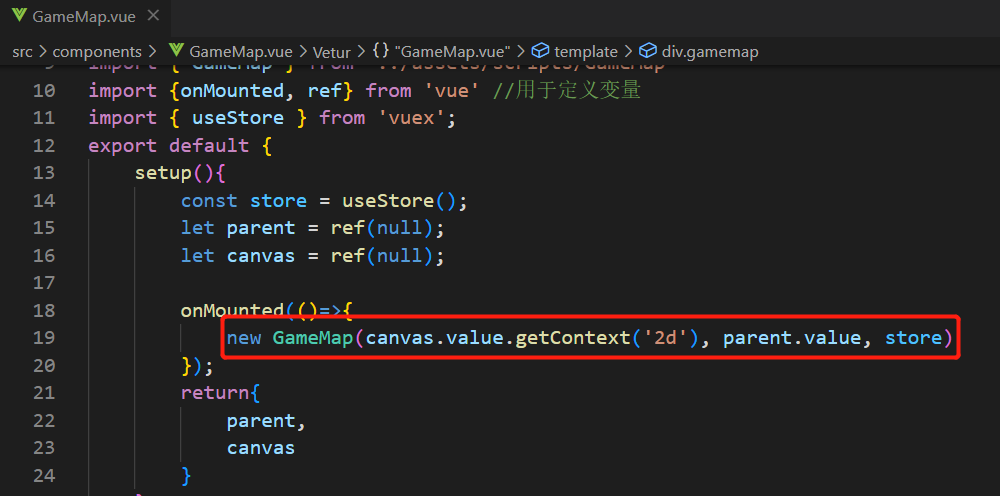
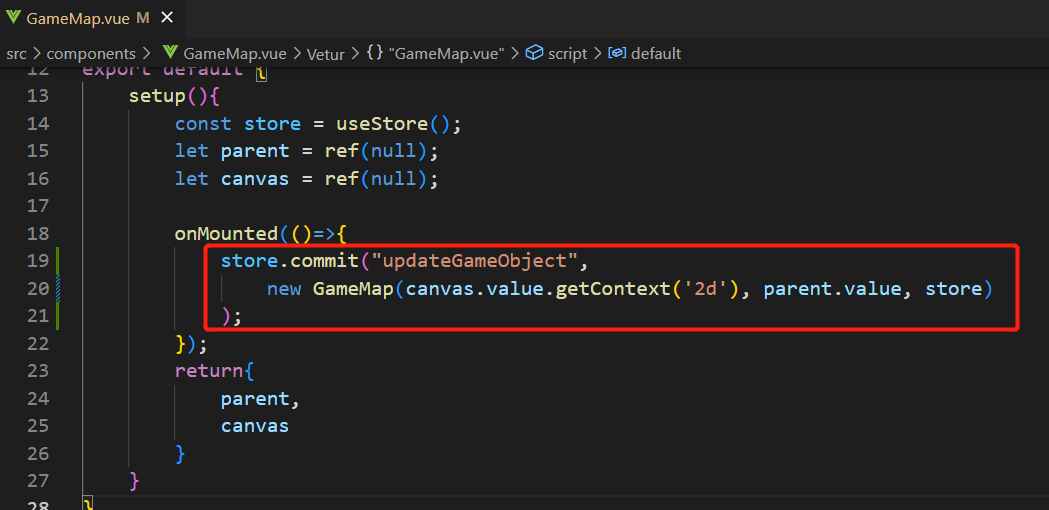
首先在组件GameMap.vue中将全局变量store传递到GameMap的构造函数中
src\components\GameMap.vue
1
2
3
4
5
6
7
8
9
10
11
12
13
14
15
16
17
18
19
| <script>
import { GameMap } from '../assets/scripts/GameMap'
import {onMounted, ref} from 'vue' //用于定义变量
import { useStore } from 'vuex';
export default {
setup(){
const store = useStore();
let parent = ref(null);
let canvas = ref(null);
onMounted(()=>{
new GameMap(canvas.value.getContext('2d'), parent.value, store)
});
return{
parent,
canvas
}
}
}
</script>
|
对于scripts\GameMap.js
相关的代码更新为:
1
2
3
4
5
6
7
8
9
10
11
12
13
14
15
16
17
18
19
20
21
22
23
24
25
26
27
28
29
30
31
32
33
34
35
36
37
| export class GameMap extends GameObject {
constructor(ctx, parent, store){
super();
this.ctx = ctx;
this.parent = parent;
this.store = store;
this.L = 0;
this.rows = 13;
this.cols = 14;
this.inner_walls_count = 10;
this.walls = [];
this.snakes = [
new Snake({id:0, color:"#4876EC",r: this.rows - 2, c: 1},this),
new Snake({id:1, color:"#F94848",r: 1, c: this.cols - 2},this),
];
}
create_walls(){
console.log(this.store)
const g = this.store.state.pk.gamemap;
for(let r = 0; r < this.rows; r++){
for(let c = 0; c < this.cols; c++){
if(g[r][c]){
this.walls.push(new Wall (r,c,this));
}
}
}
}
start(){
this.create_walls();
this.add_listening_events();
}
|
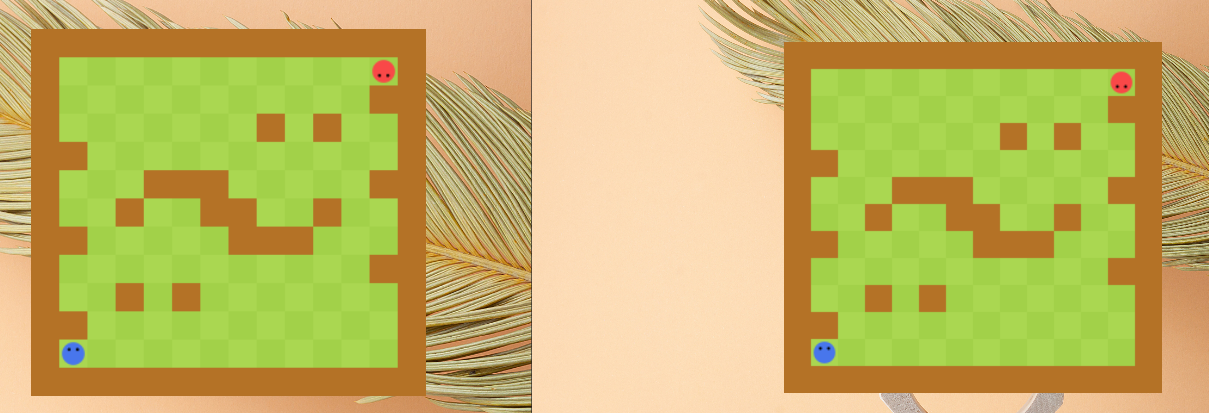
至此,就解决了地图同步问题
玩家位置同步
后端修改
玩家的位置也要在服务端确定,确定完之后将每个玩家的位置传到前端。
添加一个玩家类
consumer.utils.Game.java
1
2
3
4
5
6
7
8
9
10
11
| import java.util.List;
@Data
@AllArgsConstructor
@NoArgsConstructor
public class Player {
private Integer id;
private Integer sx;
private Integer sy;
private List<Integer> steps;
}
|
在初始化Game的时候,实例化两个Player对象
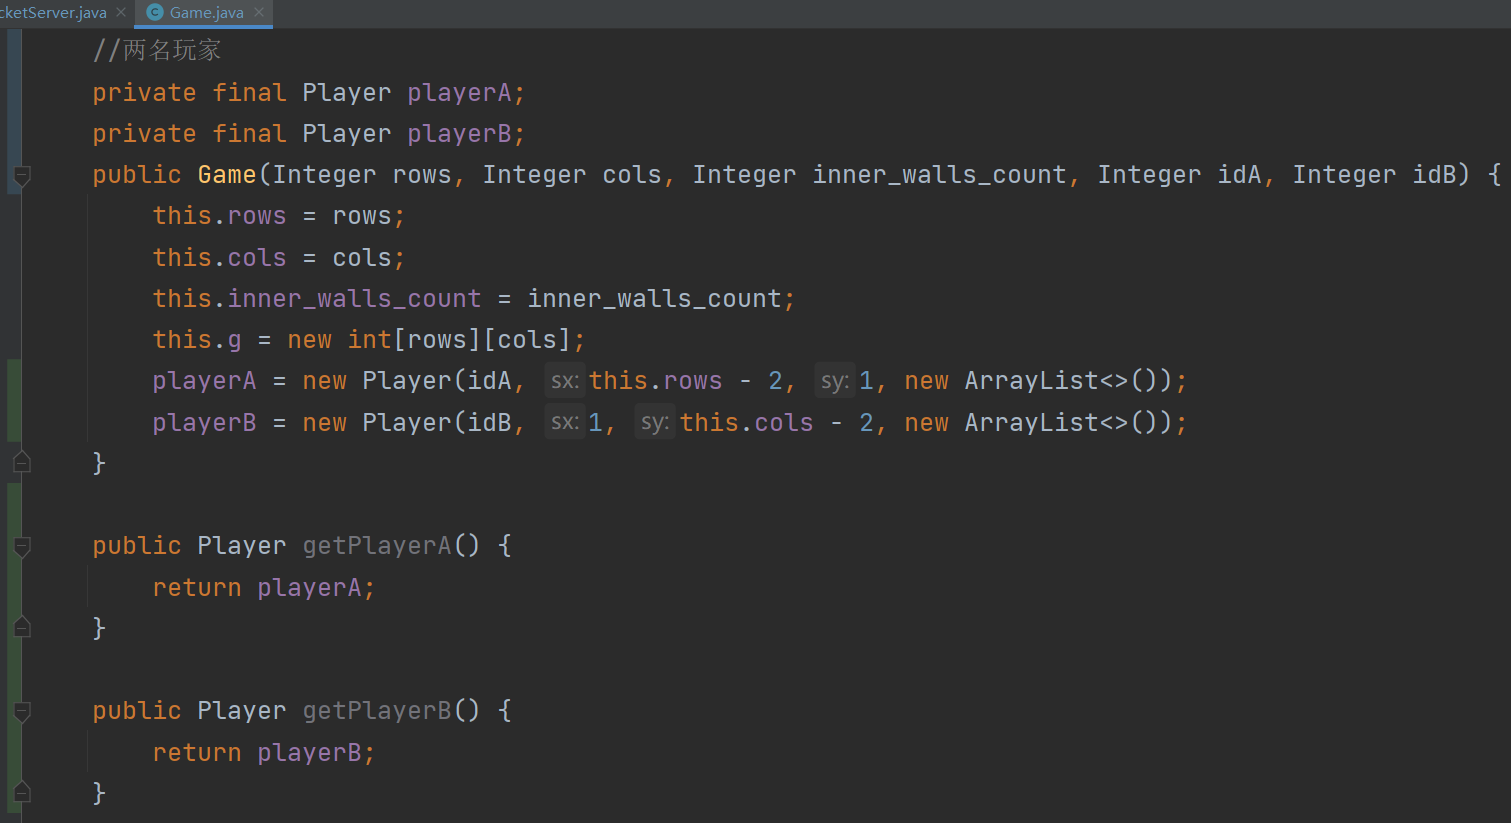
在WebSocketServer.java中,为了方便管理,将与Game相关的信息,封装成一个JSON
这样后端就可以将两名玩家的信息(包括生成的地图)传送给前端
前端修改
在src\store\pk.js中添加玩家信息的变量和更新函数
1
2
3
4
5
6
7
8
9
10
11
12
13
14
15
16
17
18
19
20
21
22
23
24
25
26
27
28
29
30
31
32
33
34
35
36
37
38
39
40
41
42
| export default ({
state: {
status:"matching",
socket:null,
opponent_username:"",
opponent_photo:"",
gamemap:null,
a_id:0,
a_sx:0,
a_sy:0,
b_id:0,
b_sx:0,
b_sy:0,
},
mutations: {
updateSocket(state, socket){
state.socket = socket;
},
updateOpponent(state, opponent){
state.opponent_username = opponent.username;
state.opponent_photo = opponent.photo;
},
updateStatus(state, status){
state.status = status;
},
updateGame(state, game){
state.a_id = game.a_id;
state.a_sx = game.a_sx;
state.a_sy = game.a_sy;
state.b_id = game.b_id;
state.b_sx = game.b_sx;
state.b_sy = game.b_sy;
state.gamemap = game.map;
},
},
actions: {
},
modules: {
}
})
|
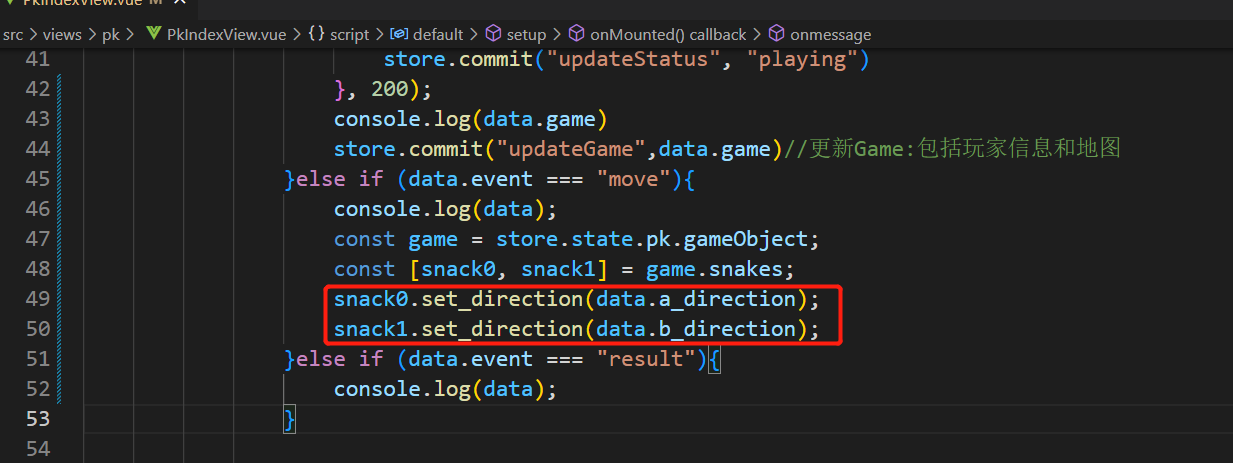
在src\views\pk\PkIndexView.vue中,在onmessage中,调用updateGame函数
1
2
3
4
5
6
7
8
9
10
11
12
13
14
15
16
17
18
19
20
21
22
23
24
25
26
27
28
29
30
31
32
33
34
35
36
37
38
39
40
41
42
43
44
| <script>
import PlayGround from '../../components/PlayGround.vue'
import MatchGround from '../../components/MatchGround.vue'
import { onMounted } from 'vue'
import { onUnmounted } from 'vue'
import { useStore } from 'vuex'
export default {
components: {
PlayGround,
MatchGround
},
setup() {
const store = useStore();
const socketUrl = `ws://127.0.0.1:3000/websocket/${store.state.user.token}`;
let socket = null;
onMounted(() => {
....//省略
socket.onmessage = msg => {
const data = JSON.parse(msg.data);
console.log(data);
if (data.event === "start-matching") {
store.commit("updateOpponent", {
username: data.opponent_username,
photo: data.opponent_photo
});
//匹配成功后,延时2秒,进入对战页面
setTimeout(() => {
store.commit("updateStatus", "playing")
}, 2000);
store.commit("updateGame",data.game)//更新Game:包括玩家信息和地图
}
}
socket.onclose = () => {
console.log("disconnected!");
}
});
onUnmounted(() => {
socket.close();
store.commit("updateStatus", "matching");
})
}
}
</script>
|
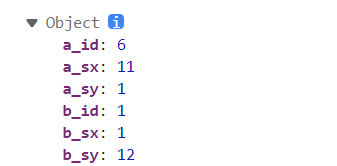
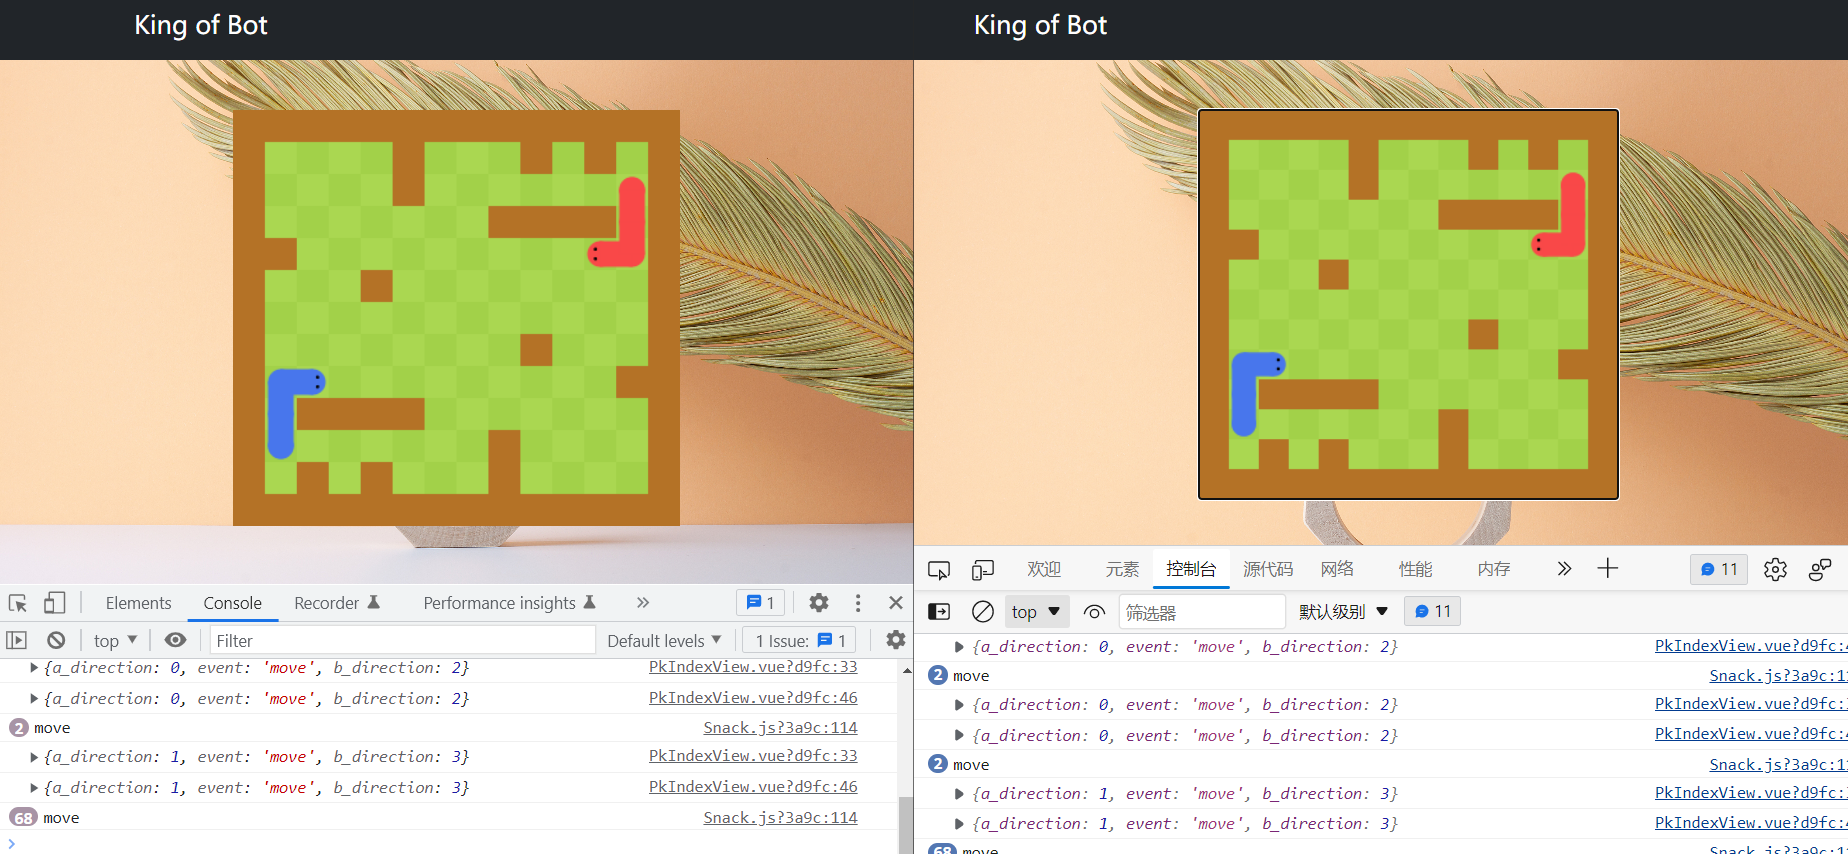
运行项目,使用用户名sun和用户名hong的登录,两个浏览器控制台console.log(data.game)的输出内容一致,均为,同步成功
游戏同步:多线程
分析过程
之前只是两个棋盘,在浏览器本地通过wsad和上下左右来控制移动。
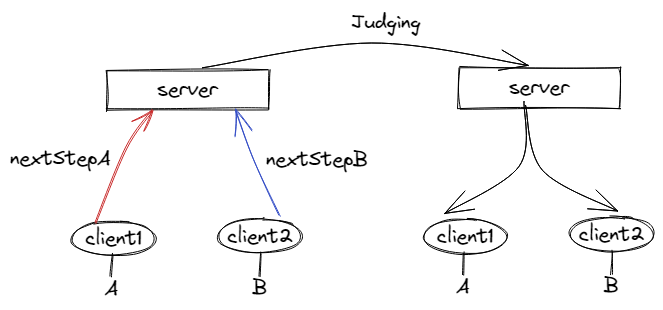
现在三个棋盘,两个client和一个server,需要实现三个棋盘的同步

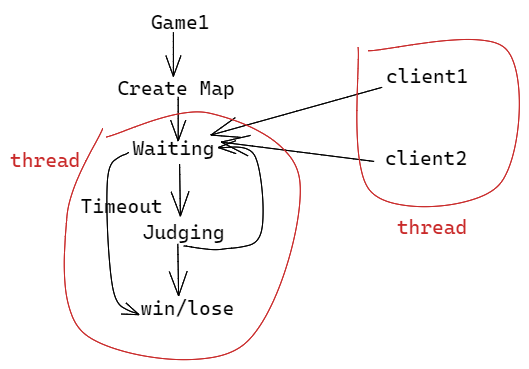
再来梳理一下之前的游戏流程
对于从等待用户orBot输入到判别系统这一过程是独立的,
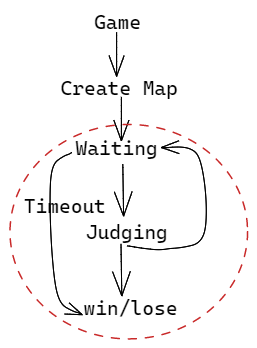
但是一般代码的执行是单线程,也就是按照顺序执行,例如如果在当前线程执行操作,当等待用户输入的时候,线程就会卡死,需要我们这样一个线程中有多个游戏在运行,只有Game1结束之后才能跑Game2,这样在第二个对局中,玩家就会漫长的等待。

因此,Game不能作为一个单线程来处理,因此,需要另起一个新的线程来做。
也就是将Game变成一个支持多线程的类
多线程
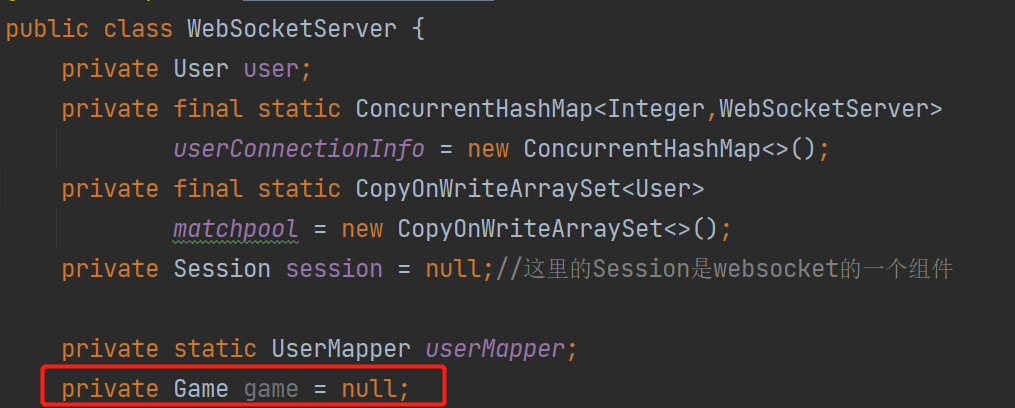
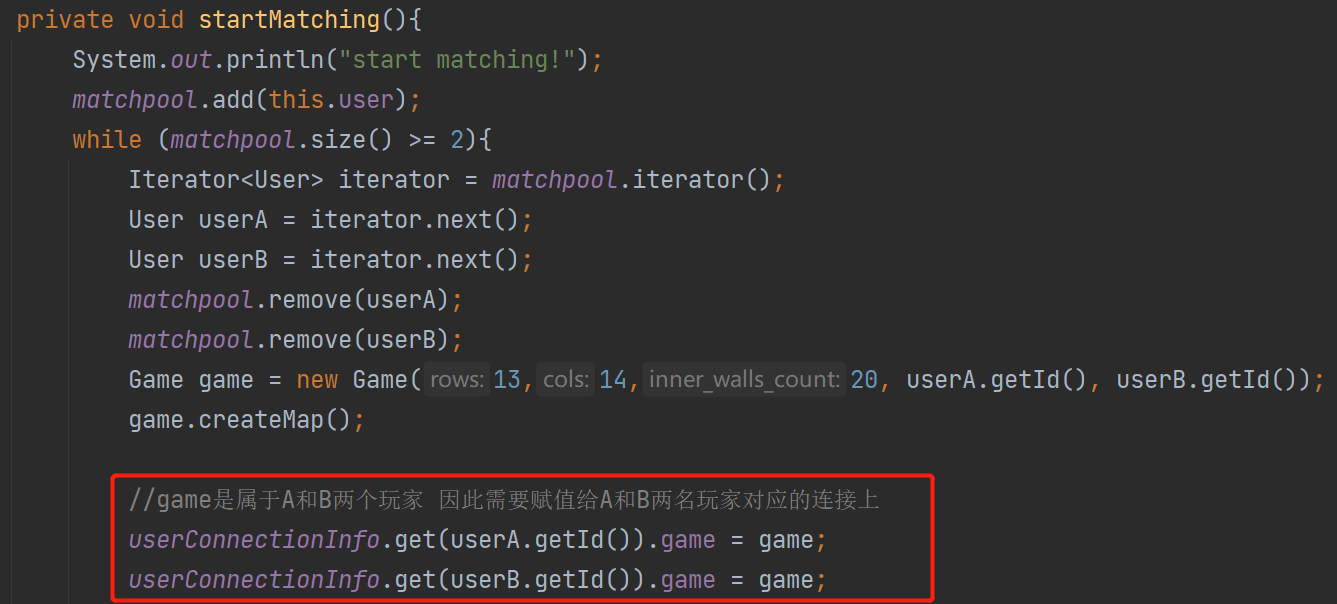
首先为WebSocketServer增加一个成员变量,用于记录链接中的Game实例
在确定两名匹配的玩家之后,更新两名玩家的WebSocketServer连接上的Game实例值。
然后回到Game.java,将Game变成一个支持多线程的类,只需将Game继承Thread类,就可以支持多线程
1
| public class Game extends Thread
|
然后重写多线程的入口函数run()
在开启一个新线程执行game.start()的时候,新线程中的入口函数,就是run()
初始化两个成员变量,用于表示两名玩家的下一步操作
1
2
3
4
5
6
7
8
| private Integer nextStepA;
private Integer nextStepB;
public void setNextStepA(Integer nextStepA) {
this.nextStepA = nextStepA;
}
public void setNextStepB(Integer nextStepB) {
this.nextStepB = nextStepB;
}
|
未来会在WebSocketServer.java中,接收到输入的时候,调用这两个函数
也就是在蓝色的线程里面修改nextStepA和nextStepB的值,而在红色的线程里面,会读取这两个线程的值
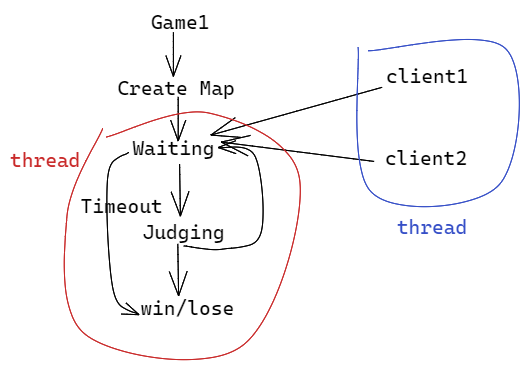
这就涉及到两个线程会同时读写一个变量,可能会产生读写冲突,需要枷锁
定义一个锁
1
| private ReentrantLock lock = new ReentrantLock();
|
之后在setNextStepA和setNextStepB中
对两个变量进行更新之前,先锁上,操作完之后,解锁(不管有没有报异常)
1
2
3
4
5
6
7
8
9
10
11
12
13
14
15
16
| public void setNextStepA(Integer nextStepA) {
lock.lock();
try {
this.nextStepA = nextStepA;
}finally {
lock.unlock();
}
}
public void setNextStepB(Integer nextStepB) {
lock.lock();
try {
this.nextStepB = nextStepB;
}finally {
lock.unlock();
}
}
|
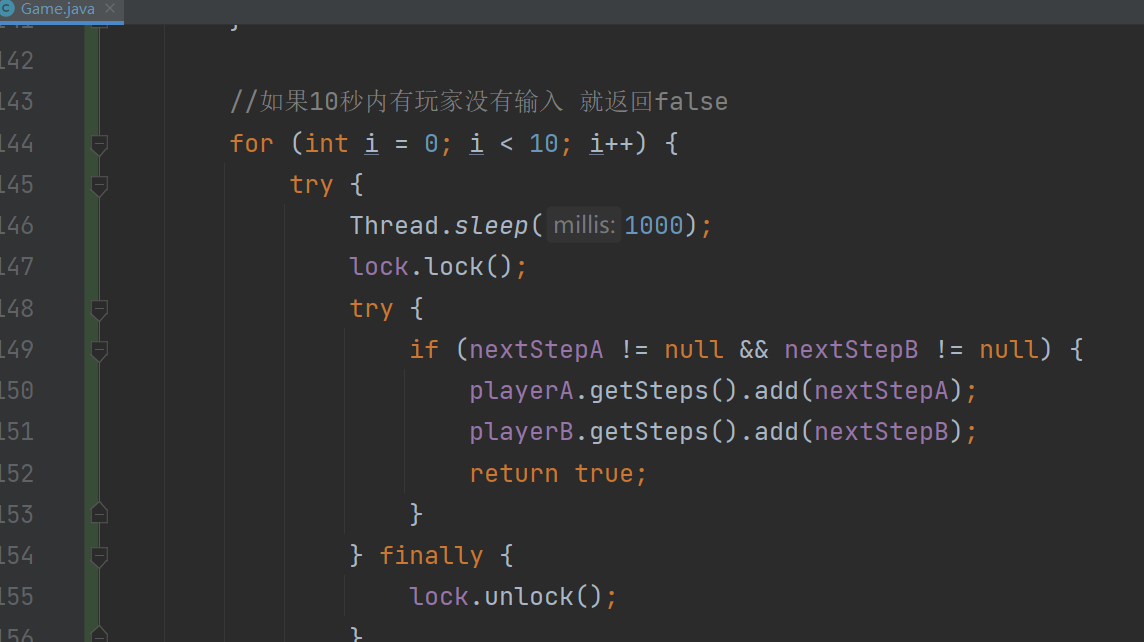
在nextStep()函数中,负责等待两名玩家的输入,如果都在指定时间内输入了,就返回true
1
2
3
4
5
6
7
8
9
10
11
12
13
14
15
16
17
18
19
20
21
22
23
24
25
26
27
28
29
30
| private boolean nextStep(){
try {
Thread.sleep(200);
} catch (InterruptedException e) {
e.printStackTrace();
}
for (int i = 0; i < 5; i++) {
try {
Thread.sleep(1000);
lock.lock();
try {
if(nextStepA != null && nextStepB != null){
playerA.getSteps().add(nextStepA);
playerB.getSteps().add(nextStepB);
return true;
}
}finally {
lock.unlock();
}
} catch (InterruptedException e) {
e.printStackTrace();
}
}
return false;
}
|
如果其中一个超时没有输入,游戏就终止,并且分出胜负。
因此还需要定义一个游戏状态status和谁输了loser
1
2
| private String status = "playing";
private String loser = "";
|
最后,在线程的入口run()中初始逻辑如下
1
2
3
4
5
6
7
8
9
10
11
12
13
14
15
16
17
| @Override
public void run() {
for (int i = 0; i < 1000; i++) {
if(nextStep()){
}else {
status = "finished";
if(nextStepA == null && nextStepB == null){
loser = "all";
} else if (nextStepA == null) {
loser = "A";
} else{
loser = "B";
}
}
}
}
|
但是上面这段逻辑有个问题,如果两名玩家在五秒内没有给出操作,就会进入else判断,此时本应该是平均,也就是loser = "all",但如果下面这段代码执行时,用户给出了输入,结果就会不符合预期。
1
2
3
4
5
6
7
| if(nextStepA == null && nextStepB == null){
loser = "all";
} else if (nextStepA == null) {
loser = "A";
} else{
loser = "B";
}
|
所以,由于这里涉及到变量的读操作,为了在读的过程中被修改,因此也需要加锁。读完之后再解锁。
1
2
3
4
5
6
7
8
9
10
11
12
13
14
15
16
17
18
| if(nextStep()){
System.out.println();
}else {
status = "finished";
lock.lock();
try {
if(nextStepA == null && nextStepB == null){
loser = "all";
} else if (nextStepA == null) {
loser = "A";
} else{
loser = "B";
}
}finally {
lock.lock();
}
}
|
然后来看if (nextStep())判断,如果获取两个玩家的下一步操作
需要先进行judge(),来判断输入是否合法
并且,虽然A和B都知道自己的操作,但是看不到对方的操作,因此需要中心服务器以广播的形式来告知。
1
2
3
4
5
6
7
8
9
10
11
12
13
14
15
16
17
18
19
20
21
22
23
24
25
26
27
28
29
30
31
| @Override
public void run() {
for (int i = 0; i < 1000; i++) {
if (nextStep()) {
judge();
if(status.equals("playing")){
sentMove();
}else {
sentResult();
break;
}
} else {
status = "finished";
lock.lock();
try {
if (nextStepA == null && nextStepB == null) {
loser = "all";
} else if (nextStepA == null) {
loser = "A";
} else {
loser = "B";
}
} finally {
lock.lock();
}
sentResult();
break;
}
}
}
|
而其中暂时不实现judge的逻辑,其他辅助函数的逻辑如下
1
2
3
4
5
6
7
8
9
10
11
12
13
14
15
16
17
18
19
20
21
22
23
24
| private void sentAllmessage(String message){
WebSocketServer.userConnectionInfo.get(playerA.getId()).sendMessage(message);
WebSocketServer.userConnectionInfo.get(playerB.getId()).sendMessage(message);
}
private void sentMove() {
lock.lock();
try{
JSONObject resp = new JSONObject();
resp.put("event","move");
resp.put("a_direction",nextStepA);
resp.put("b_direction",nextStepB);
nextStepA = nextStepB = null;
sentAllmessage(resp.toJSONString());
}finally {
lock.unlock();
}
}
private void sentResult() {
JSONObject resp = new JSONObject();
resp.put("event","result");
resp.put("loser",loser);
sentAllmessage(resp.toJSONString());
}
|
这样后端基本逻辑完成,接下来是前端与后端的通信,前端要将用户的操作发送过来,以及接收并处理中心服务器的广播
前后端通信
此前判断蛇的移动,在scripts\GameMap.js
1
2
3
4
5
6
7
8
9
10
11
12
13
14
15
16
| add_listening_events(){
this.ctx.canvas.focus();
const [snake0, snake1] = this.snakes;
this.ctx.canvas.addEventListener("keydown",e=>{
console.log(e.key);
if(e.key === 'w') snake0.set_direction(0);
else if (e.key === 'd') snake0.set_direction(1);
else if (e.key === 's') snake0.set_direction(2);
else if (e.key === 'a') snake0.set_direction(3);
else if (e.key === 'ArrowUp') snake1.set_direction(0);
else if (e.key === 'ArrowRight') snake1.set_direction(1);
else if (e.key === 'ArrowDown') snake1.set_direction(2);
else if (e.key === 'ArrowLeft') snake1.set_direction(3);
});
}
|
这里,由于一个client负责一个玩家,只处理wsad即可。
修改如下,将玩家的操作操作传送到后端
1
2
3
4
5
6
7
8
9
10
11
12
13
14
15
16
17
18
19
20
| add_listening_events(){
this.ctx.canvas.focus();
const [snake0, snake1] = this.snakes;
this.ctx.canvas.addEventListener("keydown",e=>{
console.log(e.key);
let d = -1;
if(e.key === 'w') d = 0;
else if (e.key === 'd') d = 1;
else if (e.key === 's') d = 2;
else if (e.key === 'a') d = 3;
if(d >= 0){
this.store.state.pk.socket.sent(JSON.stringify({
event:"move",
direction:d,
}))
}
});
}
|
后端接收并分配给专门的路由来进行处理
1
2
3
4
5
6
7
8
9
10
11
12
13
14
15
16
17
18
19
20
21
22
23
24
25
26
27
| private void move(Integer direction) {
if(game.getPlayerA().getId().equals(user.getId())){
game.setNextStepA(direction);
}else if (game.getPlayerB().getId().equals(user.getId())) {
game.setNextStepB(direction);
} else {
Exception e = new Exception("Error");
e.printStackTrace();
}
}
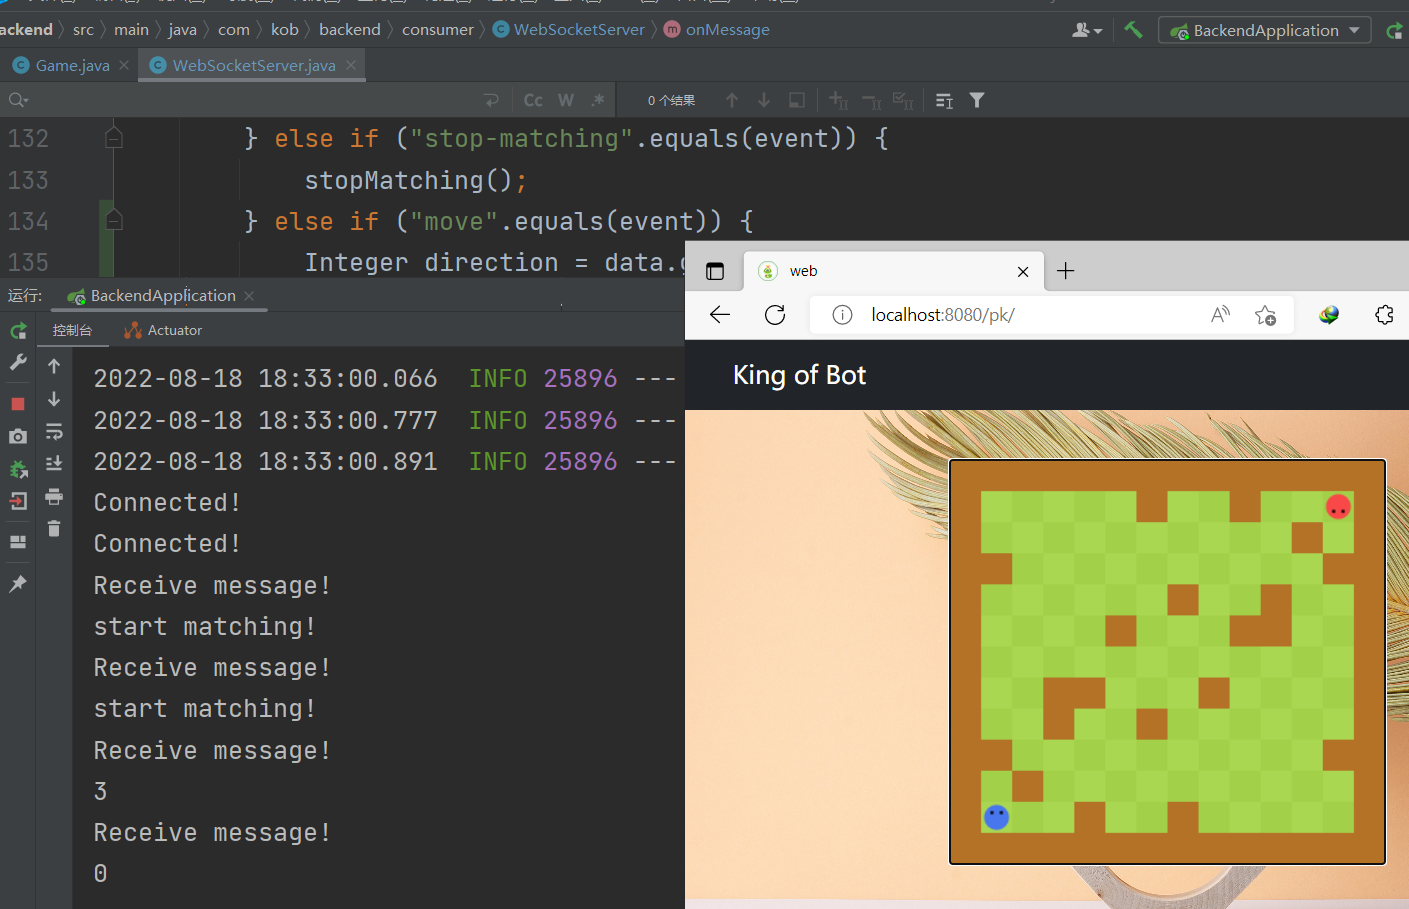
@OnMessage
public void onMessage(String message, Session session) {
System.out.println("Receive message!");
JSONObject data = JSONObject.parseObject(message);
String event = data.getString("event");
if("start-matching".equals(event)){
startMatching();
} else if ("stop-matching".equals(event)) {
stopMatching();
} else if ("move".equals(event)) {
Integer direction = data.getInteger("direction");
System.out.println(direction);
move(direction);
}
}
|
此时,client端用户输入WSAD的时候,后端就能准确接收到信息。
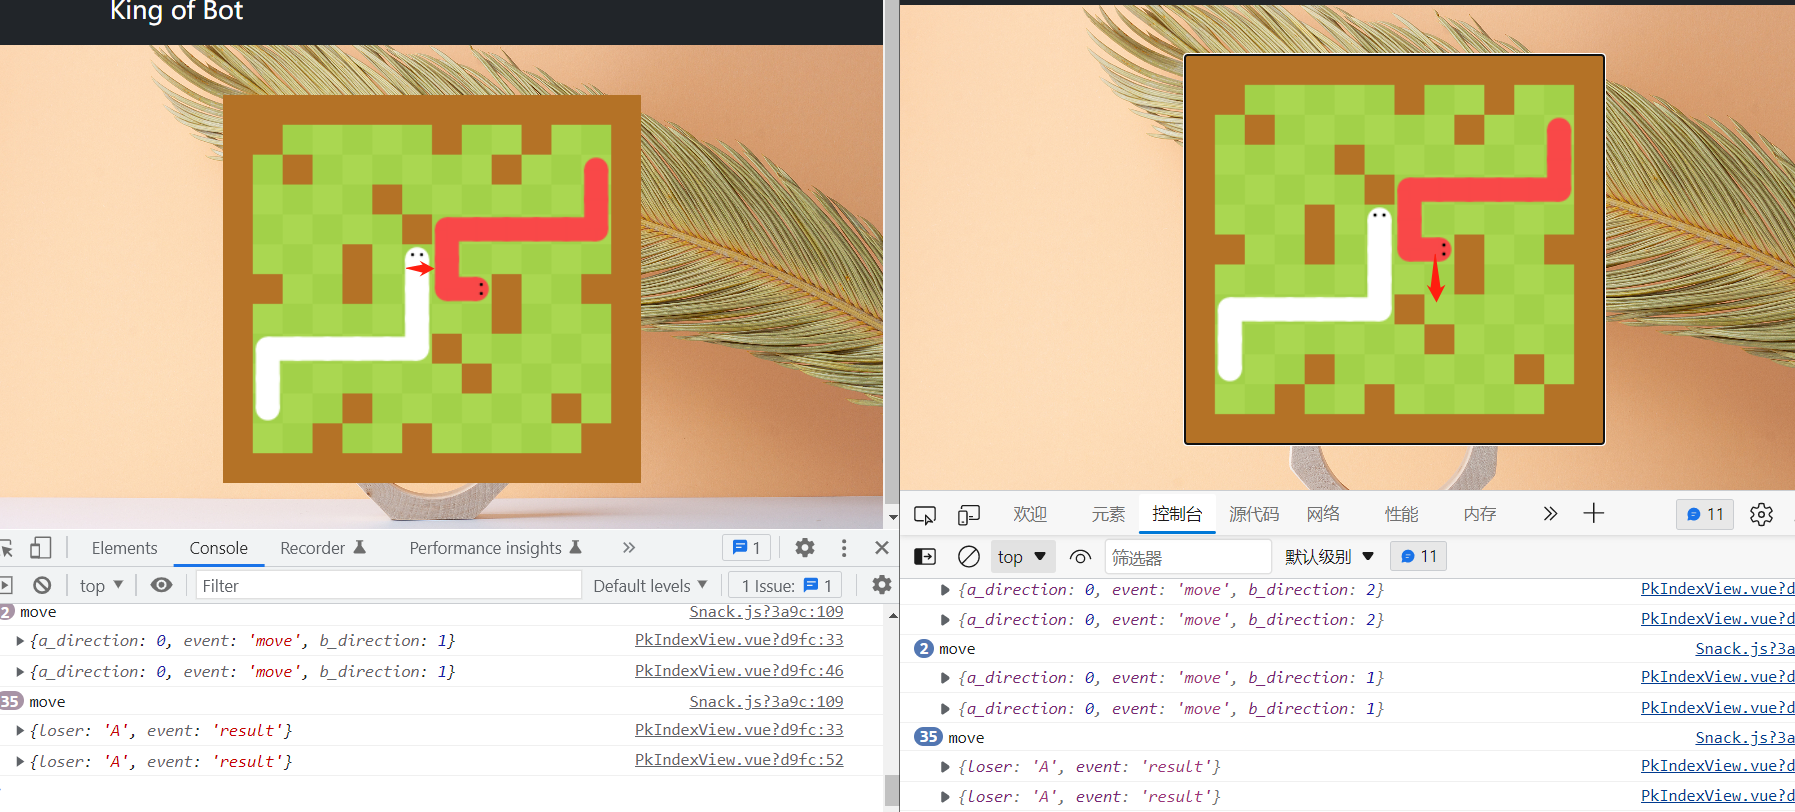
同时,前端也要接收后端的广播来的信息,具体有两种event,分别是move和result
1) event == move

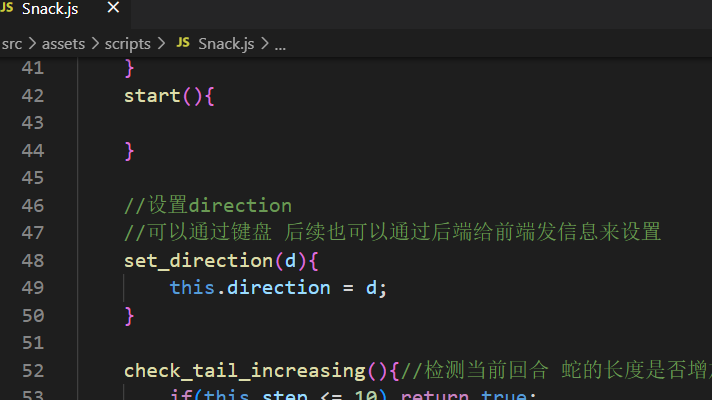
对操作进行更新需要用到Snack.js中的set_direction方法
两个玩家控制的snack对象在保存在GameMap对象中。

为了取到,需要将GameMap对象,作为游戏对象,保存为全局变量
先在src\store\pk.js中将gameObject存入全局变量,并写好更新函数
这样就能获取到游戏对象,并且更新两个玩家控制的snack的方向
此时,两个玩家都能够控制蛇正常移动
但是每次输入之后都会感觉到一些延迟,是因为输入之后可能线程还处于睡眠状态
调整为:

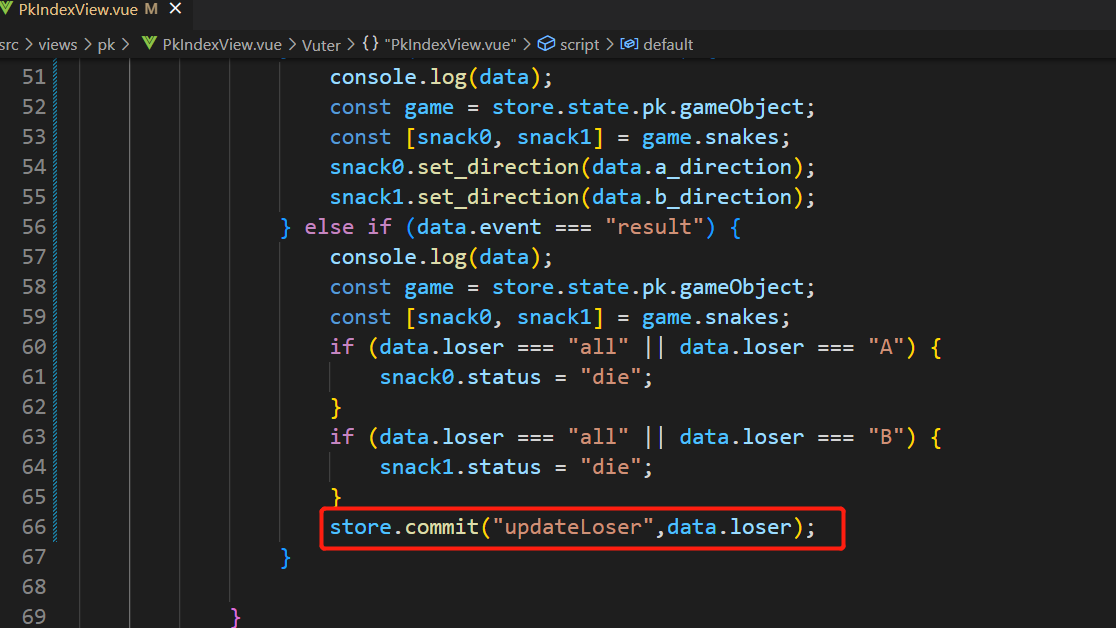
2) event == result
之前判断玩家输赢(蛇的状态)的逻辑在前端
1
2
3
4
|
if(!this.gamemap.check_valid(this.next_cell)){
this.status = "die";
}
|
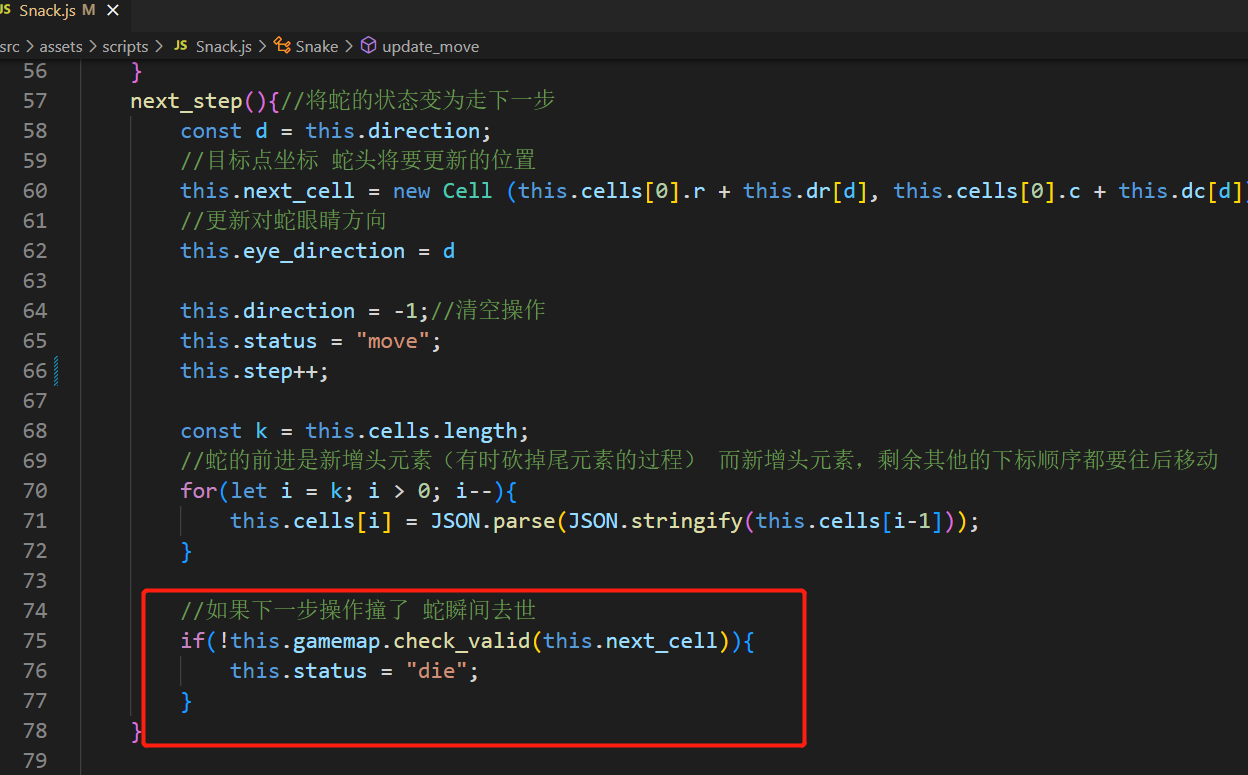
将这段代码去掉。现在要交由后端来播报结果。
判断输赢有两部分逻辑:撞墙和超时,超时的逻辑已经写好,现在写判断撞墙的逻辑
参考前端GameMap.js中的check_valid(cell)函数

后端逻辑如下:
1)首先需要将两名玩家所控制的蛇取到:
新建Cell类代表蛇的单元
1
2
3
4
5
6
7
| @Data
@AllArgsConstructor
@NoArgsConstructor
public class Cell {
private Integer x;
private Integer y;
}
|
在Player.java中,将蛇的身体返回
0、1、2、3位置表示表示上右下左

对于四种操作0(w), 1(d), 2(s), 3(a)分别在行和列方向上的偏移量
1
2
| int[] dx = {-1, 0, 1, 0};
int[] dy = {0, 1, 0, -1};
|
所以Player.java的逻辑更新为
1
2
3
4
5
6
7
8
9
10
11
12
13
14
15
16
17
18
19
20
21
22
23
24
25
26
27
28
29
30
31
32
33
34
35
36
37
| @Data
@AllArgsConstructor
@NoArgsConstructor
public class Player {
private Integer id;
private Integer sx;
private Integer sy;
private List<Integer> steps;
private boolean check_tail_increasing(int step){
if(step <= 10) return true;
else return step % 3 == 1;
}
public List<Cell> getCells(){
List<Cell> res = new ArrayList<>();
int[] dx = {-1, 0, 1, 0};
int[] dy = {0, 1, 0, -1};
int x = sx;
int y = sy;
int step = 0;
res.add(new Cell(x,y));
for (Integer d : steps) {
x += dx[d];
y += dy[d];
res.add(new Cell(x,y));
if(!check_tail_increasing(++step)){
res.remove(0);
}
}
return res;
}
}
|
2)判断两名玩家最后一步操作是否合法
- 没有撞到障碍物
- 没有撞到两条蛇的身体
- 没有撞到自己:最后一步与之前n-1个Cell是否重合
- 没有撞到别人:最后一步与之前n-1个Cell是否重合
- 由于A和B不可能走到同一个格子 因此不用判断最后一个格子是否重合
只需要判断最后一步,也就是蛇的最后一个Cell是否符合上面三种原则即可。
1
2
3
4
5
6
7
8
9
10
11
12
13
14
15
16
17
18
19
20
21
22
23
24
25
26
27
28
29
30
31
32
33
34
35
36
37
38
39
40
| private boolean check_valid(List<Cell> cellsA, List<Cell> cellsB) {
int n = cellsA.size();
Cell cell = cellsA.get(n - 1);
if(g[cell.getX()][cell.getY()] == 1)
return false;
for (int i = 0; i < n - 1; i++) {
if(cellsA.get(i).getX().equals(cell.getX())
&& cellsA.get(i).getY().equals(cell.getY())){
return false;
}
}
for (int i = 0; i < n - 1; i++) {
if(cellsB.get(i).getX().equals(cell.getX())
&& cellsB.get(i).getY().equals((cell.getY()))){
return false;
}
}
return true;
}
private void judge() {
List<Cell> cellsA = playerA.getCells();
List<Cell> cellsB = playerB.getCells();
boolean validA = check_valid(cellsA, cellsB);
boolean validB = check_valid(cellsB, cellsA);
if(!validA || !validB){
status = "finished";
if(validA){
loser = "B";
} else if (validB) {
loser = "A";
} else {
loser = "all";
}
}
}
|
此时就能正常的进行合法性判断。
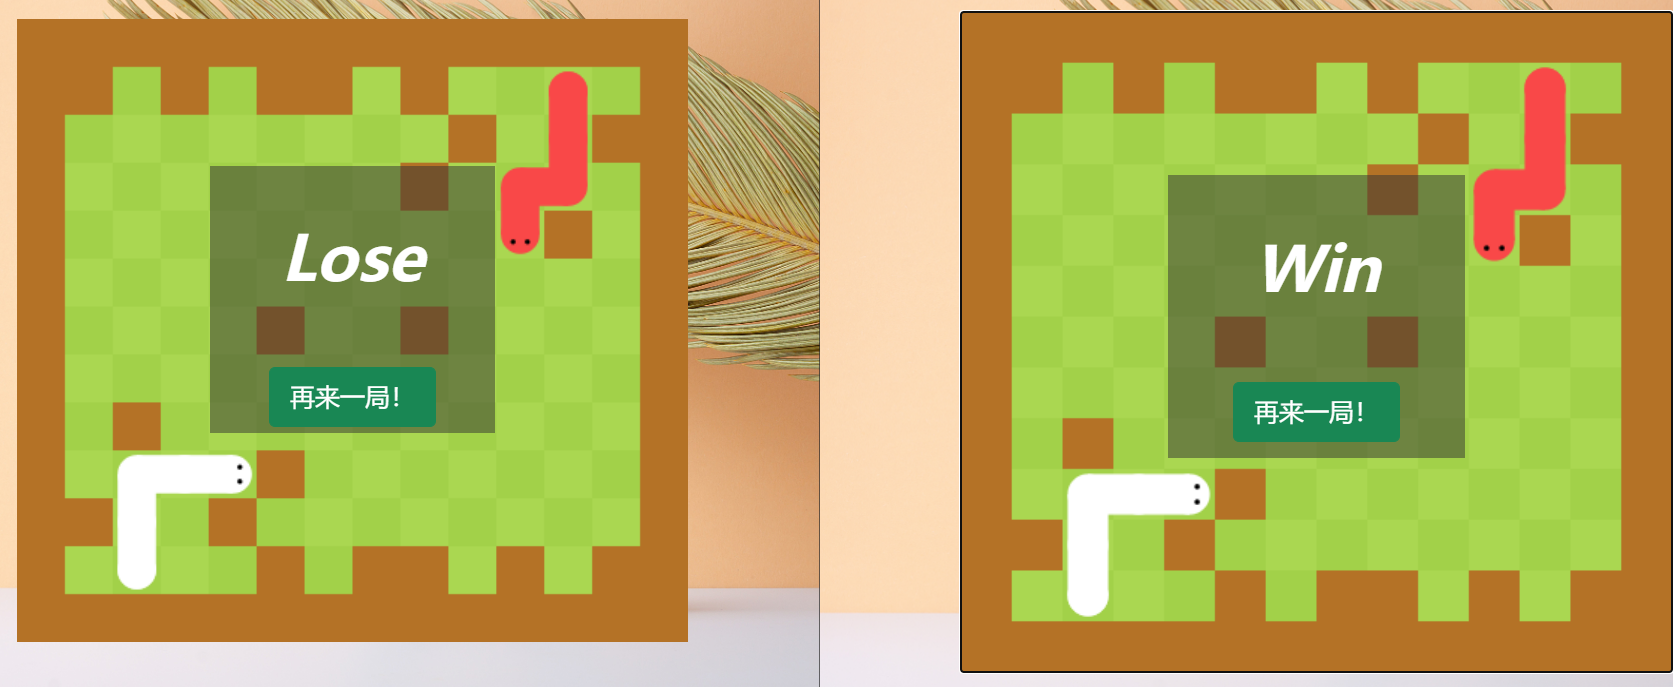
游戏结果展示
最后,还需要将游戏的结果在前端展示,并且,设置一个重启按钮,点击重启之后,重新开始一局。
在pk.js中新增变量,方便用于展示谁赢谁输

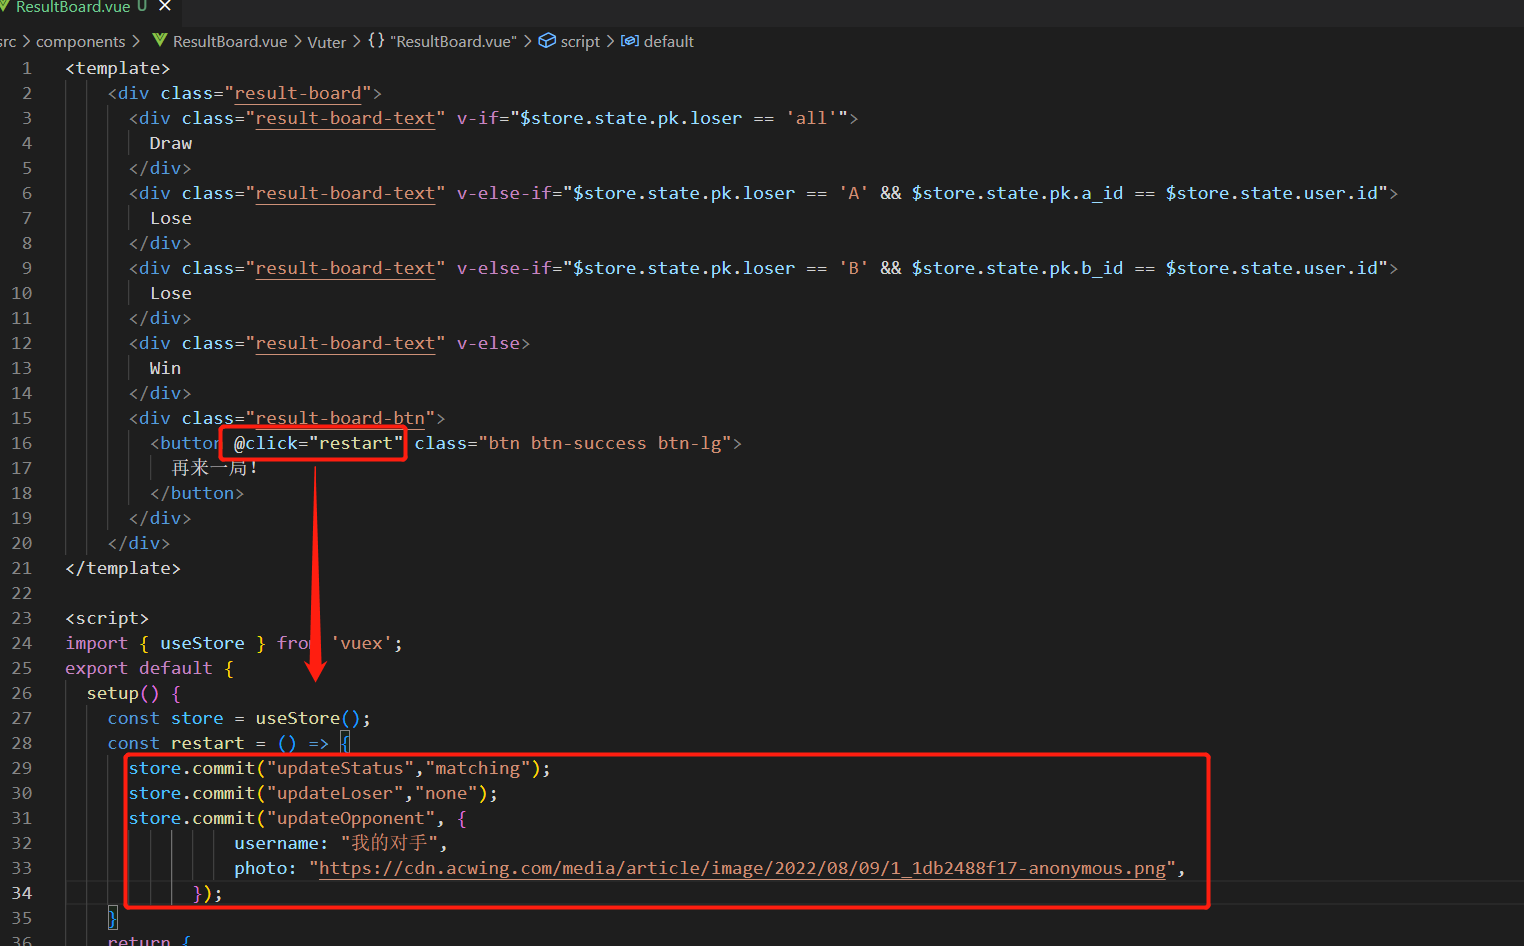
新增一个组件ResultBoard.vue用于展示结果
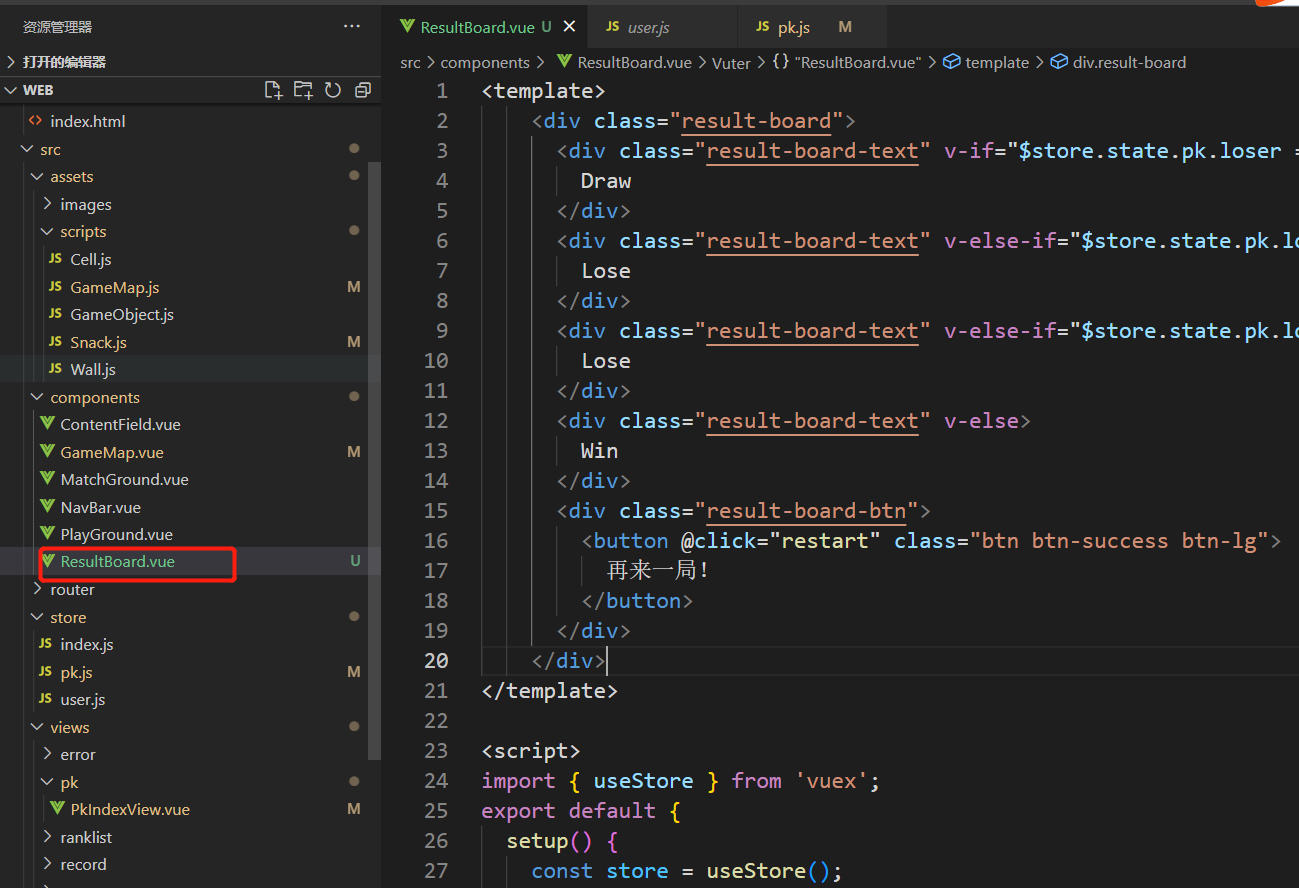
核心代码如下:
然后在对战页面PkIndexView.vue导入组件,使其在loser!=none时展示出来
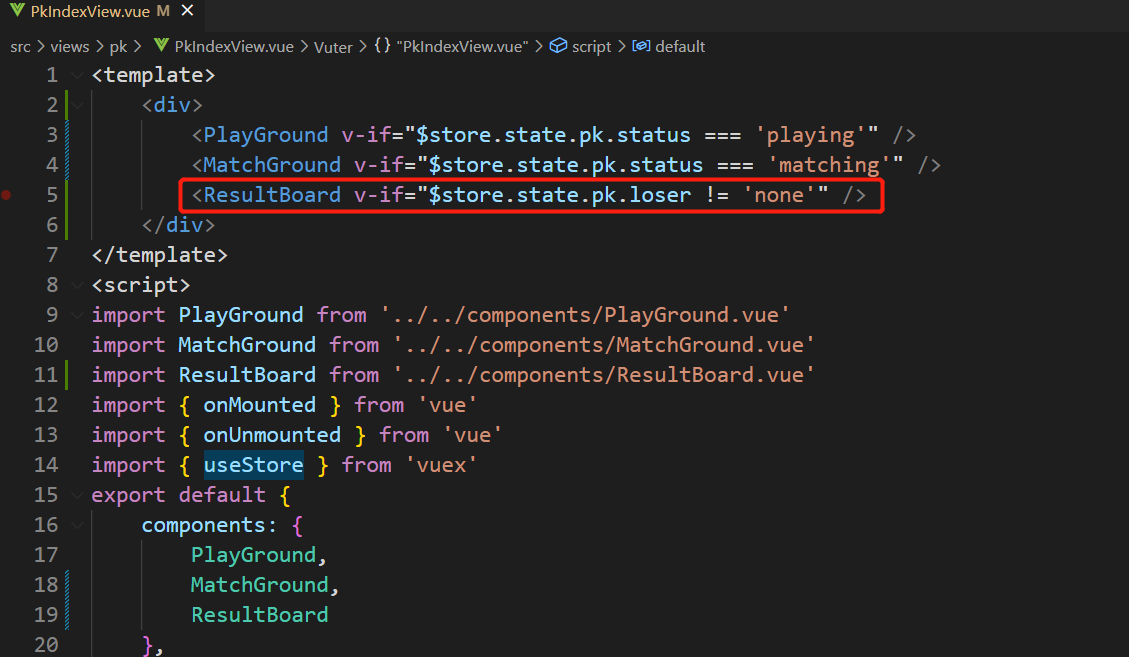
并且在收到后端播报结果时,更新全局变量中的loser
最终的结果如下,成功的实现了结果展示和重来一局。
点击重启
此时,再匹配的用户,又可以开始新的一轮对战。

这样,游戏同步功能就全部完成。
对局记录
接下来来实现另外一功能,就是将对局记录保存在数据库中。
创建record
1)创建record表用来记录每局对战的信息
表中的列:
id: int
a_id: inta_sx: inta_sy: intb_id: intb_sx: intb_sy: inta_steps: varchar(1000)b_steps: varchar(1000)map: varchar(1000)loser: varchar(10)createtime: datetime
2)创建Pojo
注意,数据库中如果用下划线,则在pojo中要使用驼峰命名法
1
2
3
4
5
6
7
8
9
10
11
12
13
14
15
16
17
18
19
| @Data
@AllArgsConstructor
@NoArgsConstructor
public class Record {
@TableId(type = IdType.AUTO)
private Integer id;
private Integer aId;
private Integer aSx;
private Integer aSy;
private Integer bId;
private Integer bSx;
private Integer bSy;
private String aSteps;
private String bSteps;
private String map;
private String loser;
@JsonFormat(pattern = "yyyy-MM-dd HH:mm:ss", timezone = "Asia/Shanghai")
private Date createtime;
}
|
3)创建Mapper
1
2
3
| @Mapper
public interface RecordMapper extends BaseMapper<Record> {
}
|
写入数据库
首先将RecordMapper实例注入到WebSocketServer中
在Game.java中,在每次向client播报结果之前,将记录保存到数据库
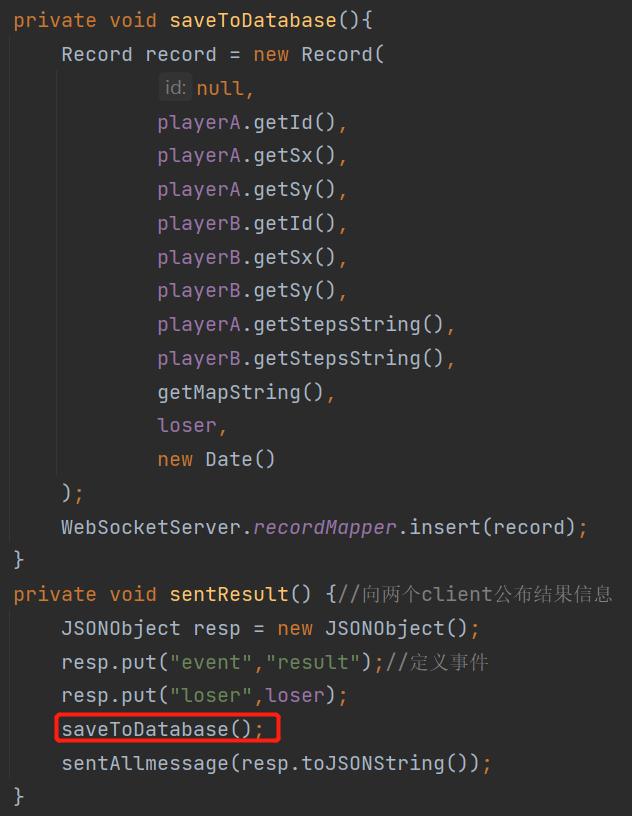
这样在每局游戏结束时,记录就被保存下来

后续就可以根据记录来复原游戏画面
实现匹配系统的微服务
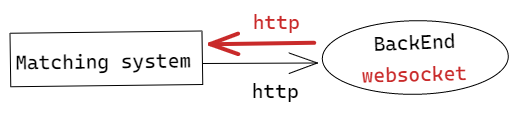
微服务可以理解为在SpringBoot之外的另外一个Server,负责处理一段独立的功能,与SpringBoot Server之间通过http通信。在游戏的匹配系统,之前是简单粗暴的放在一个集合上,当集合元素大于2时,取出两名玩家进行匹配,无法适应更加复杂的场景,因此现在要将这段程序独立出来。
微服务有多种实现方式,这里采用SpringCloud。SpringCloud和SpringBoot都相当于一个Web Server两者之间通过Http通信

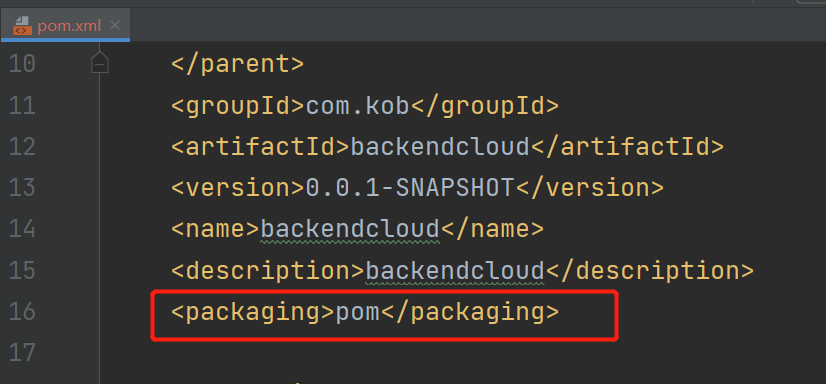
由于SpringCloud实现的匹配系统和SpringBoot实现的游戏后端是并列的,因此项目结构需要改动。
创建SpringCloud项目
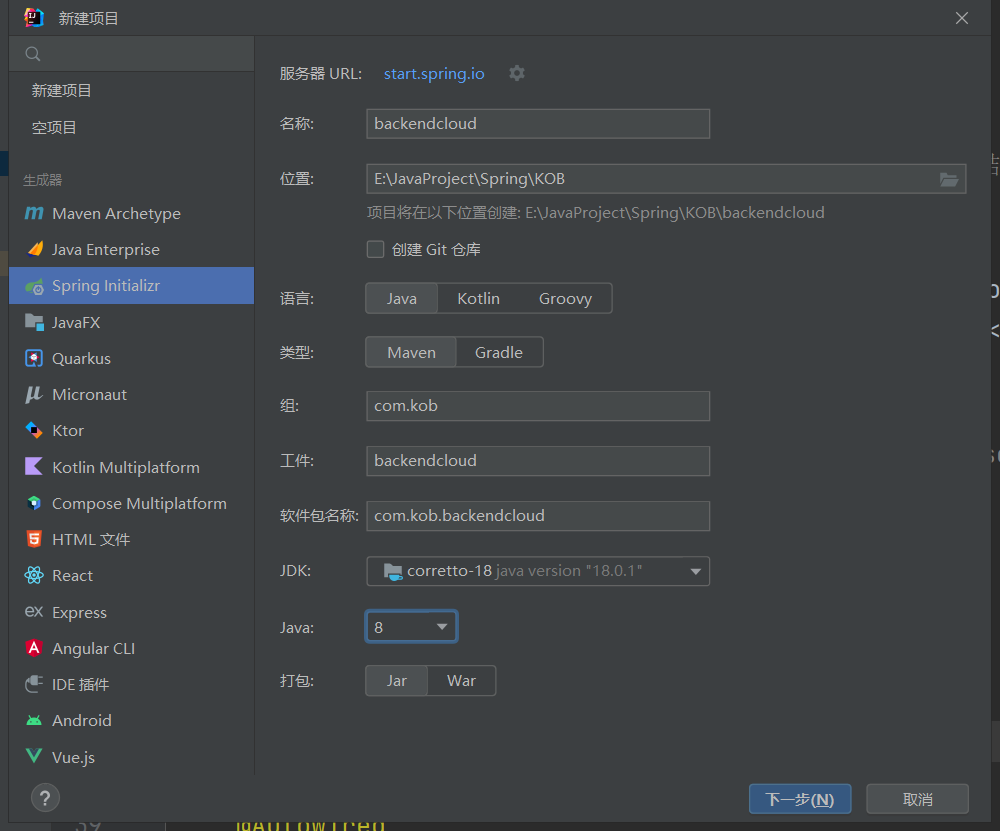
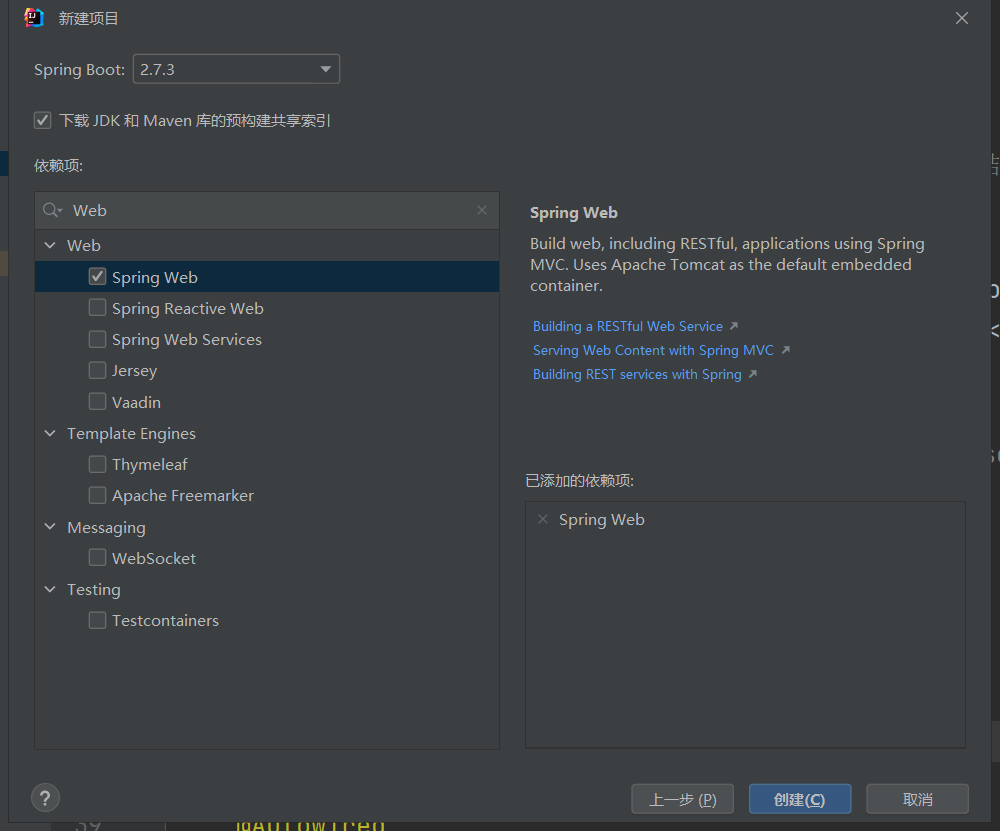
配置SpringCloud项目
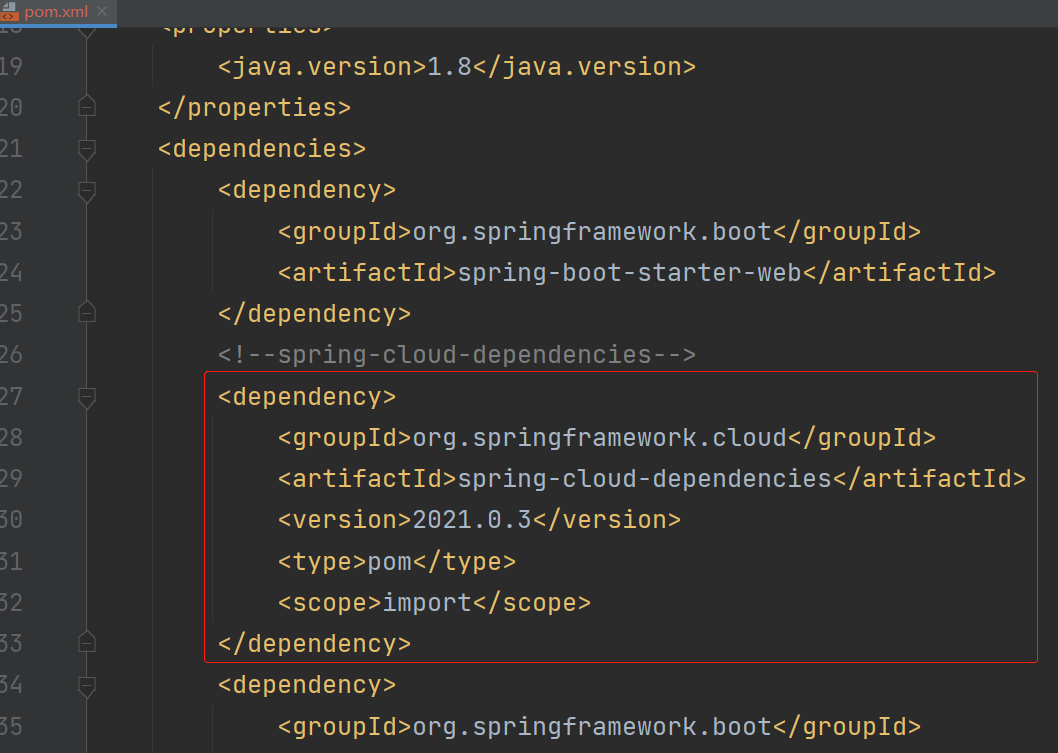
在SpringCloud项目中添加依赖:
Maven仓库地址
spring-cloud-dependencies
添加子项目—MatchingSystem
1)添加和配置
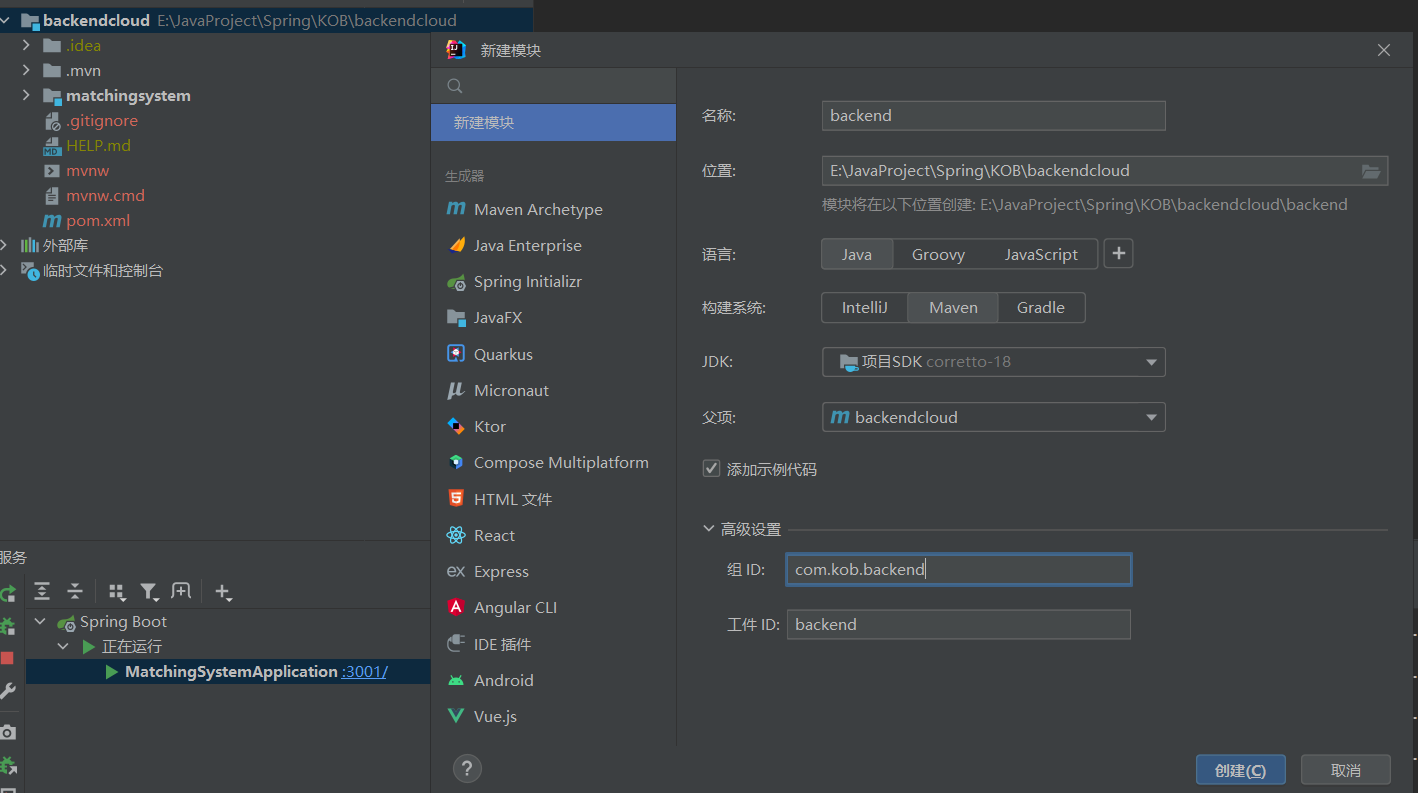
创建SpringCloud的子项目——matchingsystem

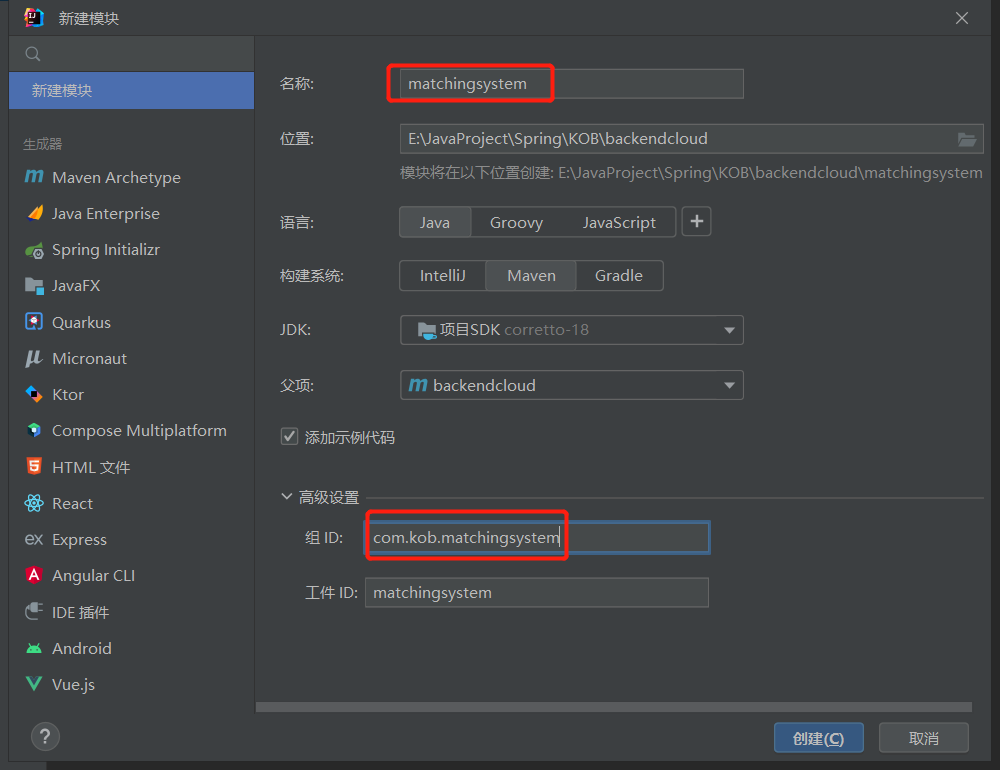
然后需要配置一些依赖。
matchingsystem本质上也是一个springboot,所以需要将父级目录backendcloud中porm.xml中的依赖,SpringWeb依赖,直接复制到子项目matchingsystem对应的porm.xml
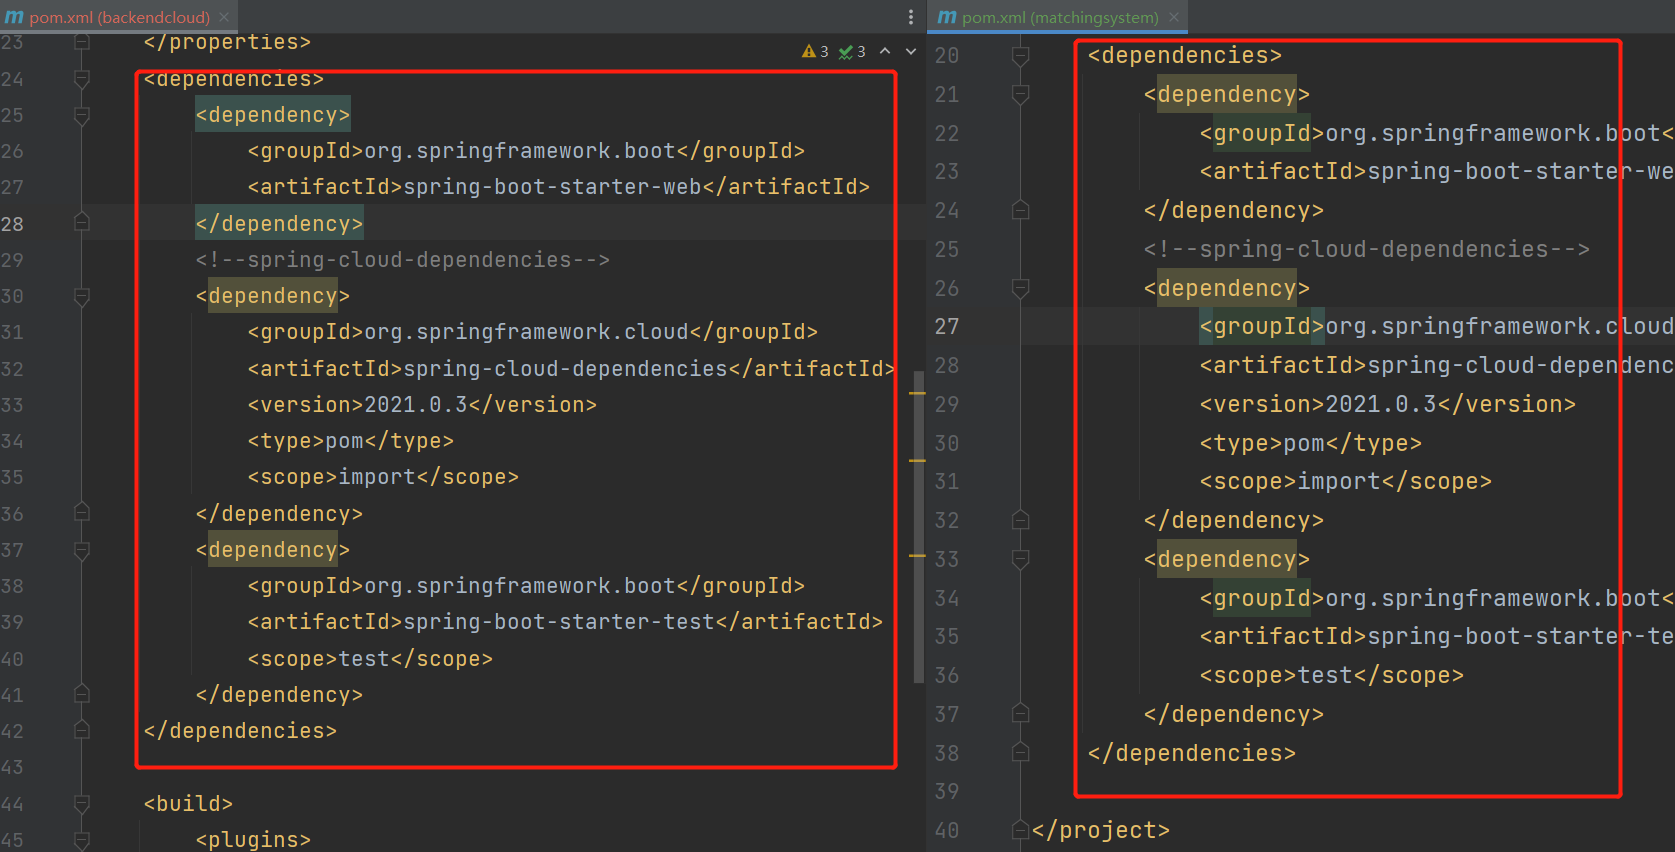
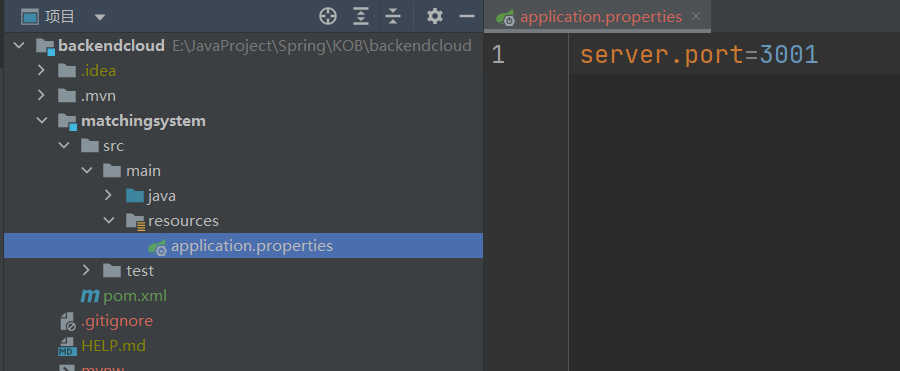
创建application.properties,配置端口,由于游戏后端backend中是3000,这里设置为3001
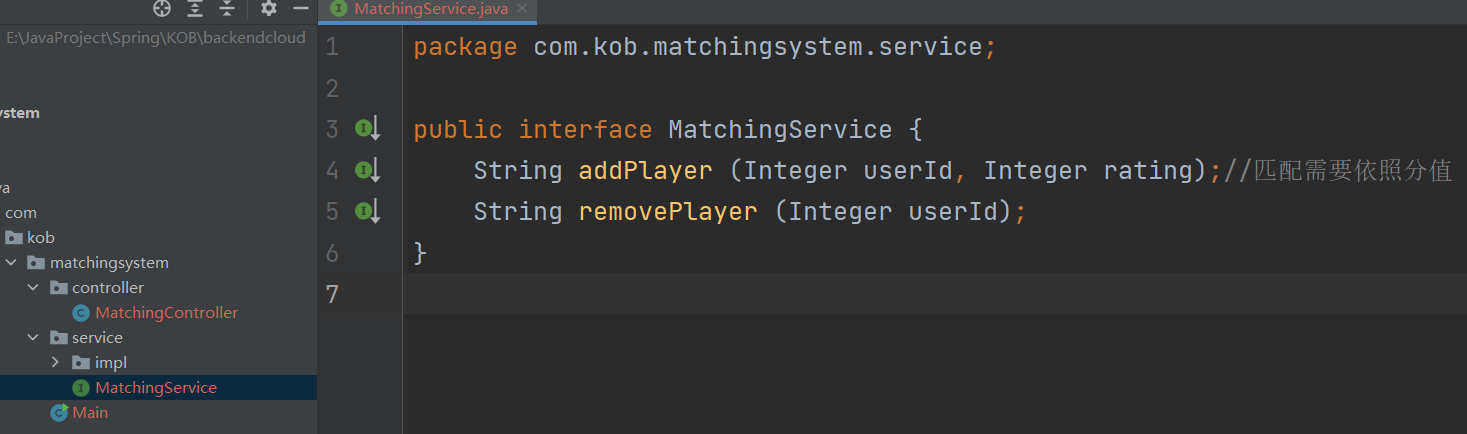
2)匹配系统的简单布局
对于匹配系统而言,需要实现的接口中需要有两个函数,addPlayer和removePlayer用于添加和删除玩家
创建接口,就需要创建controller负责调用接口,service负责声明接口,service.impl负责实现接口
为了方便调试,暂时不实现具体功能。
MatchingService.java
MatchingServiceImpl.java
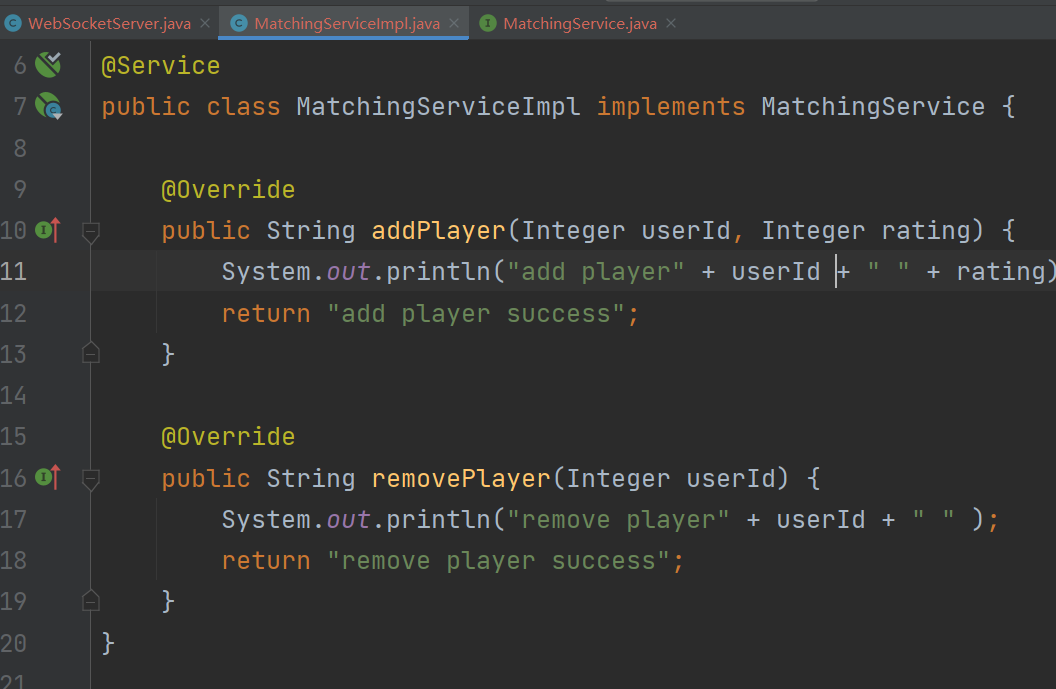
MatchingController.java
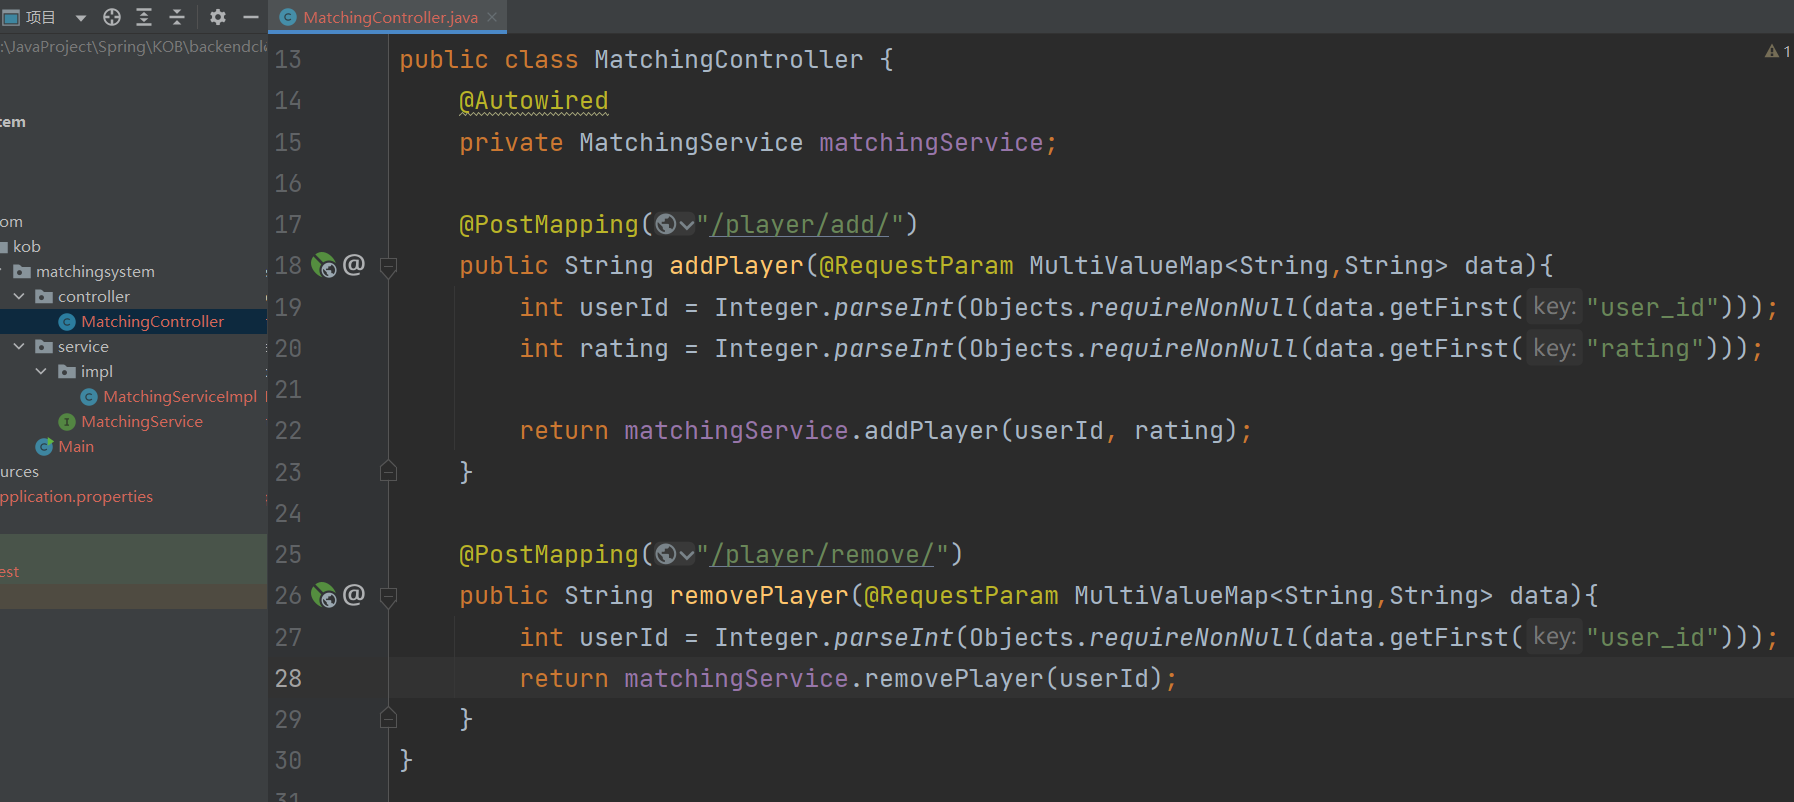
注意,对于MultiValueMap结构而言,运行一个key对应的多个value,并用数组保存
map.getFirst("user_id")表示user_id所对应的value数组中,第一个值001

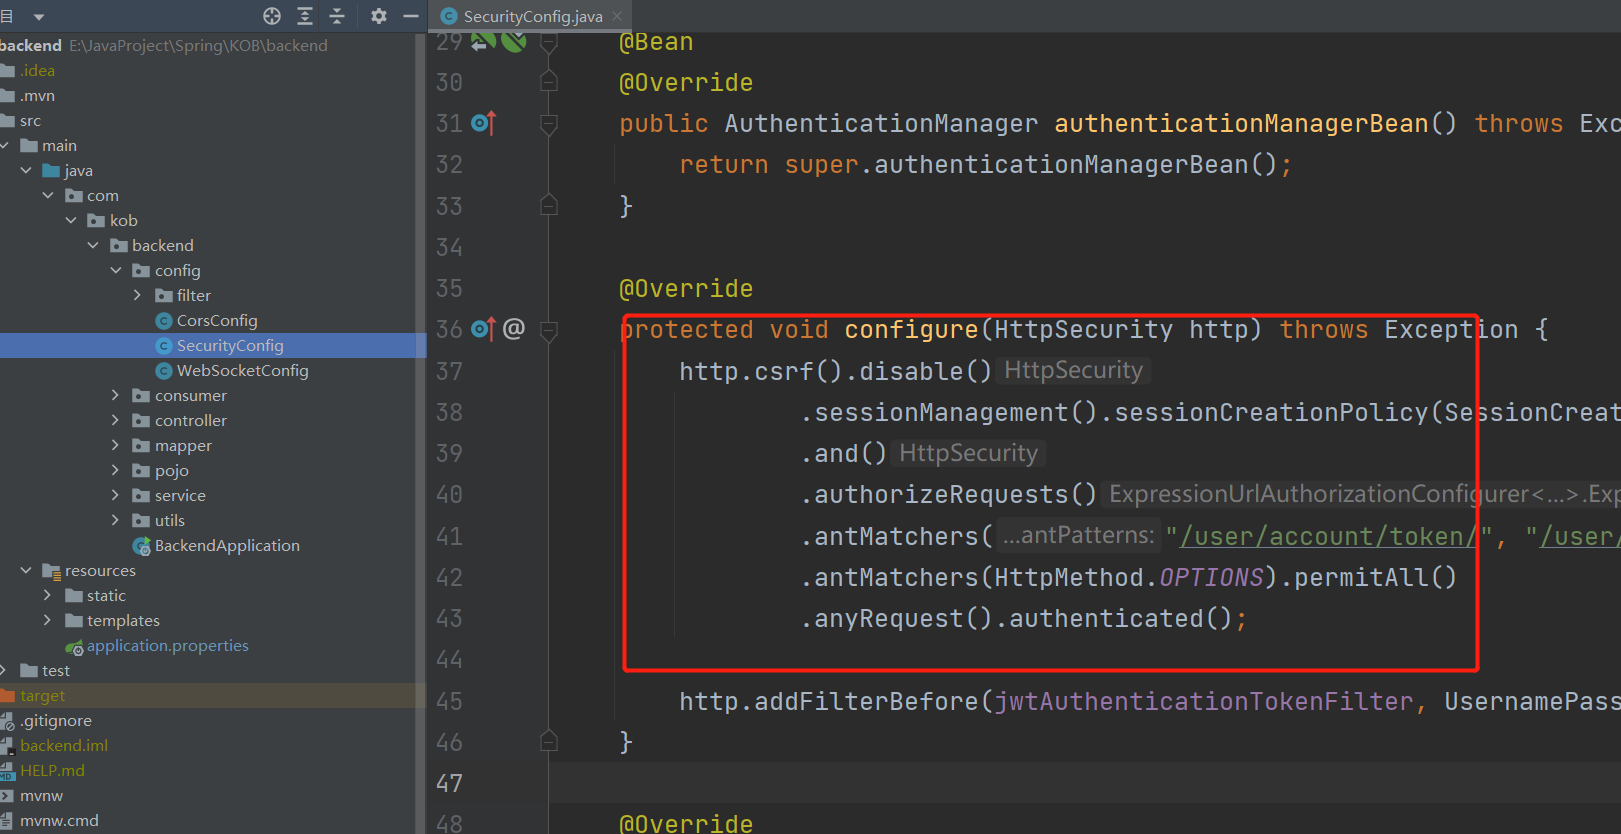
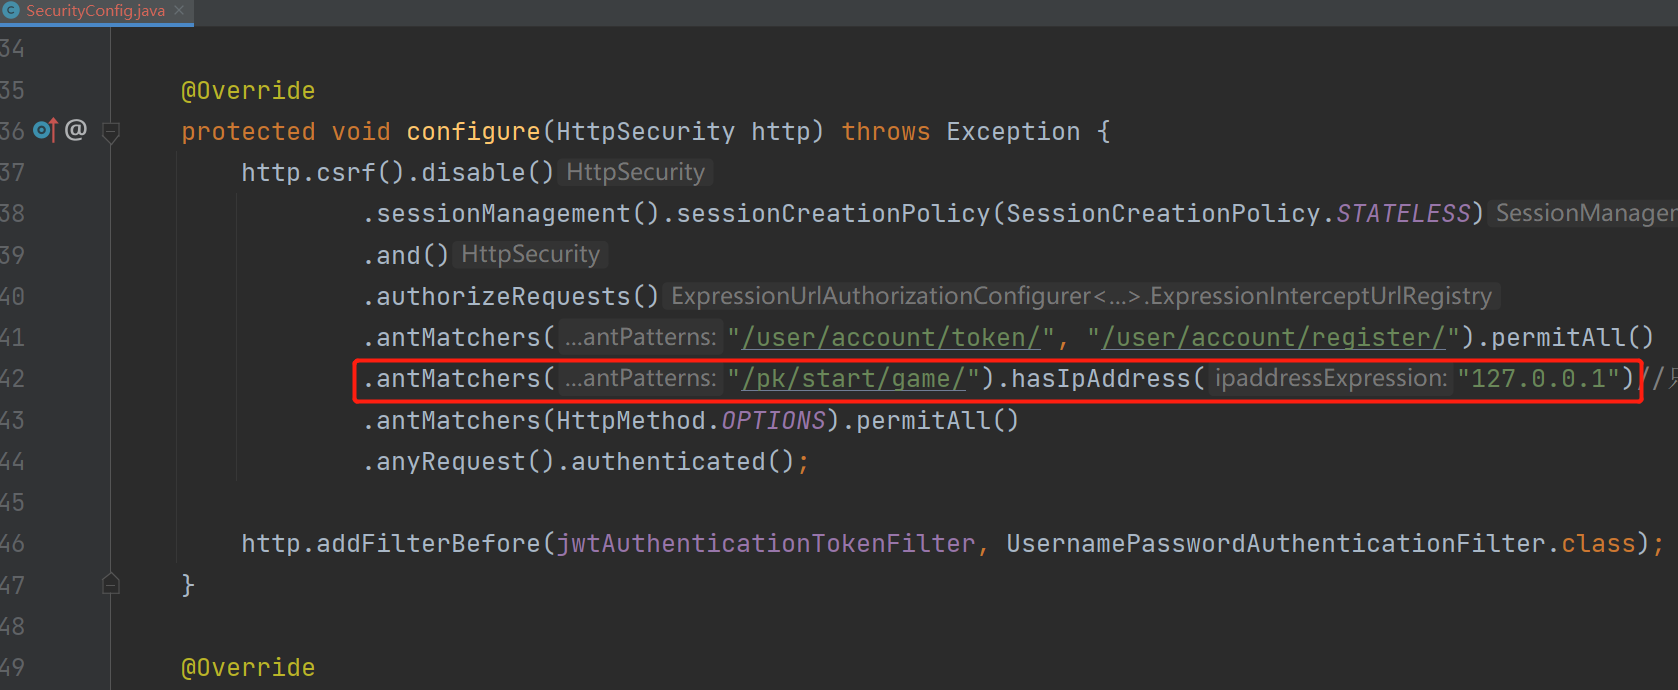
此时MatchingController还有一个问题是,没有授权验证,这样就有外网通过其他请求来恶意攻击的风险。
与之前backend一样,添加Spring Security依赖

照着之前的代码,只用到configure这一段代码,且不涉及Jwt-token的验证,直接抄过来修改
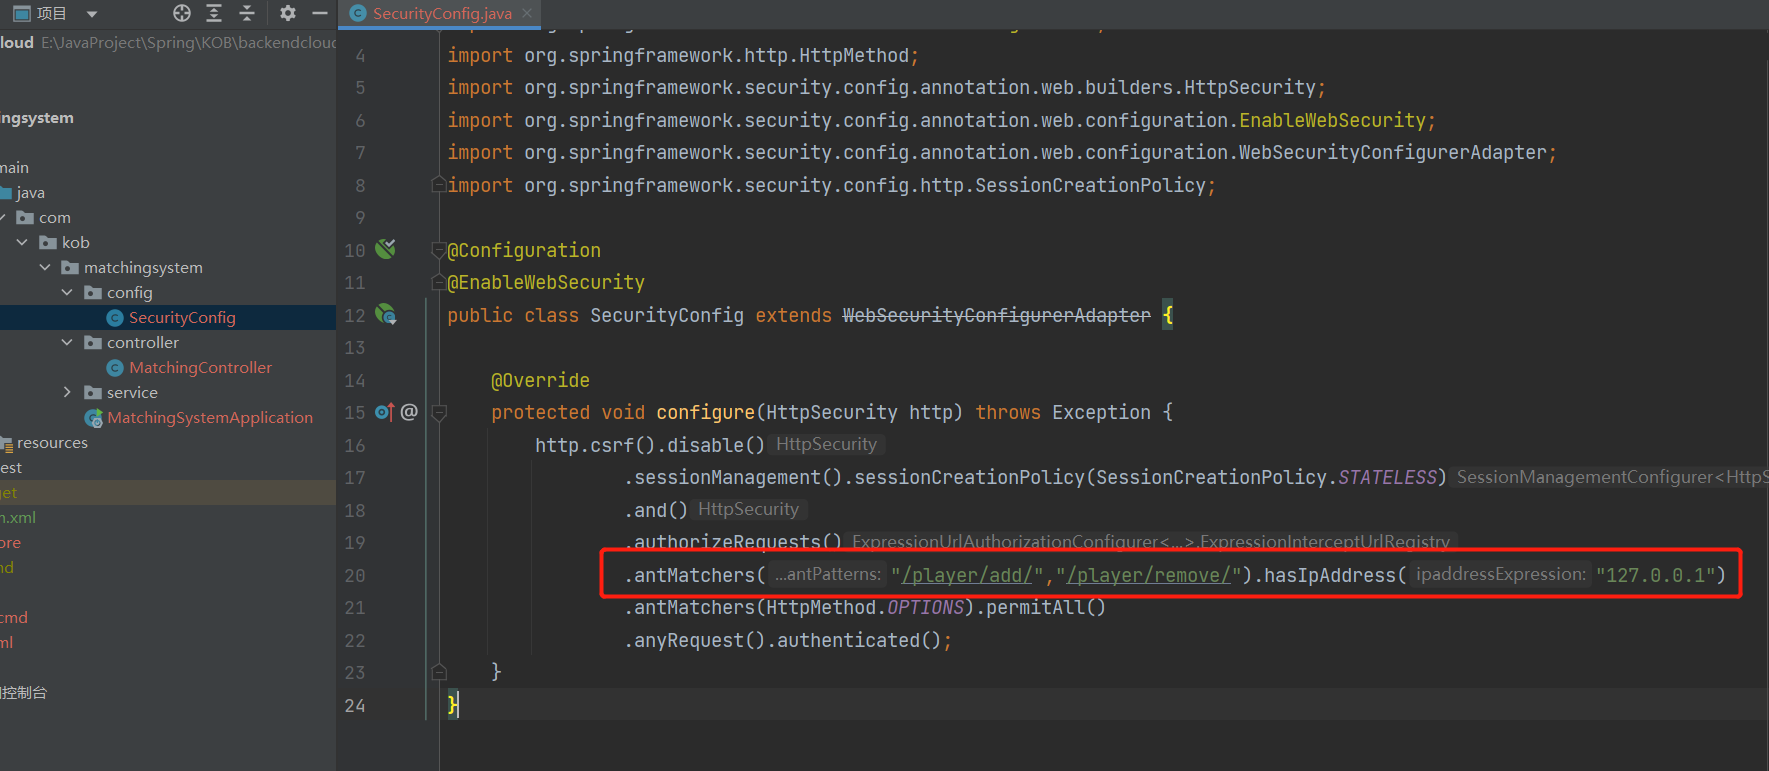
我们期望的的是只能被后端服务器访问,而不能以其他方式访问。解决这个问题,可以根据IP地址来判断,也就是只能通过本地,而不能通过其他地方来访问。
如下图,对"/player/add/"和"/player/remove/"的请求放开
只有IP地址为本地(127.0.0.1)的Server发出的请求才是有效的。
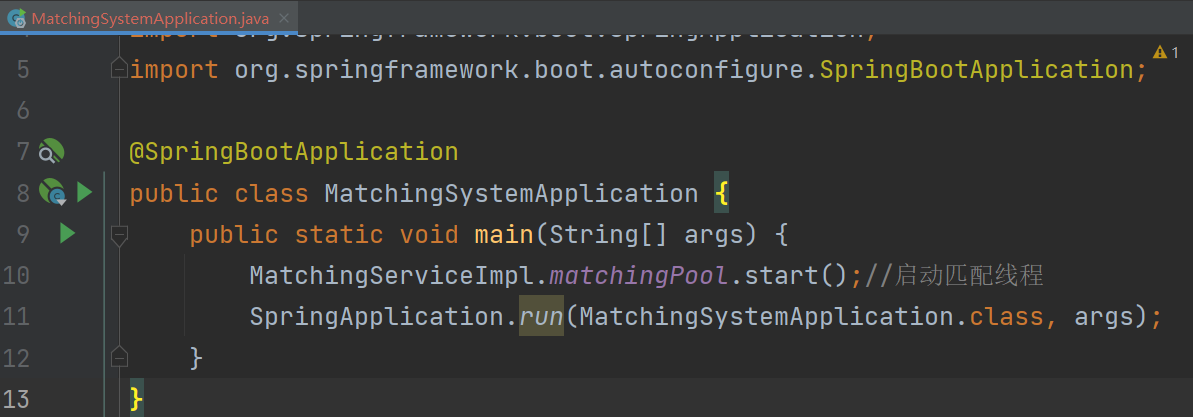
将原来的Main函数,重命名为MatchingSystemApplication,作为Springboot的入口
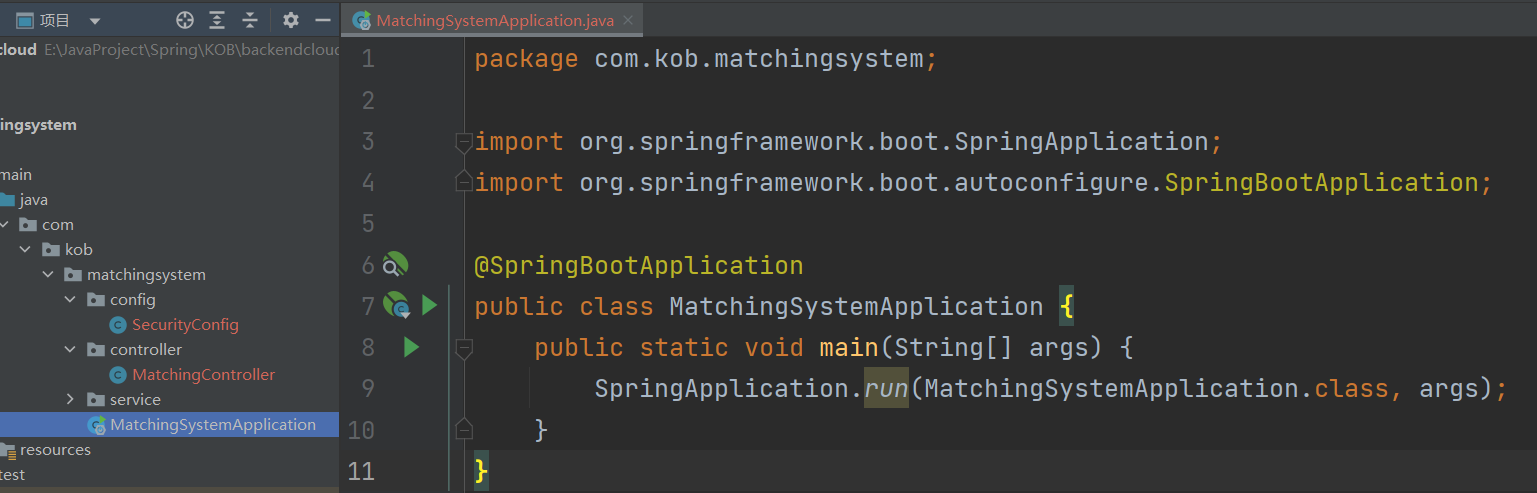
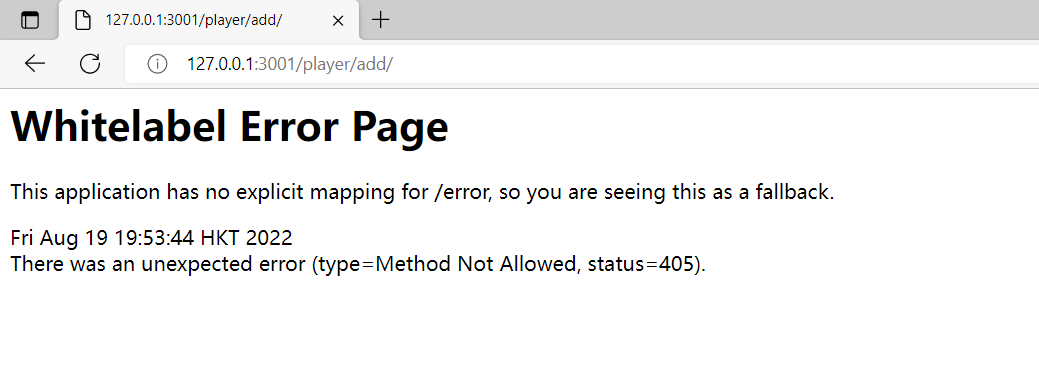
这样就能够跑起来(只不过此时由于是POST的类型的请求,不支持通过浏览器直接请求)
由于请求是游戏后端backend发起的,因此还需要将两部分对接起来。
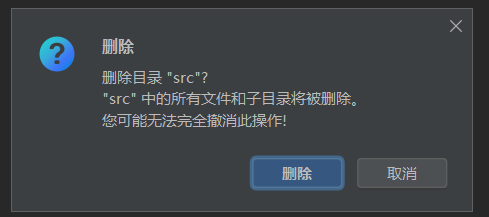
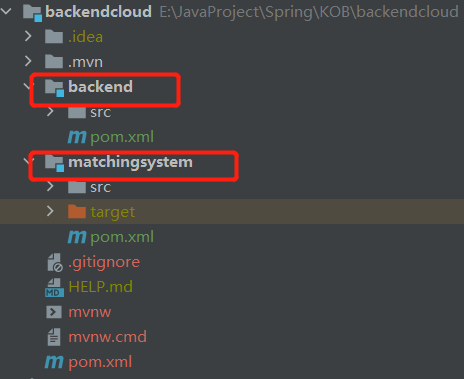
现在需要创建一个新的子项目,将之前的逻辑装在backendclound下面
添加子项目—Backend
1)添加和配置
在backendcloud下面创建SpringCloud的子项目——Backend
然后,将之前的后端backend项目的src整个文件夹直接复制过来。
复制到backendcloud下面的子模块backend下面
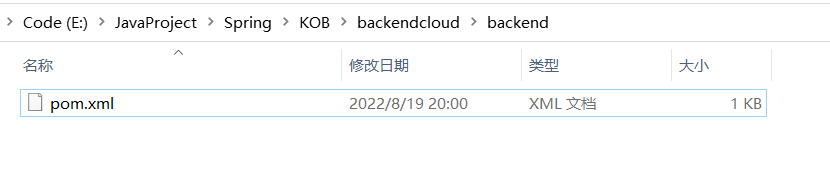
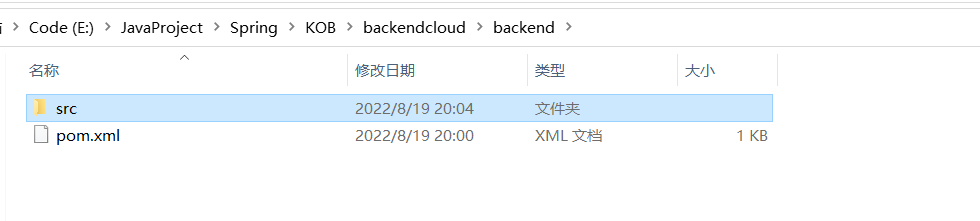
然后将后端backend项目下的porm.xml中的依赖也粘贴到下面这个位置
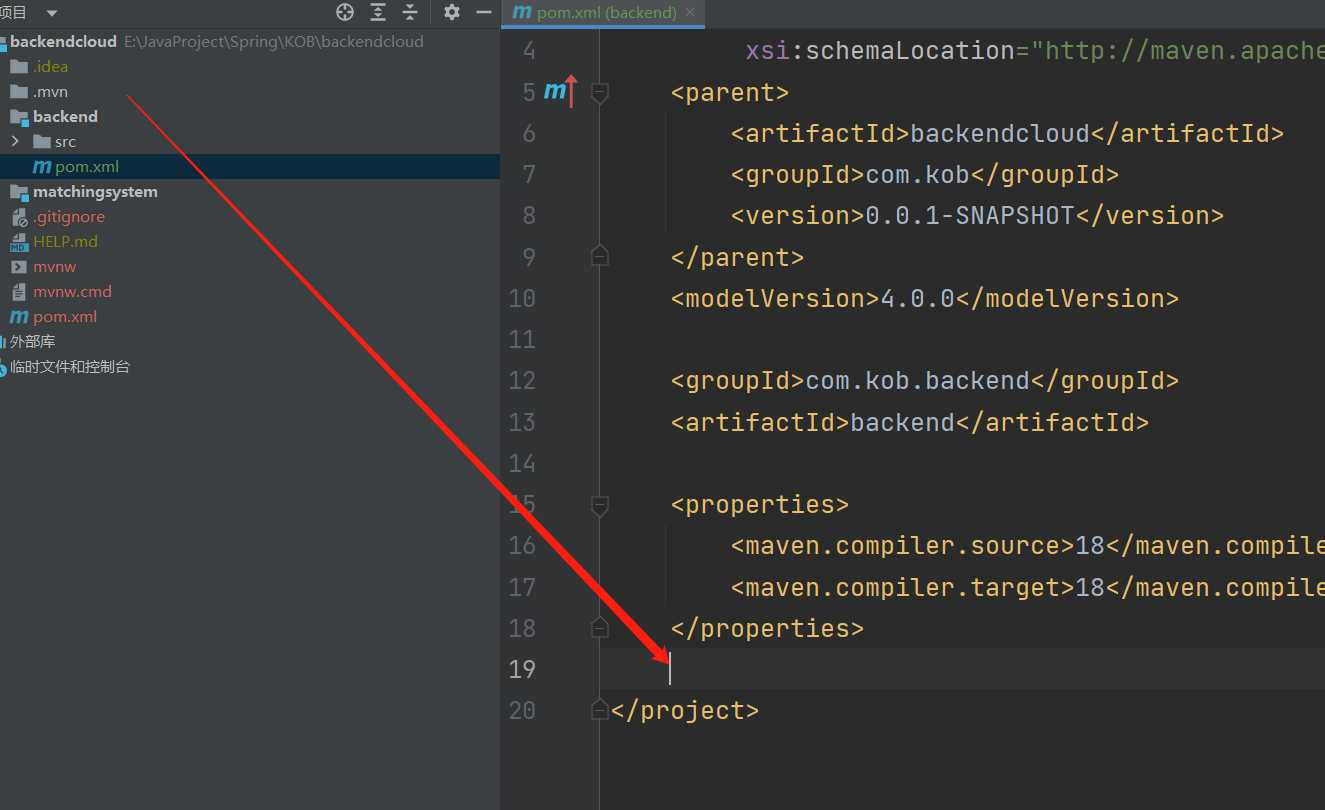
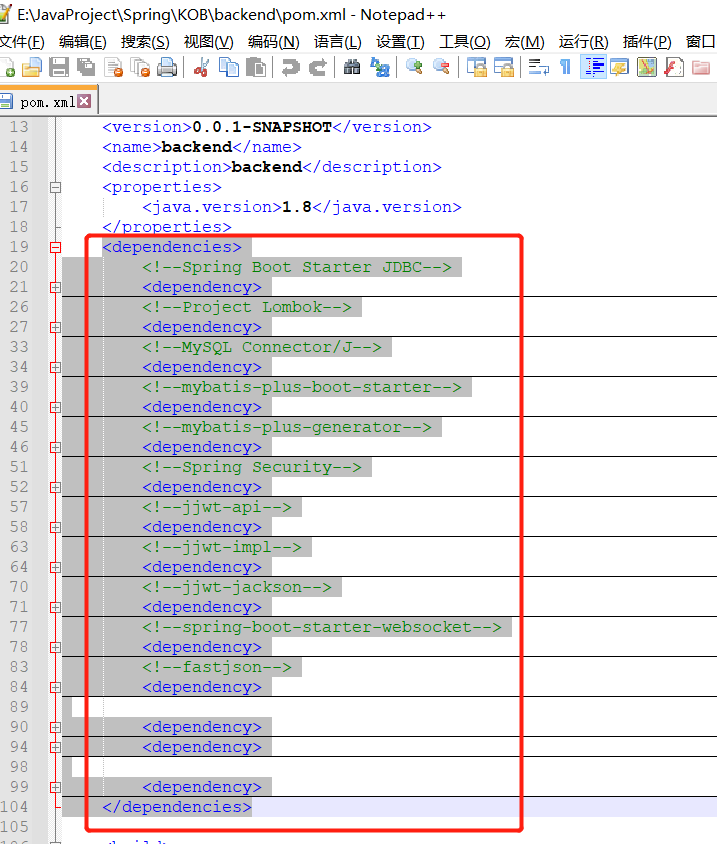
其中的thymeleaf用不到,删除即可。
目前的项目结构如下:
2)连通匹配系统
首先要打通
需要将下面这段修改,目前还只是简单粗暴的进行从集合中取出User
修改如下:
将与matchpool相关的所有操作都删掉
然后在startMatching()调用时向MatchingSystem发请求,申请为玩家匹配对手,在stopMatching()和onClose() 调用时向MatchingSystem发请求,申请取消玩家的匹配,
配置RestTemplate
向MatchingSystem发请求,需要借助Springboot中的一个工具RestTemplate,它可以在两个Spring进程之间进行通信。
先配置一下这个工具,如果希望在WebSocketServer.java中使用RestTemplate,就需要加Bean注解,这样才能够取出来。
可以理解为,需要用到某个工具的时候,就定义一个它的Configuration,加一个注解Bean,返回一个它的实例。
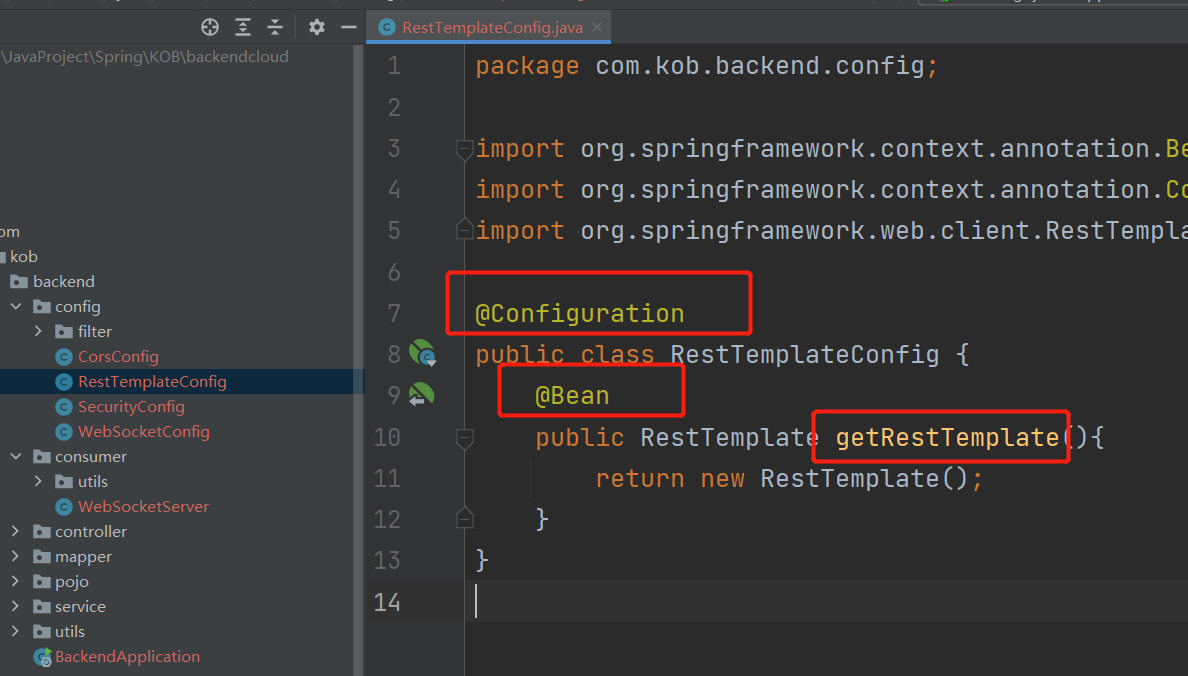
这样在未来使用的时候,就可以通过@Autowired将其注入
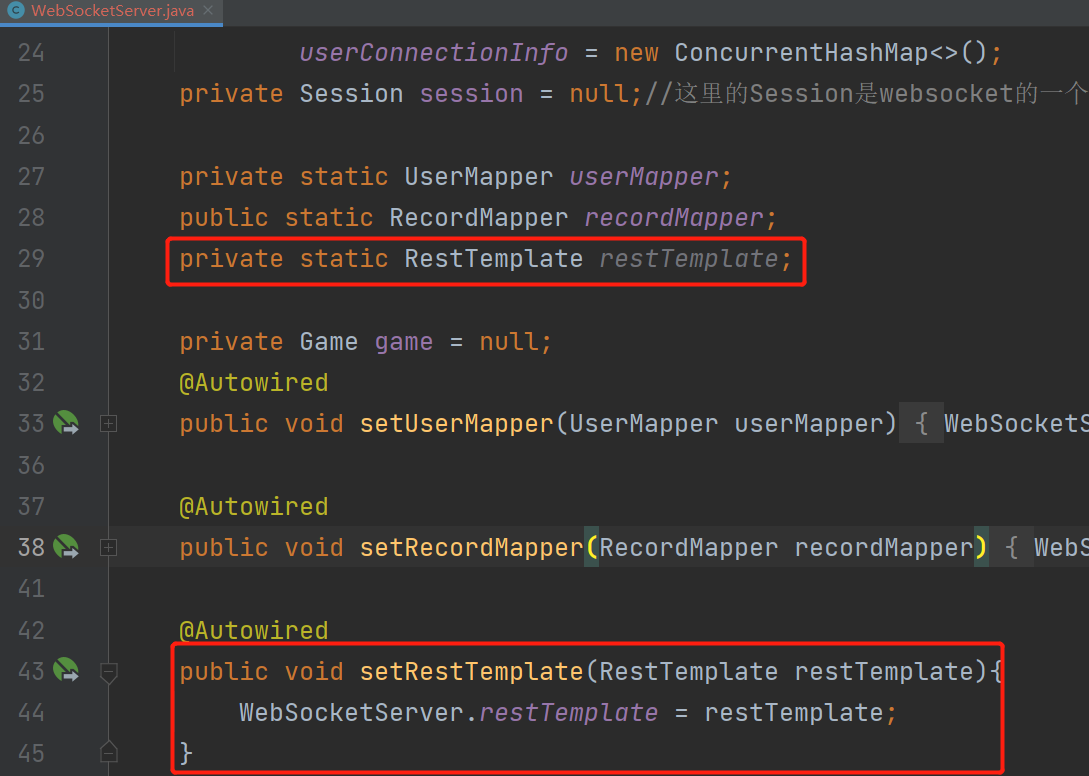
原理是,如果加了@Autowired,就会看一下这个接口(或者Service)是否有一个唯一的注解为Bean的函数和它对应,如果有的话就调用这个函数,将返回值赋过来。
现在看下怎么用。
在具体用之前,需要修改下数据库。将rating字段,将bot表中,移动到user表中
同样,修改这两个表对应的pojo
并且在所用调用User和Bot构造函数的时候修改


然后进入正题。
使用RestTemplate
借助RestTemplate向MatchingSystem发请求

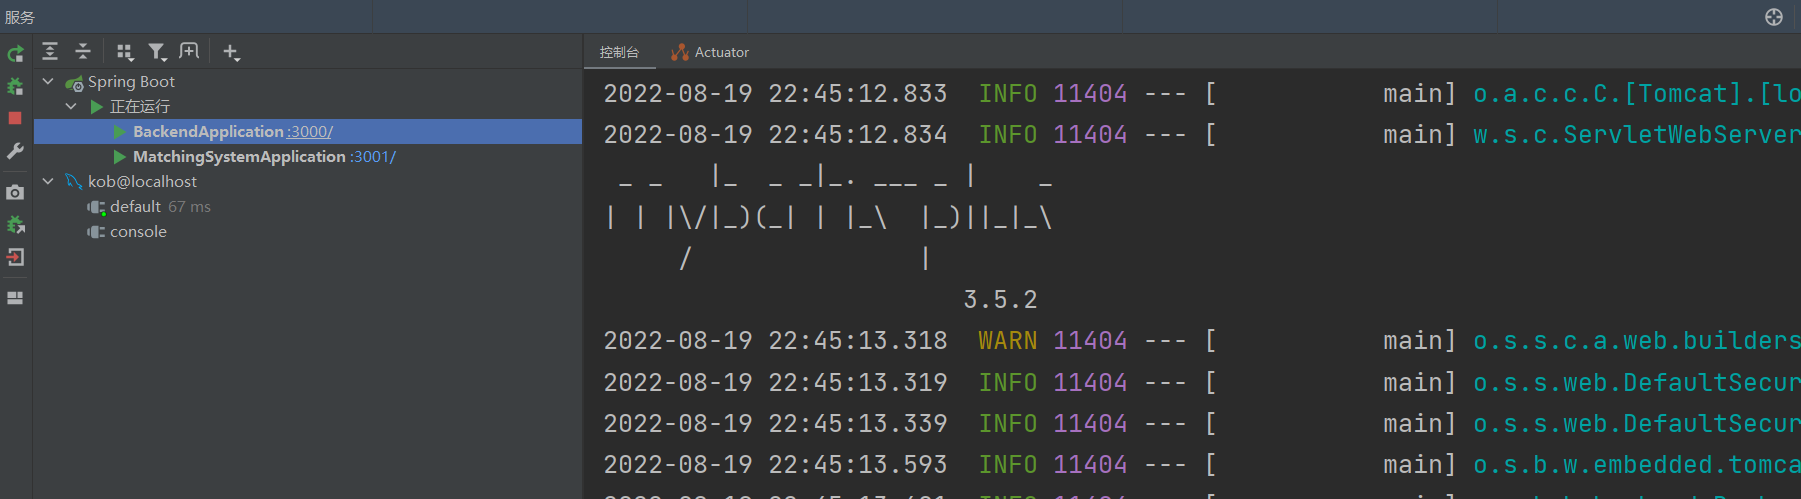
启动Backend模块对应的Spring服务
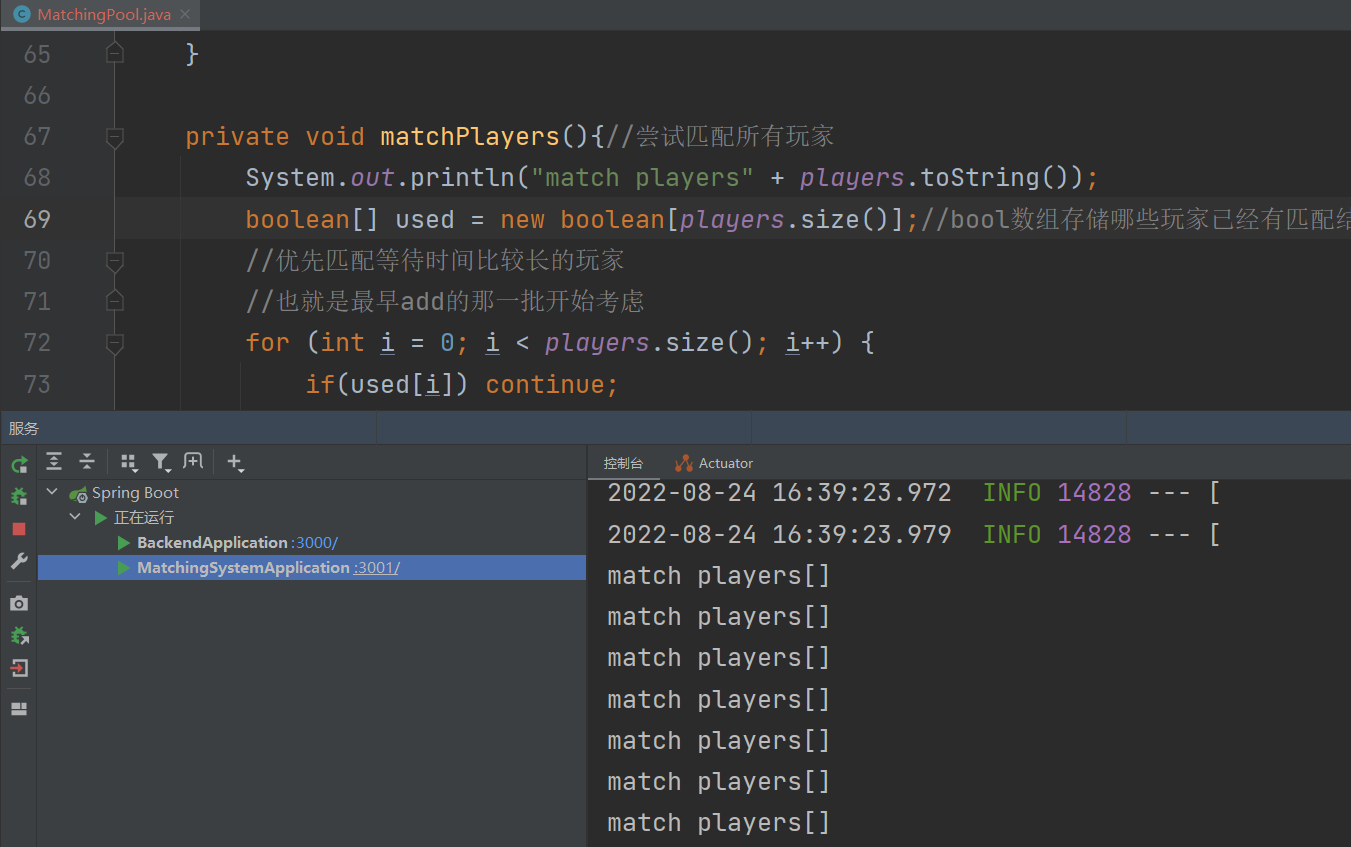
此时能够在服务中看到,启动了两个SpringBoot
Backend对应的端口号为3000
MatchingSystem对应的端口号为3001
用户登录之后,进行匹配,在MatchingSystem对应的控制台下面add player1 1500表示匹配系统接收到了来自后端的玩家ID为6的匹配请求。
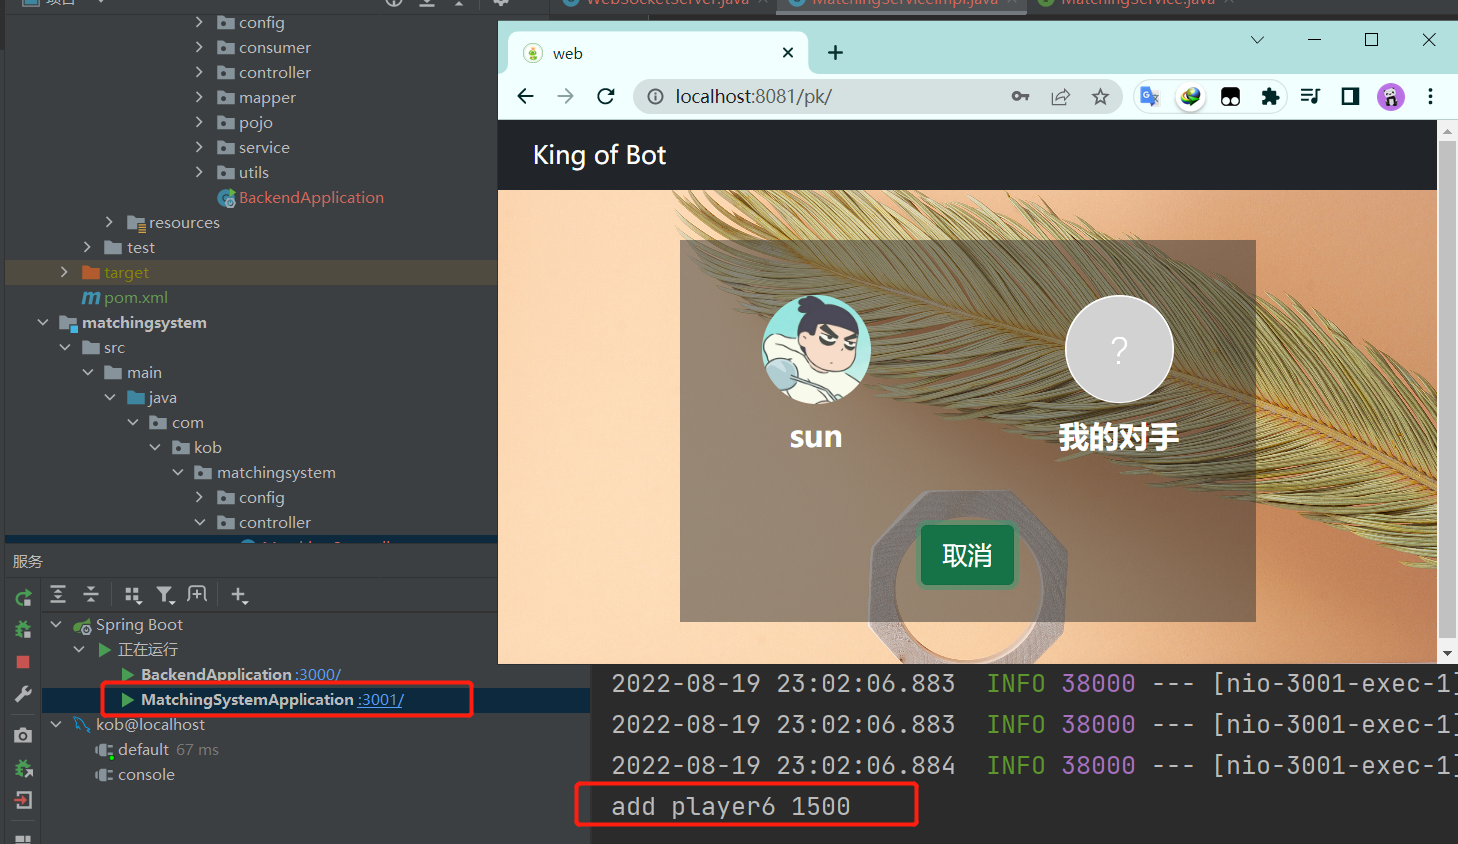
当点击取消时,同样成功接收到了请求
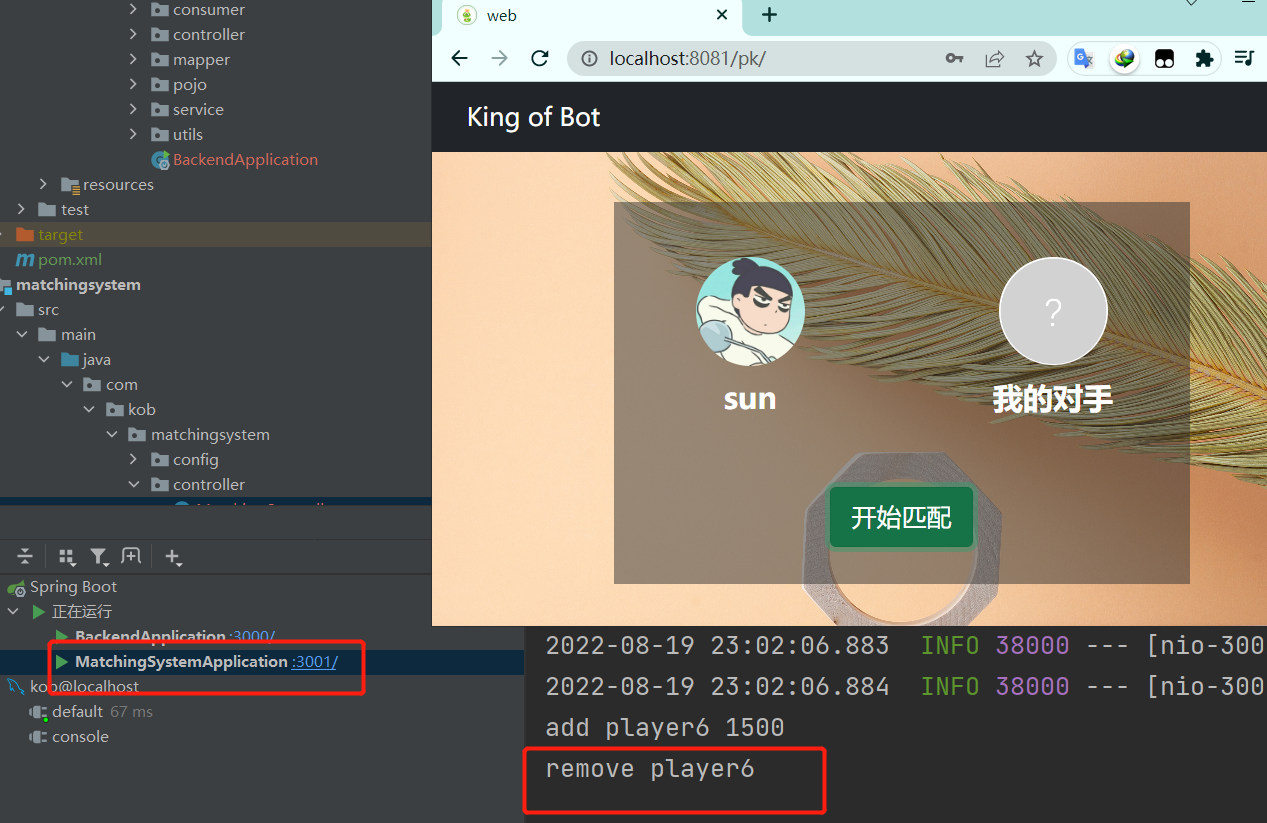
控制台中看到的输出,是在匹配系统中实现的输出。
至此,游戏后端,向匹配系统发请求这一过程就完成。

接下来要实现匹配系统内部的逻辑。
匹配系统
匹配系统在接收到来自游戏后端的匹配请求之后,会将当前参与匹配的所有用户,放在一个池子(数组)里面。开辟额外新线程,每隔1s就扫描一遍整个数组,将能够匹配的玩家匹配到一起。我们期望匹配相近分值的玩家,随着时间的推移,可以逐步放宽分值要求,也就是允许两名匹配玩家的分值差距较大,直到所有玩家都可以在规定时间内匹配在一块为止。具体来说,第一秒,匹配分值差距10以内的玩家,第二秒,匹配分值差距20以内的玩家…..直到匹配完成为止。
现在需要将之前关于线程的那部分再重复一遍。
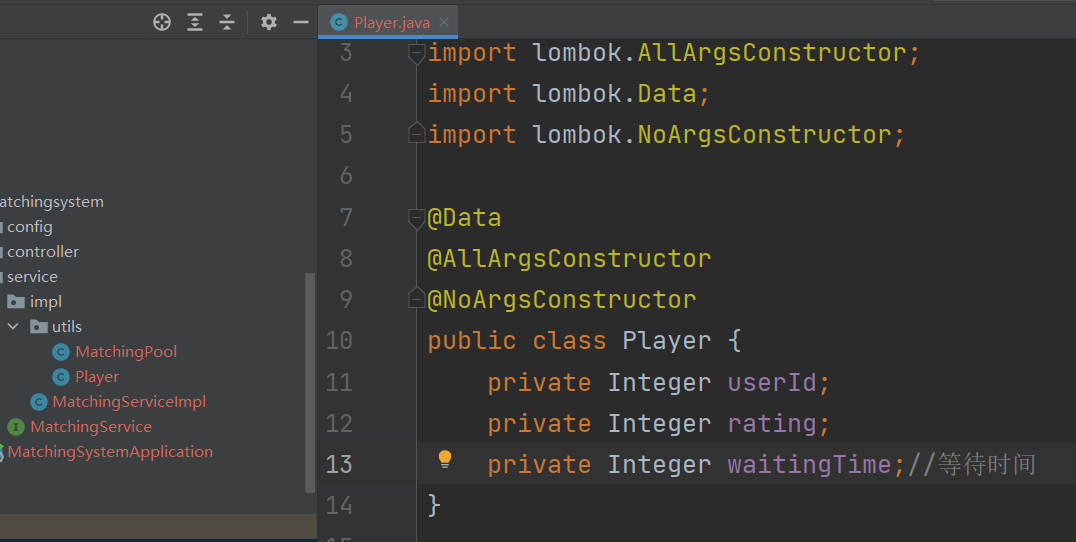
创建service.impl.utils.MatchingPool用于维护这样一个线程,同时创建service.impl.utils.Player来存储玩家(需要提前将Lombok依赖添加到匹配系统的porm.xml中)
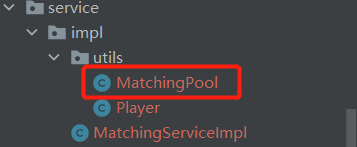
对于Player类,需要考虑三个属性:用户名,积分值,等待时间
MatchingPool线程
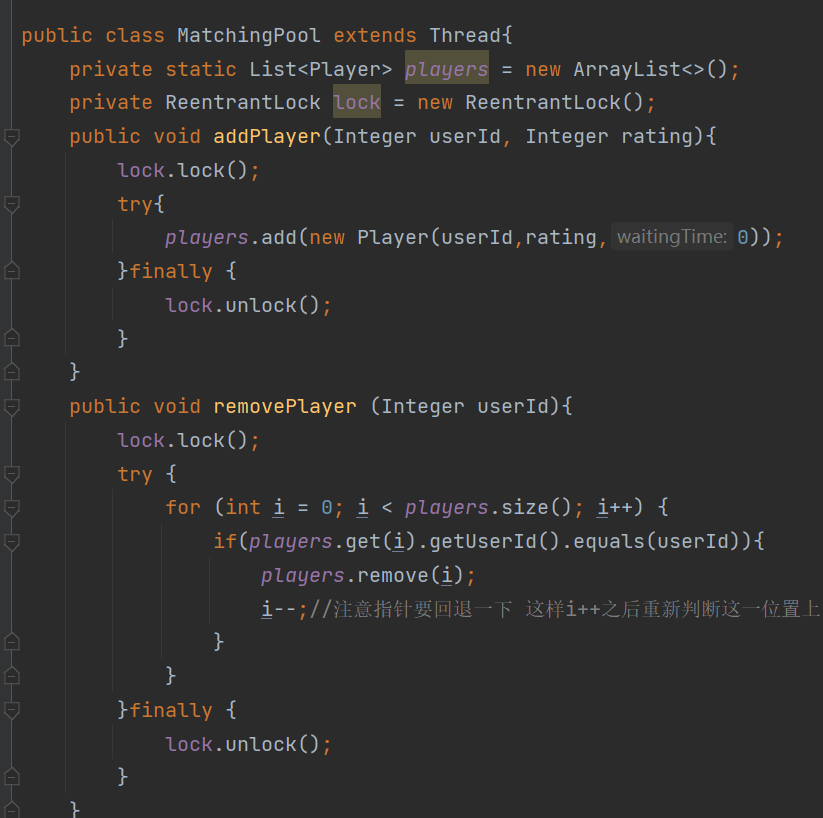
对于MatchingPool,是一个多线程的类,需要继承Thread
- 创建一个列表
players保存玩家
- 添加玩家的函数
- 删除玩家的函数
由于players变量多个线程(匹配线程,传入参数线程)共用,因此这个变量涉及到读写冲突,因此就需要加锁。还要注意,从列表中删除元素的时候,要注意重新判断该位置。
对于匹配系统而言,由于全局只有一个匹配线程,因此将其定义成静态变量,放在MatchingServiceImpl中。

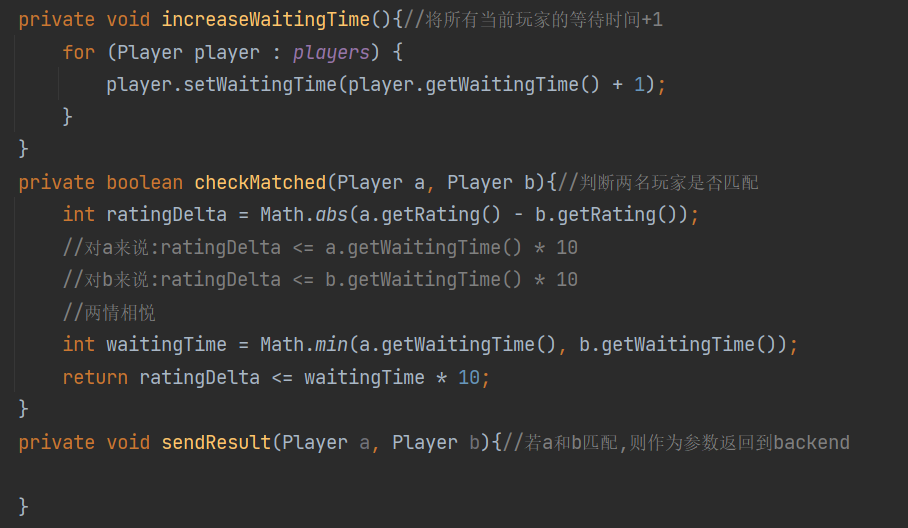
同时在MatchingPool开一个线程,需要重写Thread的run()。对于线程的执行,我们期望周期性的执行,判断当前所有玩家中有没有匹配的。写一个死循环,Thread.sleep(1000),每1秒中自动执行一遍。对于每一名玩家而言,每等待一秒,对应的waitingTime就会加一,相应的匹配阈值就会变大。
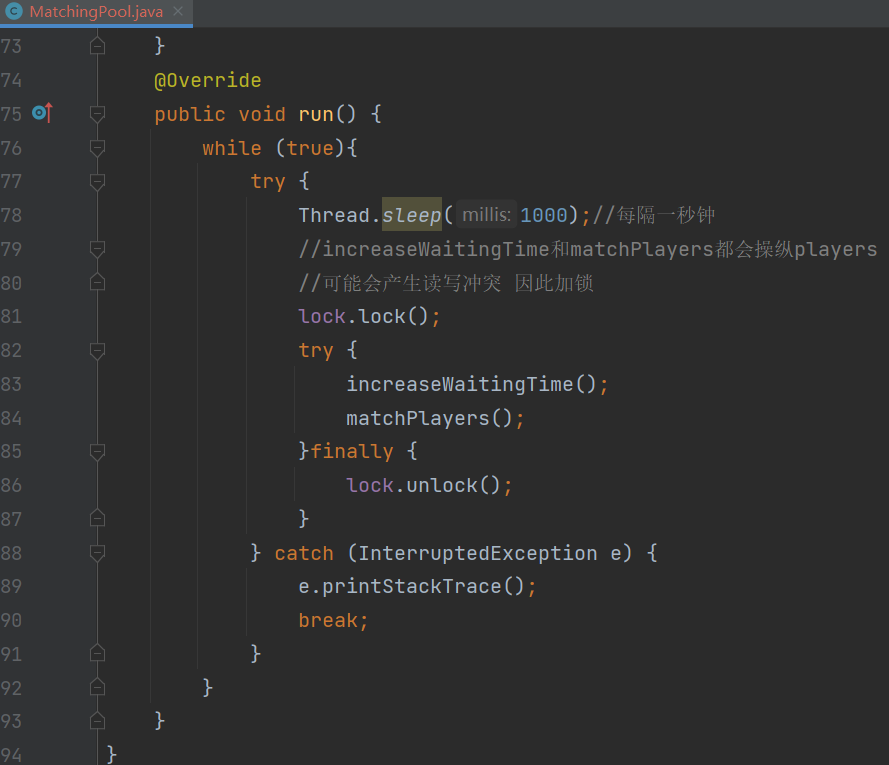
在matchPlayers()中,尝试匹配所有玩家
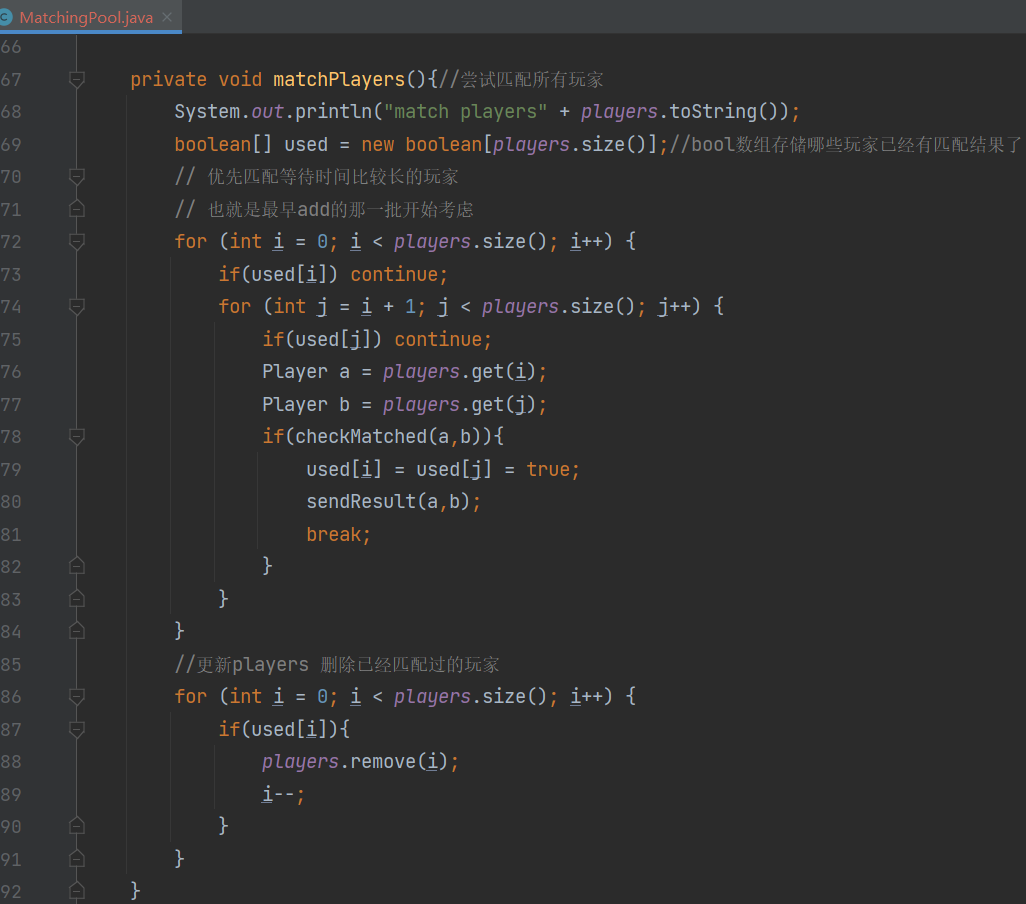
注意,java中的break:跳出当前循环;但是如果是嵌套循环,则只能跳出当前的这一层循环,只有逐层break才能跳出所有循环。continue:终止当前循环,但是不跳出循环(在循环中continue后面的语句是不会执行了),继续往下根据循环条件执行循环。
以上用到的辅助函数
MatchingSystem发送请求
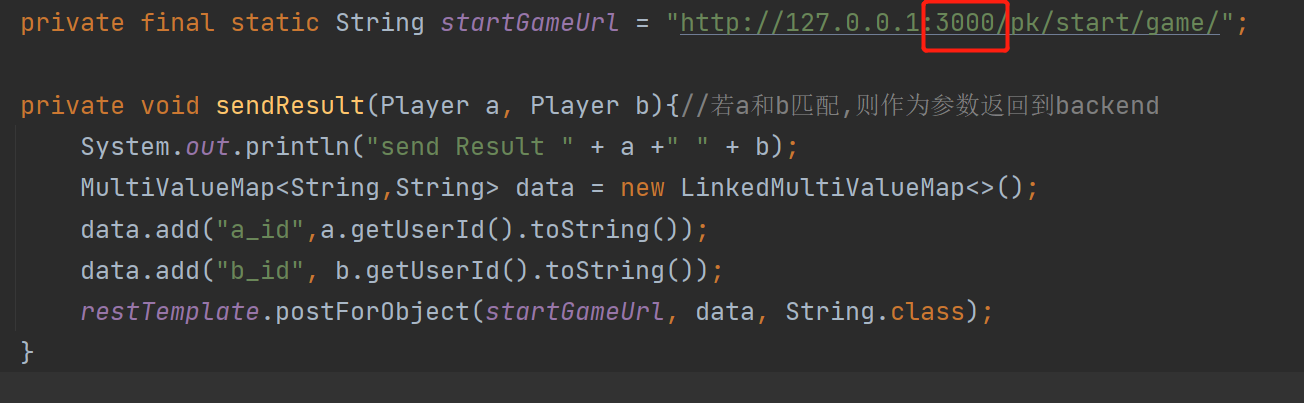
对于sendResult,负责将匹配的两名玩家作为参数返回到backend
也就是这个过程

因为也要用到RestTemplateConfig
所以将backend.config.RestTemplateConfig文件复制到matchingsystem.config.RestTemplateConfig
为了能让RestTemplateConfig中的Bean注入进来,添加@Component
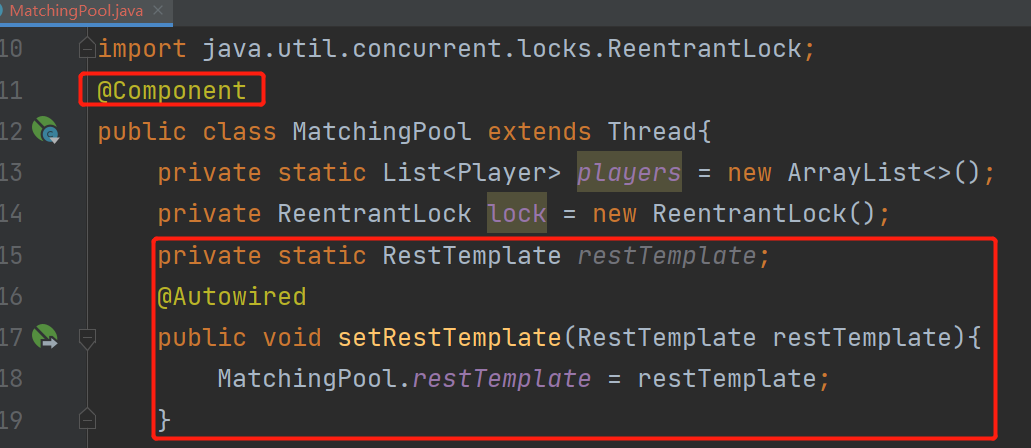
注入之后,就可以使用RestTemplateConfig来进行SpringBoot服务之间的通信
注意要加端口号
Backend接收请求
为了能将匹配的a和b作为参数返回到backend,我们需要在backend写一个接收信息的方法
对于这样的一个方法而言,同样的一个流程
serviceservice.implcontroller
变动的文件如下,除了SecurityConfig,其他的均为新增文件
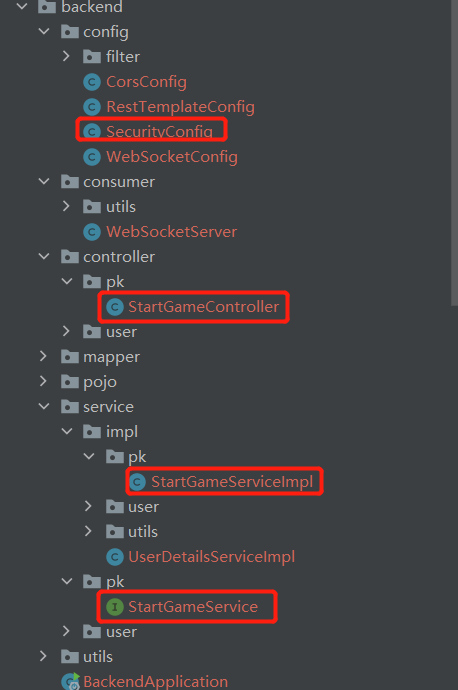
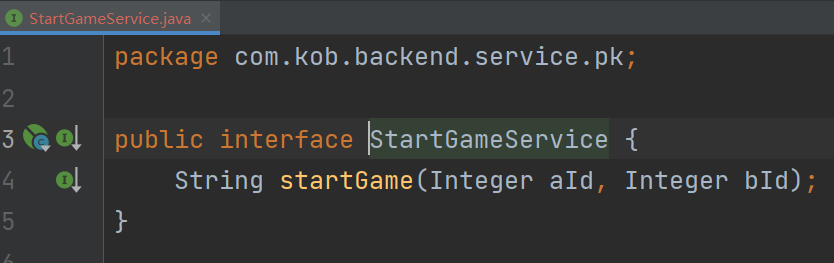
StartGameService.java
StartGameServiceImpl.java
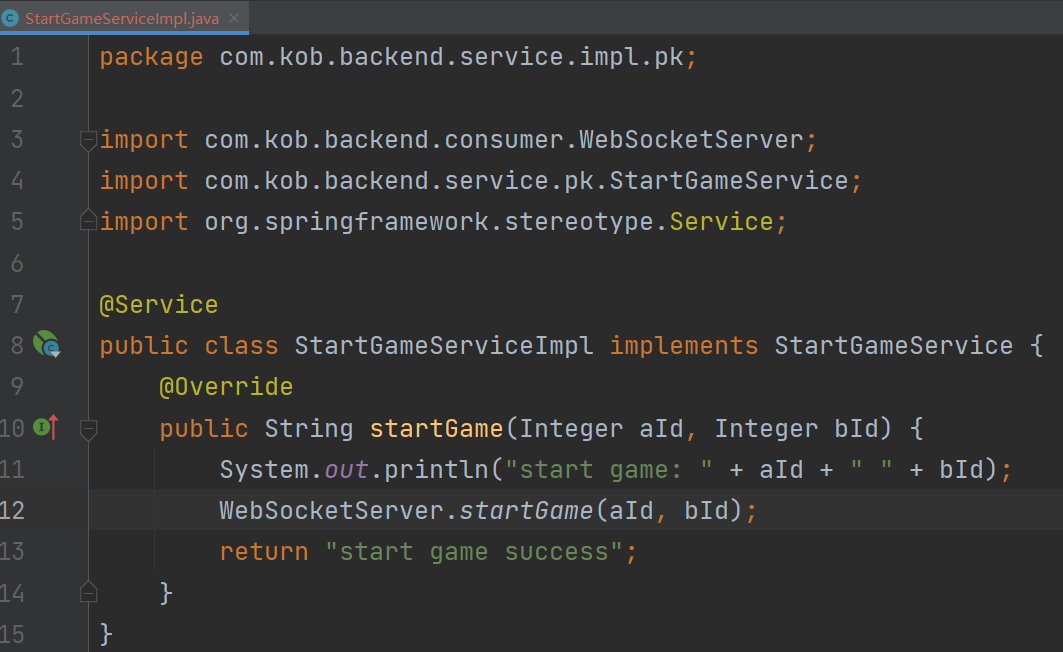
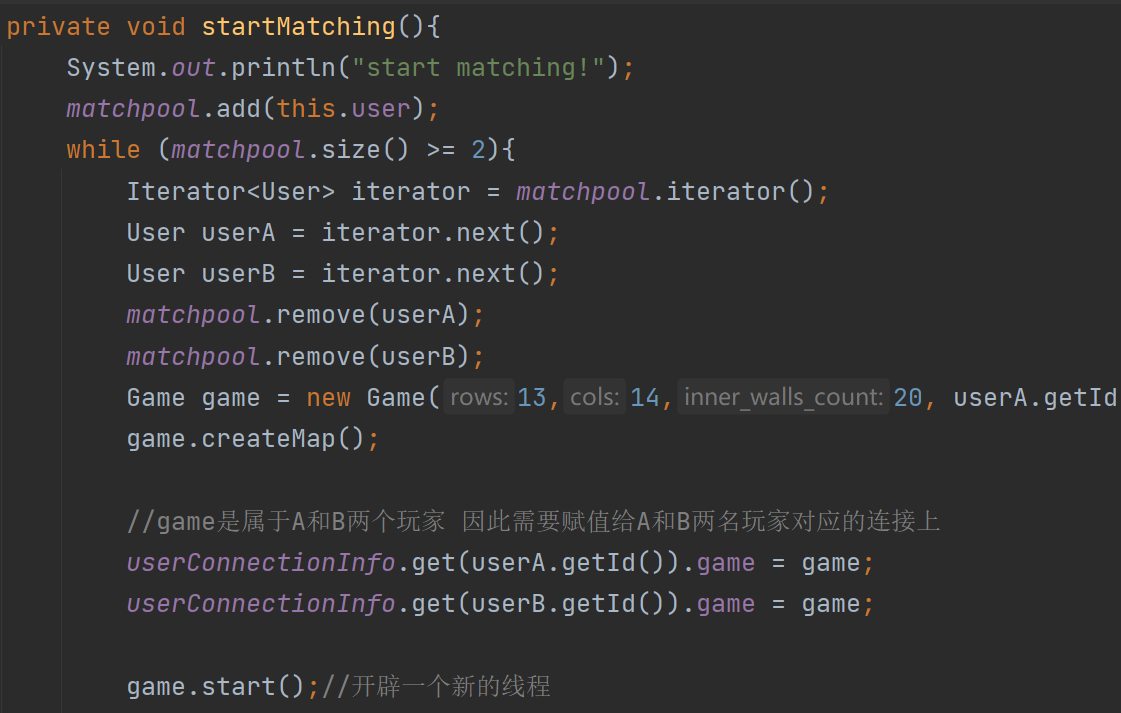
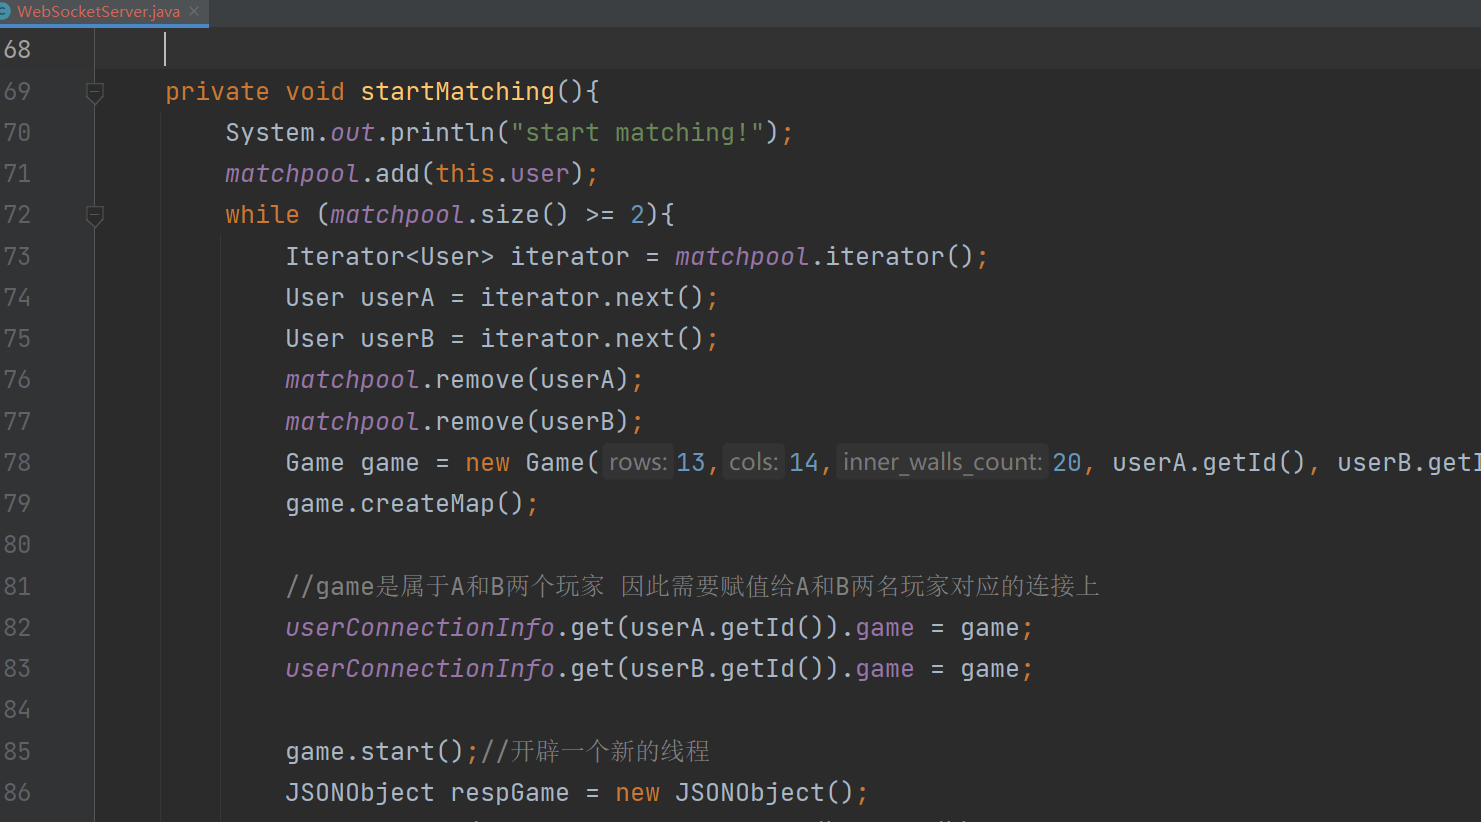
其中的WebSocketServer.startGame(aId, bId)
内容为:
1
2
3
4
5
6
7
8
9
10
11
12
13
14
15
16
17
18
19
20
21
22
23
24
25
26
27
28
29
30
31
32
33
34
35
36
37
38
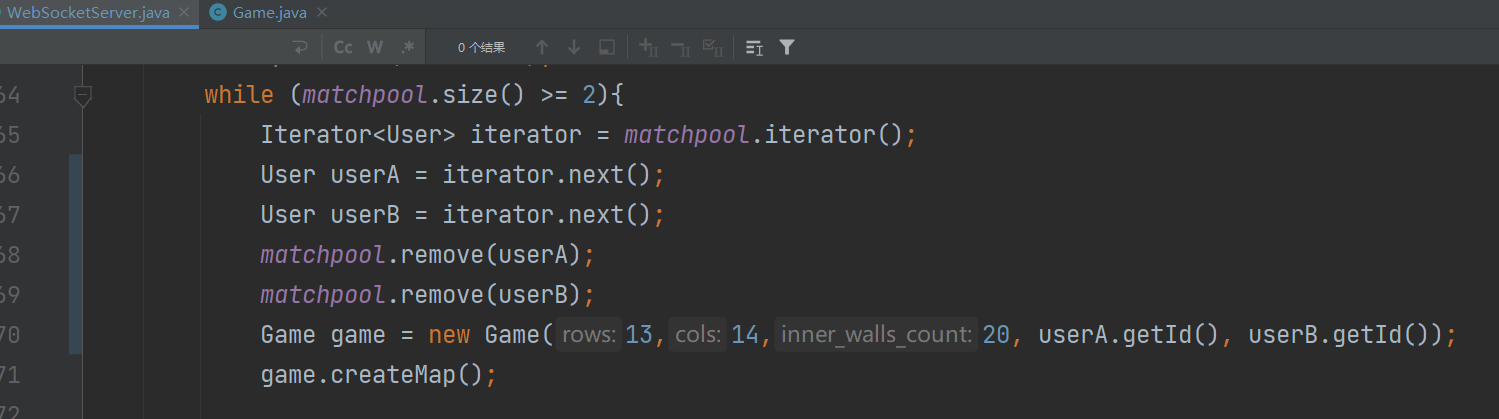
39
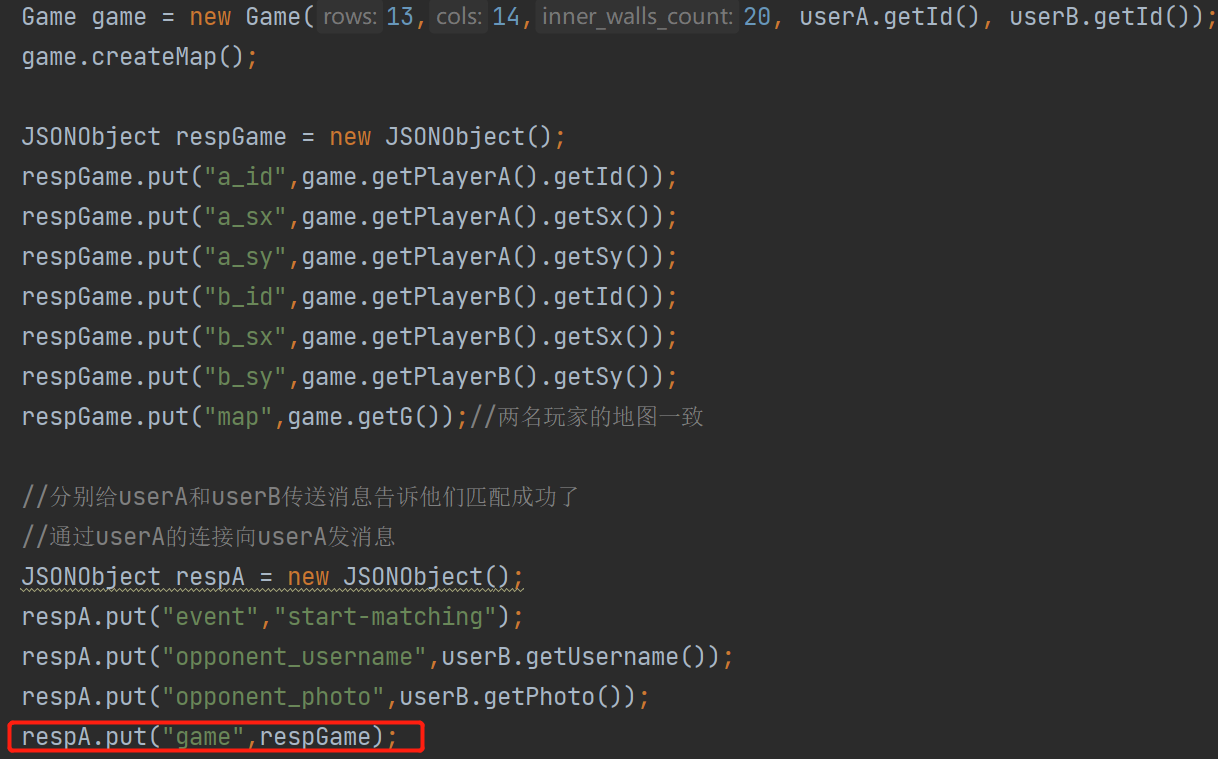
| public static void startGame(Integer aId, Integer bId){
User userA = userMapper.selectById(aId);
User userB = userMapper.selectById(bId);
Game game = new Game(13,14,20, userA.getId(), userB.getId());
game.createMap();
userConnectionInfo.get(userA.getId()).game = game;
userConnectionInfo.get(userB.getId()).game = game;
game.start();
JSONObject respGame = new JSONObject();
respGame.put("a_id",game.getPlayerA().getId());
respGame.put("a_sx",game.getPlayerA().getSx());
respGame.put("a_sy",game.getPlayerA().getSy());
respGame.put("b_id",game.getPlayerB().getId());
respGame.put("b_sx",game.getPlayerB().getSx());
respGame.put("b_sy",game.getPlayerB().getSy());
respGame.put("map",game.getG());
JSONObject respA = new JSONObject();
respA.put("event","start-matching");
respA.put("opponent_username",userB.getUsername());
respA.put("opponent_photo",userB.getPhoto());
respA.put("game",respGame);
WebSocketServer webSocketServer1 = userConnectionInfo.get(userA.getId());
webSocketServer1.sendMessage(respA.toJSONString());
JSONObject respB = new JSONObject();
respB.put("event","start-matching");
respB.put("opponent_username",userA.getUsername());
respB.put("opponent_photo",userA.getPhoto());
respB.put("game",respGame);
WebSocketServer webSocketServer2 = userConnectionInfo.get(userB.getId());
webSocketServer2.sendMessage(respB.toJSONString());
}
|
StartGameController.java
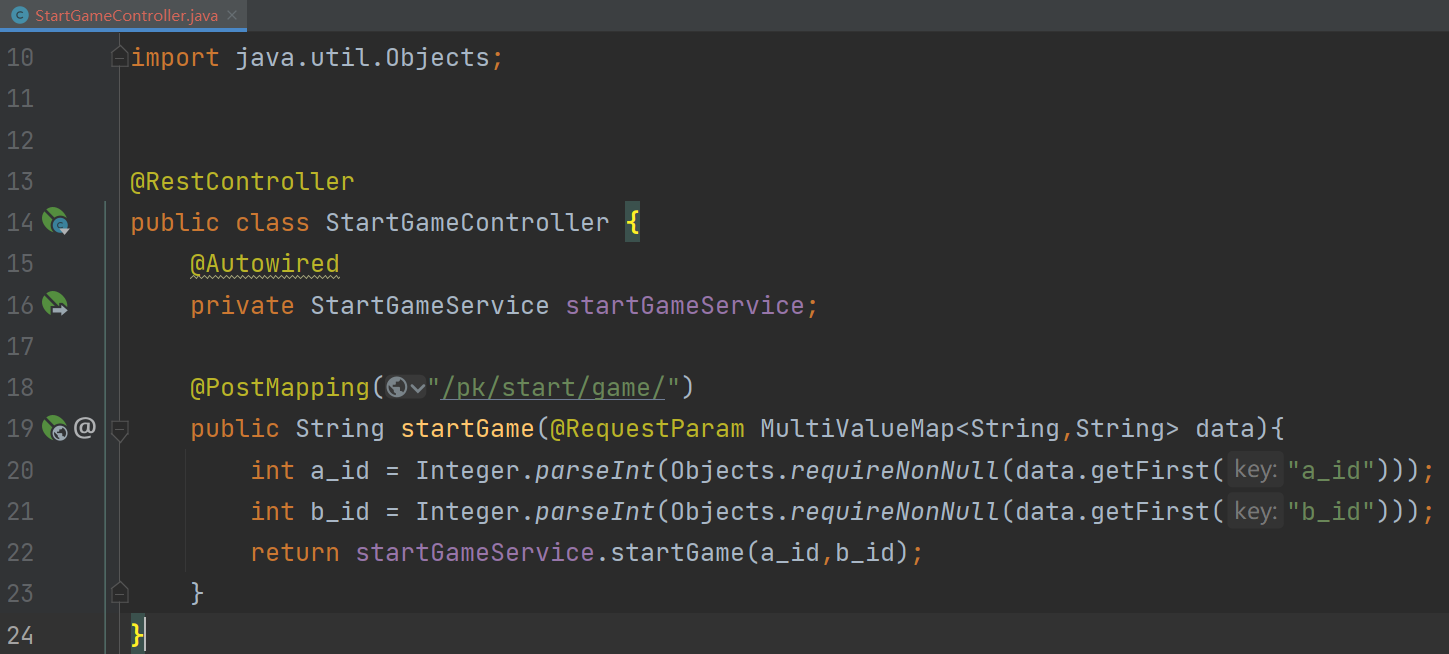
SecurityConfig.java,对于"/pk/start/game/"这样一个URL,只允许本地调用。
这样backend端的接收函数就实现了
匹配池启动
这样一个匹配池线程我们选择在Springboot启动之前随之启动
Debug调试
启动MatchingSystem所对应的SpringBoot服务,可以看到,每秒就会执行一次matchPlayers()
现在前端一个玩家点击“匹配”按钮
可以看到对应的waitingTime每隔一秒加1
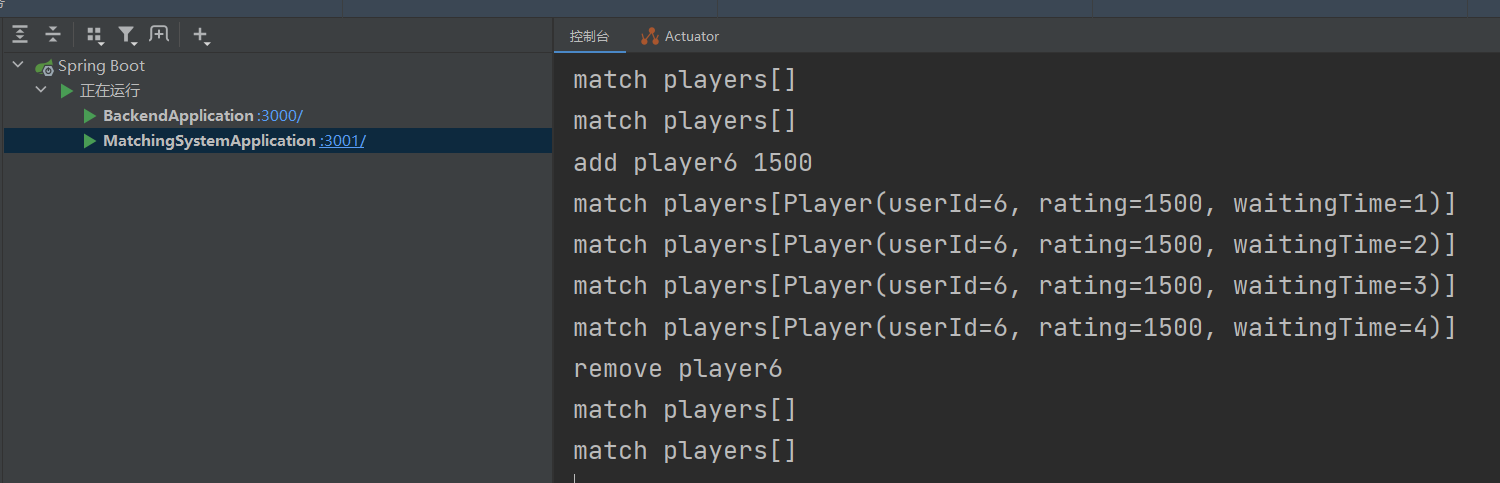
点击取消之后,就会删除。
之后测试两个用户
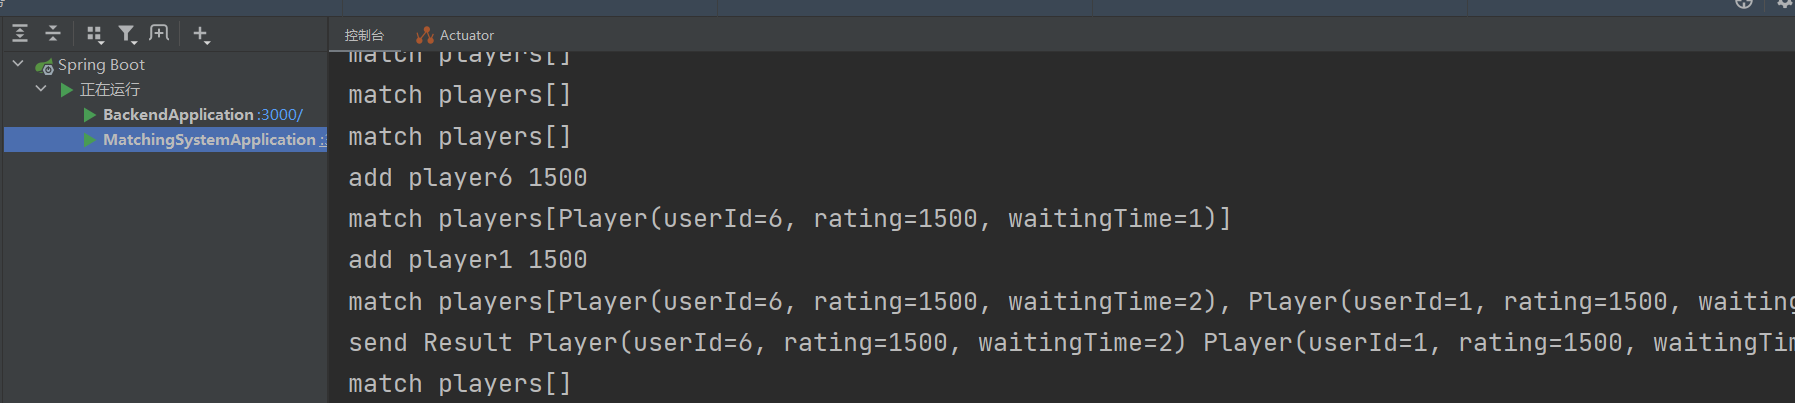
很快实现匹配
为了便于测试,将两名玩家的分值差距调大。
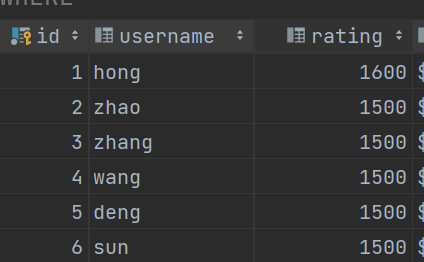
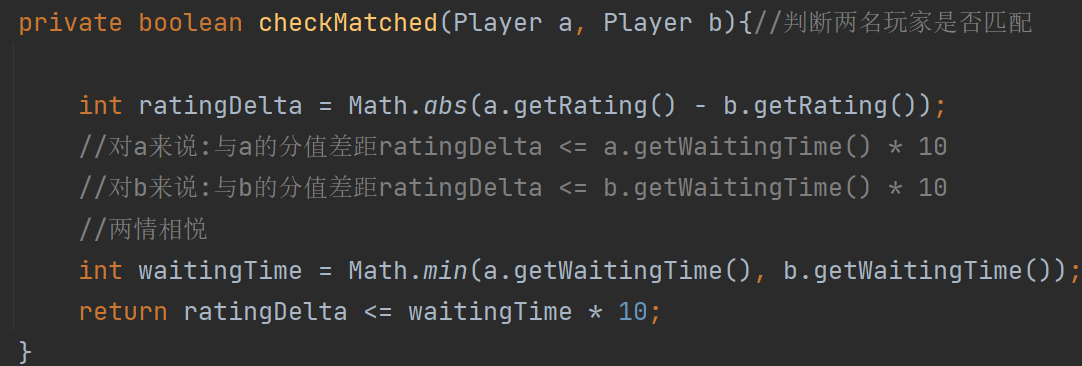
分差100,根据匹配规则,需要满足与自己的分值差距,小于自己的等待时间*10,
ratingDelta <= waitingTime * 10; (ratingDelta = 100)
意味着
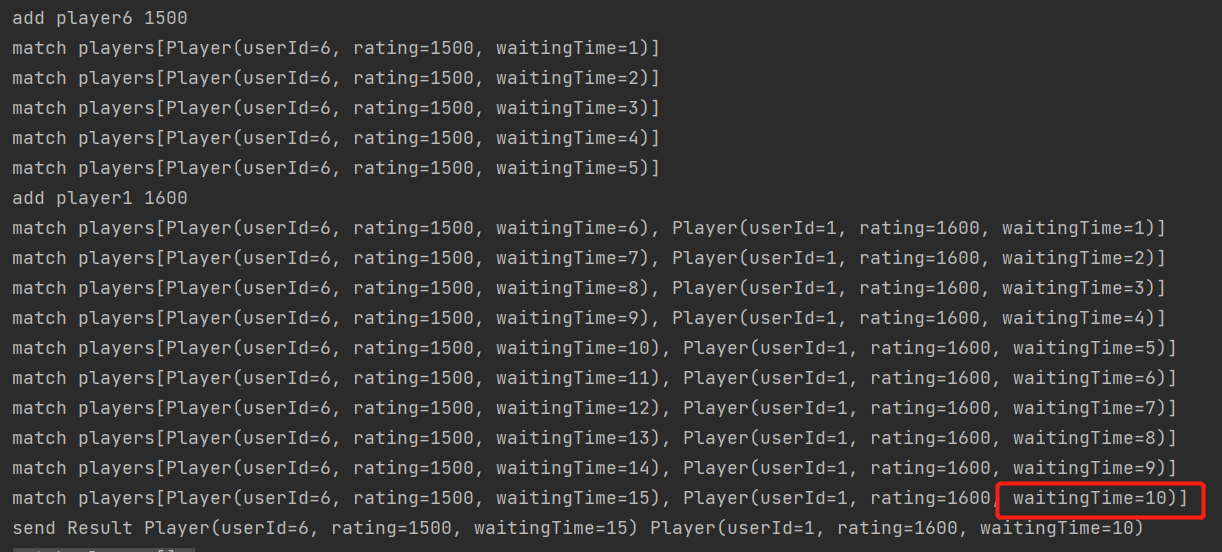
waitingTime >= 10
因此,需要两名玩家的等待时间都>=10的时候,两者匹配。
测试结果如下:
老板模式
有些时候玩家匹配成功之后,游戏过程中,突然老板进来了,然后此时立刻关闭网页。也就是不通过请求的方式想匹配系统发起取消匹配,而是直接断开连接。
也就是针对:玩家在匹配池,但是玩家已经断开连接
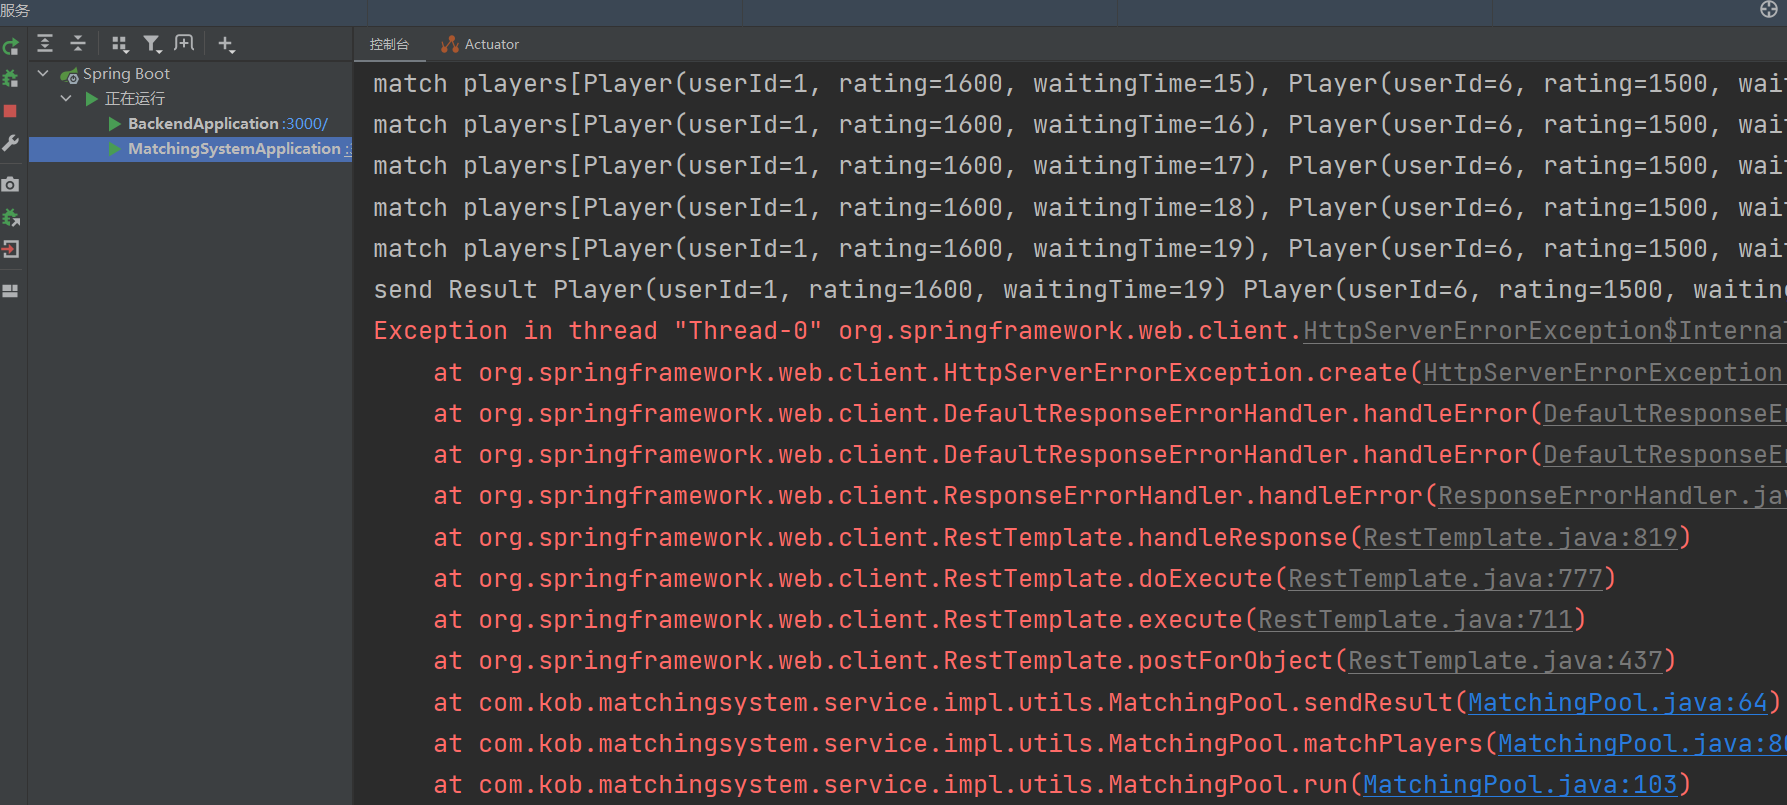
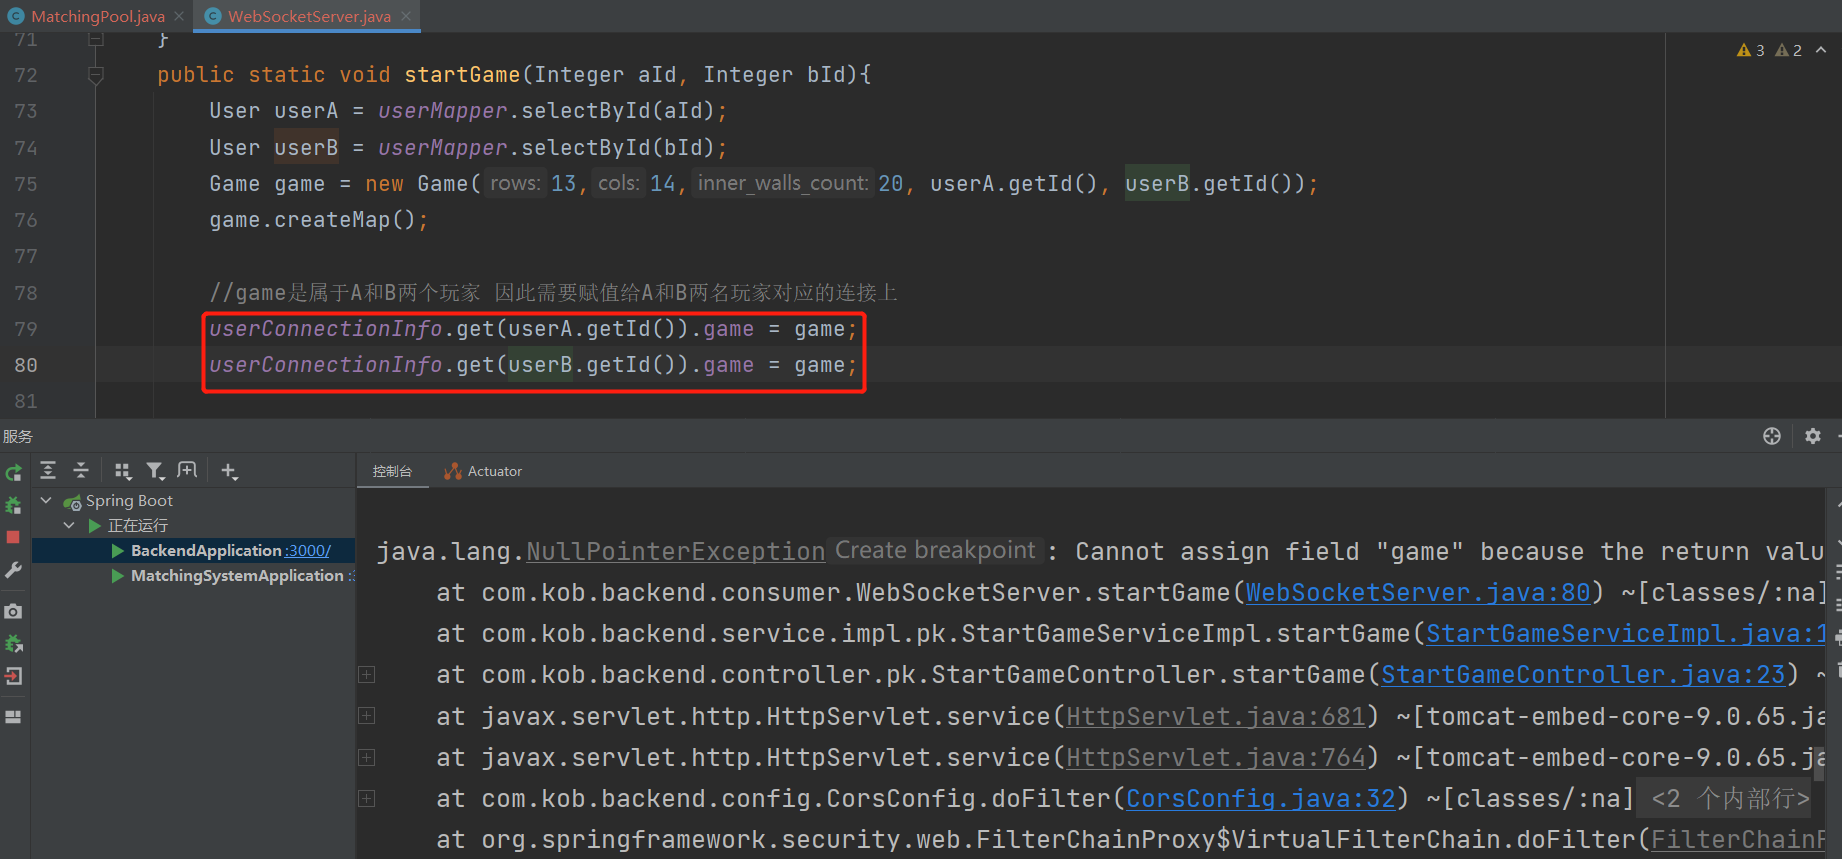
如上,报异常的原因是因为,userConnectionInfo.get(userA.getId())返回的是一个空对象,然后空对象是没有game属性的,所以会报错。
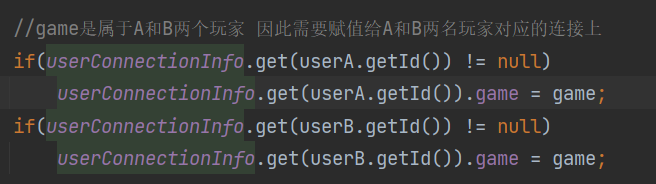
因此这里需要加一些判断。如果已经断开连接,还是将其匹配到一起,但是6秒之内没有接收到操作就会判输。
WebSocketServer.java

同时,consumer.utils.Game.java也要添加判断
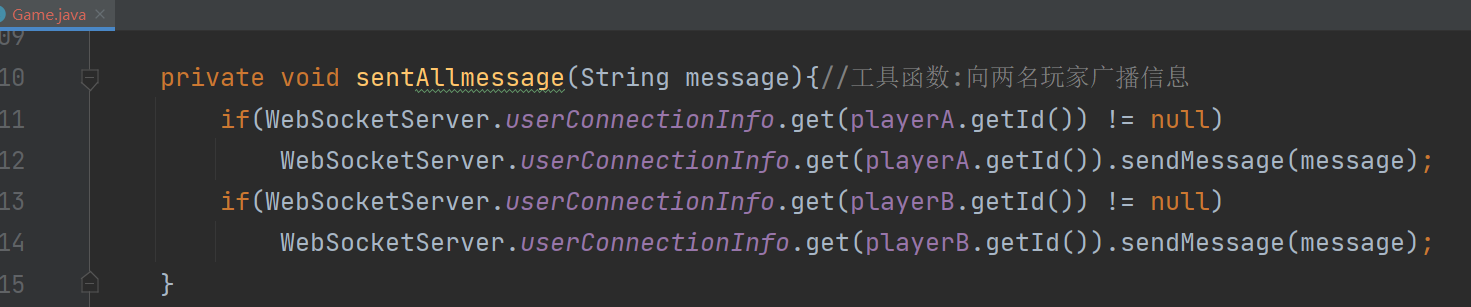
如果已经断开连接,还是将其匹配到一起(不报异常),但是6秒之内没有接收到操作就会判输。