数据库
在数据库中创建表bot
表中包含的列:
id: int:非空、自动增加、唯一、主键user_id: int:非空,用于表示bot的作者
- 注意:在pojo中需要定义成
userId,也就是驼峰命名;在queryWrapper中的名称仍然为user_id
title: varchar(100)description: varchar(300)content:varchar(10000),对应的bot的代码rating: int:默认值为1500createtime: datetime
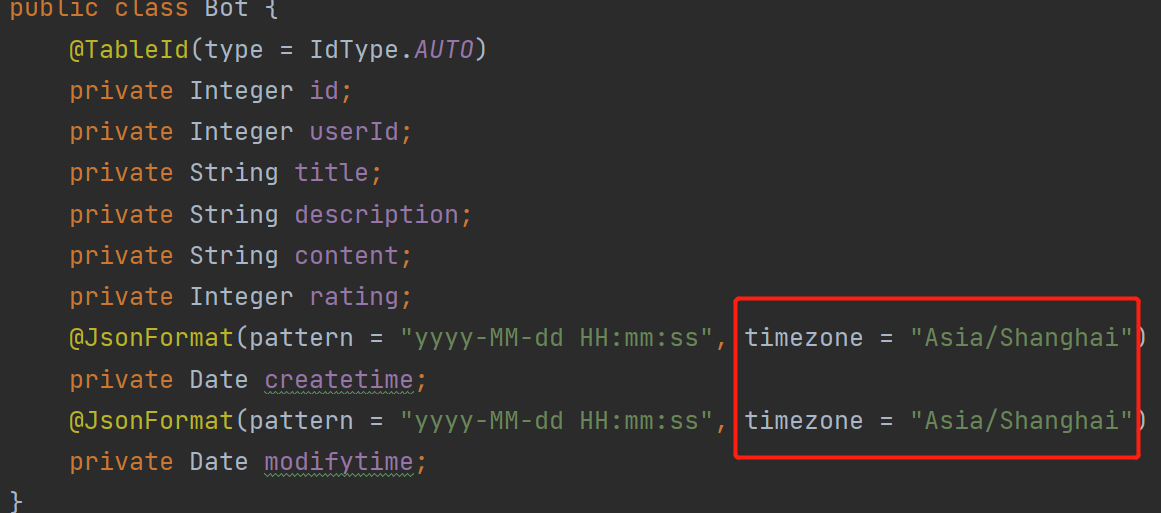
pojo中定义日期格式的注解:@JsonFormat(pattern = "yyyy-MM-dd HH:mm:ss")
modifytime: datetime
pojo中定义日期格式的注解:@JsonFormat(pattern = "yyyy-MM-dd HH:mm:ss")
Pojo
backend/pojo中.java创建对应的Bot.java,将表中的内容映射成class
1
2
3
4
5
6
7
8
9
10
11
12
13
14
15
16
| @Data
@NoArgsConstructor
@AllArgsConstructor
public class Bot {
@TableId(type = IdType.AUTO)
private Integer id;
private Integer userId;
private String title;
private String description;
private String content;
private Integer rating;
@JsonFormat(pattern = "yyyy-MM-dd HH:mm:ss")
private Date createtime;
@JsonFormat(pattern = "yyyy-MM-dd HH:mm:ss")
private Date modifytime;
}
|
mapper
创建backend/mapper/BotMapper.java
1
2
3
| @Mapper
public interface BotMapper extends BaseMapper<User> {
}
|
后端API
接下来就需要实现有关增删改查的四个后端api
/user/bot/add/:创建一个Bot/user/bot/remove/:删除一个Bot/user/bot/update/:修改一个Bot/user/bot/getlist/:查询Bot列表
对于后端api,总共需要实现三个地方,service,service.impl和controller
service
1)service.user.bot.AddService.java
1
2
3
| public interface AddService {
Map<String, String> add (Map<String, String> data);
}
|
2)service.user.bot.RemoveService.java
1
2
3
| public interface RemoveService {
Map<String, String> remove(Map<String, String> data);
}
|
3)service.user.bot.UpdateService.java
1
2
3
| public interface UpdateService {
Map<String, String> update (Map <String, String> data);
}
|
4)service.user.bot.GetListService.java
1
2
3
4
| public interface GetListService {
List<Bot> getlist();
}
|
service.impl
1)service.impl.user.bot.AddServiceImpl.java
1
2
3
4
5
6
7
8
9
10
11
12
13
14
15
16
17
18
19
20
21
22
23
24
25
26
27
28
29
30
31
32
33
34
35
36
37
38
39
40
41
42
43
44
45
46
47
48
49
50
51
52
53
54
55
56
| @Service
public class AddServiceImpl implements AddService {
@Autowired
private BotMapper botMapper;
@Override
public Map<String, String> add(Map<String, String> data) {
UsernamePasswordAuthenticationToken authenticationToken =
(UsernamePasswordAuthenticationToken) SecurityContextHolder.getContext().getAuthentication();
UserDetailsImpl loginUser = (UserDetailsImpl) authenticationToken.getPrincipal();
User user = loginUser.getUser();
String title = data.get("title");
String description = data.get("description");
String content = data.get("content");
Map<String,String> map = new HashMap<>();
if(title == null || title.length() == 0){
map.put("error_message","标题不能为空");
return map;
}
if(title.length() > 100){
map.put("error_message","标题长度不能大于100");
return map;
}
if(description == null || description.length() == 0){
description = "这个用户很懒,什么也没有留下";
}
if(description.length() > 300){
map.put("error_message","Bot描述的长度不能大于300");
return map;
}
if(content == null || content.length() == 0){
map.put("error_message","代码不能为空");
return map;
}
if(content.length() > 10000){
map.put("error_message","代码长度不能大于10000");
return map;
}
Date now = new Date();
Bot bot = new Bot(null, user.getId(), title, description, content, 1500, now, now);
botMapper.insert(bot);
map.put("error_message","success");
return map;
}
}
|
2)service.impl.user.bot.RemoveServiceImpl.java
1
2
3
4
5
6
7
8
9
10
11
12
13
14
15
16
17
18
19
20
21
22
23
24
25
26
27
28
29
30
31
32
33
| @Service
public class RemoveServiceImpl implements RemoveService {
@Autowired
private BotMapper botMapper;
@Override
public Map<String, String> remove(Map<String, String> data) {
UsernamePasswordAuthenticationToken authenticationToken =
(UsernamePasswordAuthenticationToken) SecurityContextHolder.getContext().getAuthentication();
UserDetailsImpl loginUser = (UserDetailsImpl) authenticationToken.getPrincipal();
User user = loginUser.getUser();
int bot_id = Integer.parseInt(data.get("bot_id"));
Bot bot = botMapper.selectById(bot_id);
Map<String, String> map = new HashMap<>();
if(bot == null){
map.put("error_message","Bot不存在或已被删除");
return map;
}
if(!bot.getUserId().equals(user.getId())){
map.put("error_message","没有权限删除该Bot");
return map;
}
botMapper.deleteById(bot_id);
map.put("error_message","success");
return map;
}
}
|
3)service.impl.user.bot.UpdateServiceImpl.java
1
2
3
4
5
6
7
8
9
10
11
12
13
14
15
16
17
18
19
20
21
22
23
24
25
26
27
28
29
30
31
32
33
34
35
36
37
38
39
40
41
42
43
44
45
46
47
48
49
50
51
52
53
54
55
56
57
58
59
60
61
62
63
64
65
66
67
68
| @Service
public class UpdateServiceImpl implements UpdateService {
@Autowired
private BotMapper botMapper;
@Override
public Map<String, String> update(Map<String, String> data) {
UsernamePasswordAuthenticationToken authenticationToken
= (UsernamePasswordAuthenticationToken) SecurityContextHolder.getContext().getAuthentication();
UserDetailsImpl loginUser
= (UserDetailsImpl) authenticationToken.getPrincipal();
User user = loginUser.getUser();
String title = data.get("title");
String description = data.get("description");
String content = data.get("content");
Date now = new Date();
Map<String, String> map = new HashMap<>();
if(title == null || title.length() == 0){
map.put("error_message","标题不能为空");
return map;
}
if(title.length() > 100){
map.put("error_message","标题长度不能大于100");
return map;
}
if(description == null || description.length() == 0){
description = "这个用户很懒,什么也没有留下";
}
if(description.length() > 300){
map.put("error_message","Bot描述的长度不能大于300");
return map;
}
if(content == null || content.length() == 0){
map.put("error_message","代码不能为空");
return map;
}
if(content.length() > 10000){
map.put("error_message","代码长度不能大于10000");
return map;
}
int bot_id = Integer.parseInt(data.get("bot_id"));
Bot bot = botMapper.selectById(bot_id);
if(bot == null){
map.put("error_message","Bot不存在或已删除");
return map;
}
if(!bot.getUserId().equals(user.getId())){
map.put("error_message", "没有权限修改该Bot");
return map;
}
try{
bot.setTitle(title);
bot.setDescription(description);
bot.setContent(content);
bot.setModifytime(now);
}catch(Exception e) {
System.out.println("更新失败");
}
botMapper.updateById(bot);
map.put("error_message", "success");
return map;
}
}
|
4)service.impl.user.bot.GetListServiceImpl.java
1
2
3
4
5
6
7
8
9
10
11
12
13
14
15
16
17
18
19
| @Service
public class GetListServiceImpl implements GetListService {
@Autowired
private BotMapper botMapper;
@Override
public List<Bot> getlist() {
UsernamePasswordAuthenticationToken authenticationToken =
(UsernamePasswordAuthenticationToken) SecurityContextHolder.getContext().getAuthentication();
UserDetailsImpl loginUser = (UserDetailsImpl) authenticationToken.getPrincipal();
User user = loginUser.getUser();
QueryWrapper<Bot> queryWrapper = new QueryWrapper();
queryWrapper.eq("user_id",user.getId());
List<Bot> bots = botMapper.selectList(queryWrapper);
return bots;
}
}
|
controller
1)controller.user.bot.AddController.java
1
2
3
4
5
6
7
8
9
10
| @RestController
public class AddController {
@Autowired
private AddService addService;
@PostMapping("/user/bot/add/")
public Map<String, String> add (@RequestParam Map<String,String> data){
return addService.add(data);
}
}
|
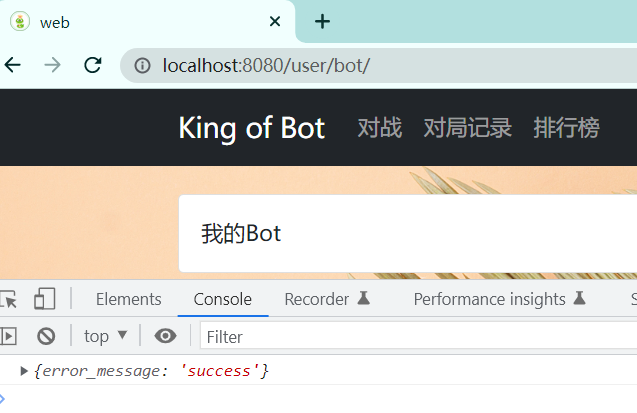
测试:
在views\user\bot\UserBotIndexView.vue中创建如下代码:

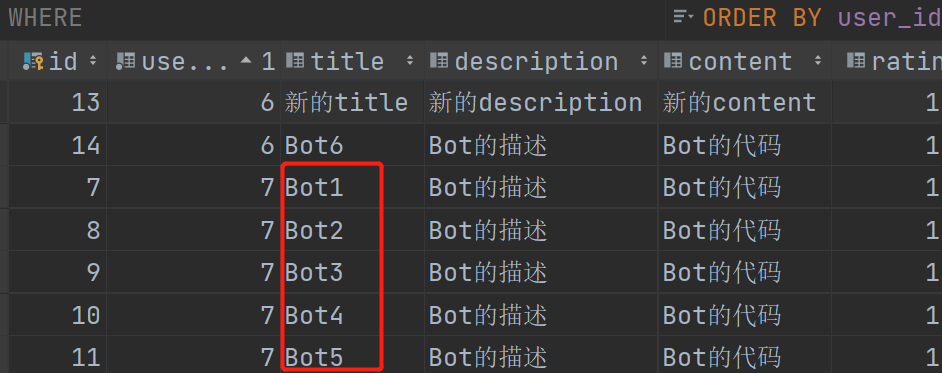
使用zhou进行登录,对应的userID为7

2)controller.user.bot.RemoveController.java
1
2
3
4
5
6
7
8
9
10
11
| @RestController
public class RemoveController {
@Autowired
private RemoveService removeService;
@PostMapping("/user/bot/remove/")
public Map<String,String> remove (@RequestParam Map<String, String> data){
return removeService.remove(data);
}
}
|
3)controller.user.bot.UpdateController.java
1
2
3
4
5
6
7
8
9
10
| @RestController
public class UpdateController {
@Autowired
private UpdateService updateService;
@PostMapping("/user/bot/update/")
public Map<String, String> update (@RequestParam Map<String,String> data){
return updateService.update(data);
}
}
|
4)controller.user.bot.GetListController.java
1
2
3
4
5
6
7
8
9
| @RestController
public class GetListController {
@Autowired
private GetListService getListService;
@GetMapping("/user/bot/getlist")
public List<Bot> getlist (){
return getListService.getlist();
}
}
|
前端实现
接下来实现“我的Bot”页面
在个人中心页面,要能对Bot进行增删改查
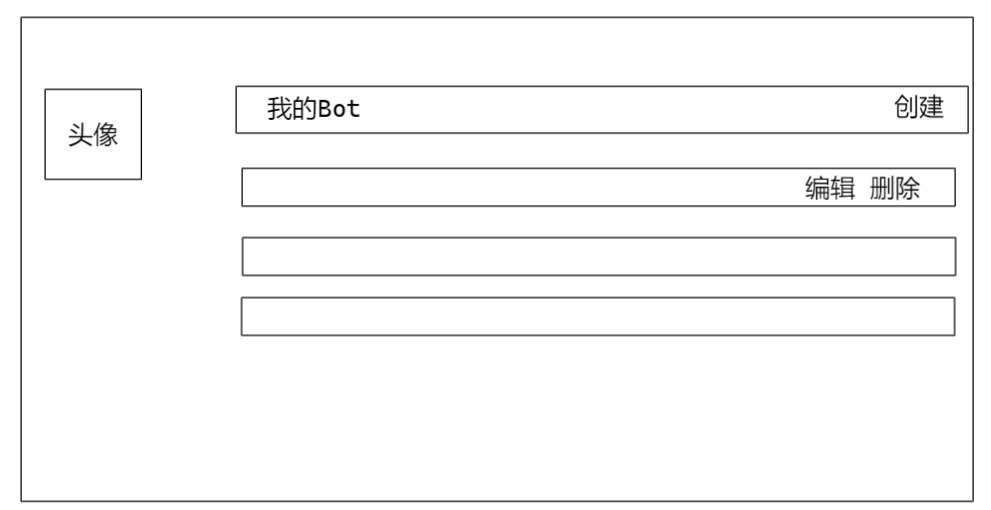
展示列表
依然是使用Grid system进行布局,Grid system将一行分成12份,我们设置头像占3份,其余占9份
1
2
3
4
5
6
7
8
9
10
11
12
13
14
15
16
17
18
19
20
21
22
23
24
25
26
27
| <template>
<div class="container">
<div class="row">
<div class="col-3">
<div class="card">
<div class="card-body">
<img :src="$store.state.user.photo" style="width:100%">
</div>
</div>
</div>
<div class="col-9">
<div class="card">
<div class="card-header">
<span style="font-size:130%">我的Bot</span>
<button type="button" class="btn btn-primary float-end">创建</button>
</div>
<div class="card-body"></div>
</div>
</div>
</div>
</div>
</template>
<style scoped>
div.card{
margin-top: 20px;
}
</style>
|
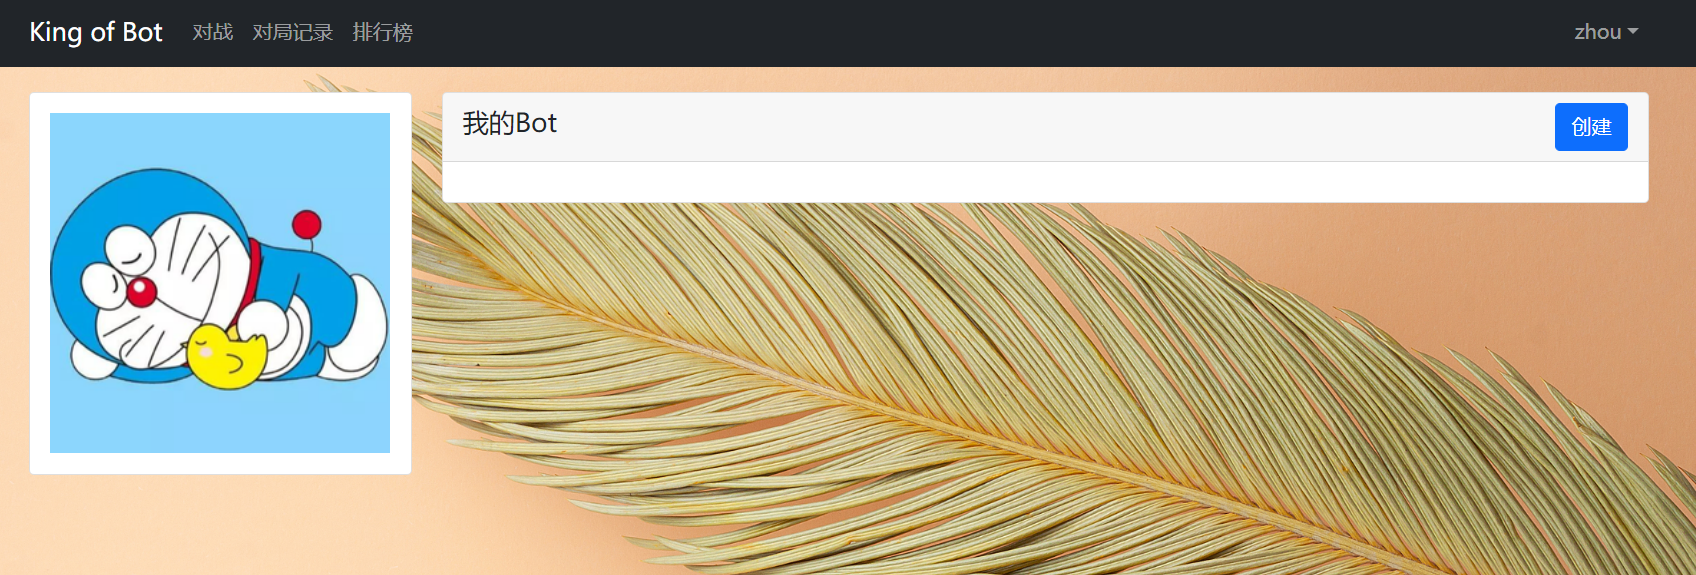
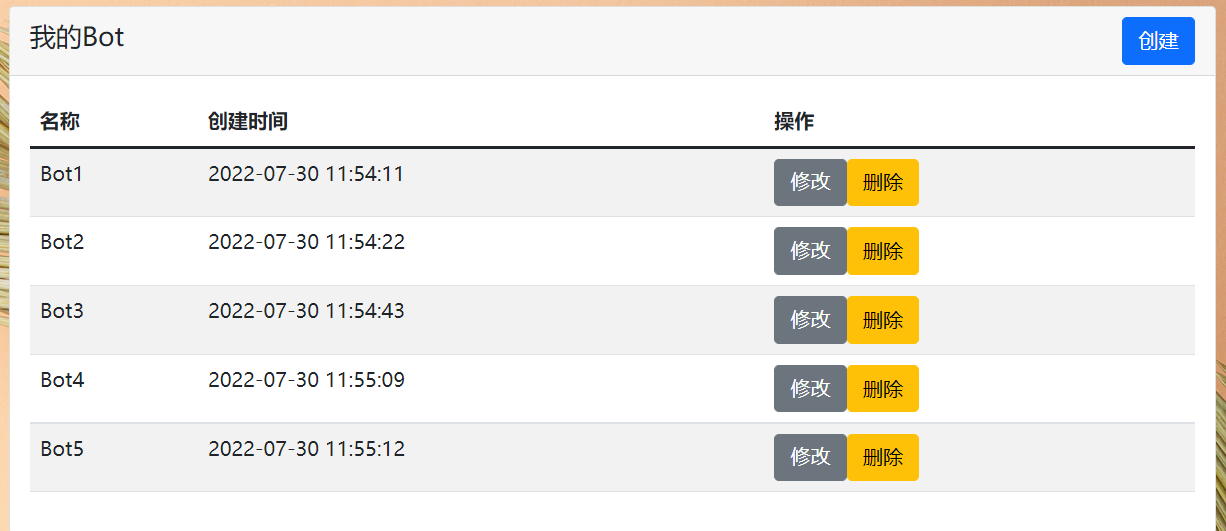
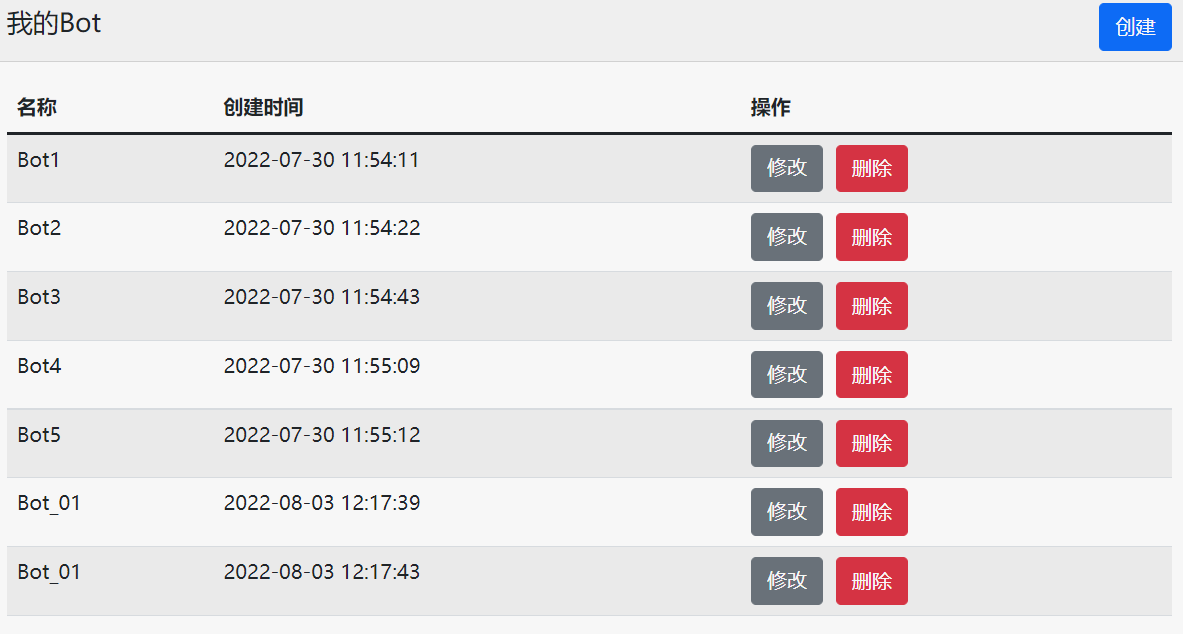
样式如下:
现在需要显示bot列表,就需要通过Ajax来请求后端的api:/user/bot/getlist/
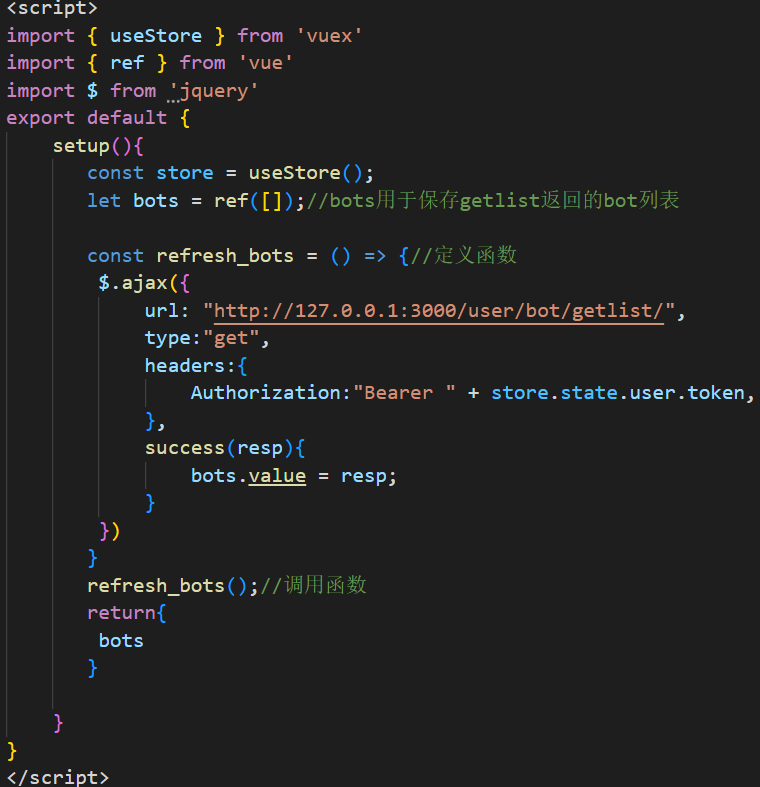
然后将获取到的bots渲染到前端
首先添加一个表格样式:

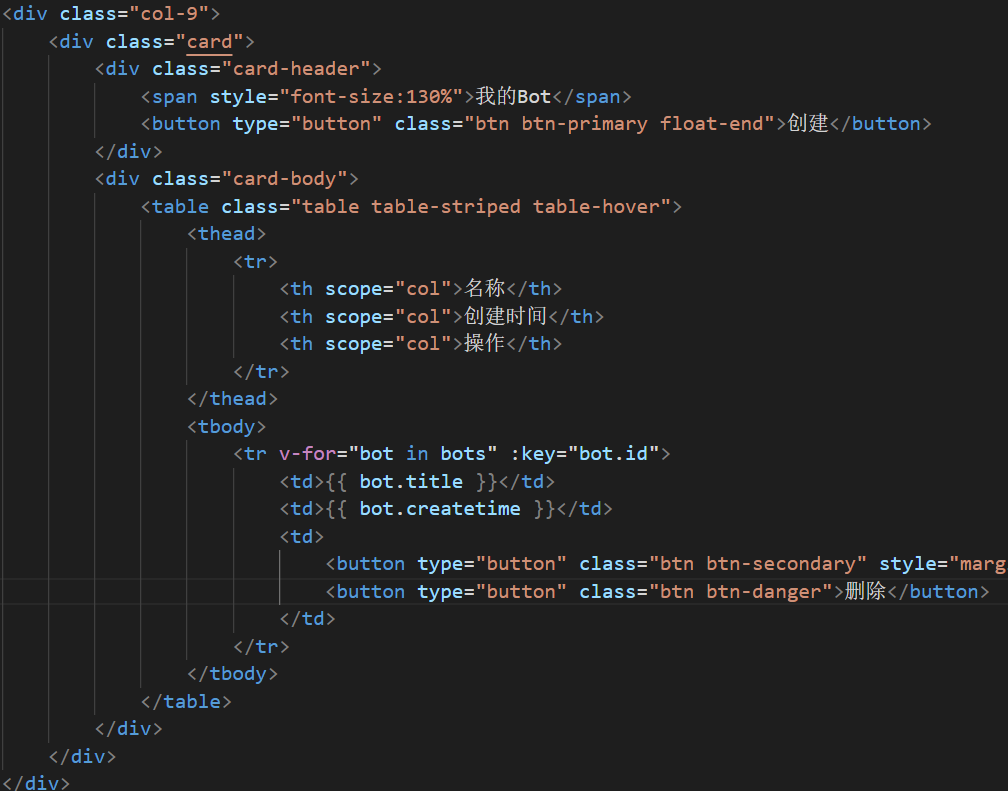
此时,前端就将后端数据库中的结果遍历出来(当前登录的是7号用户)
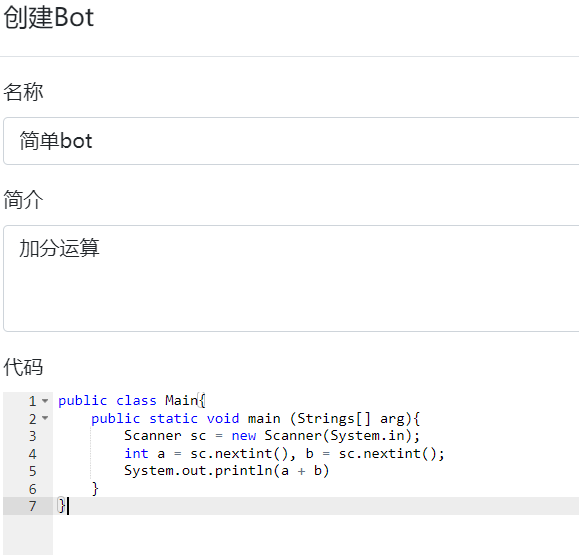
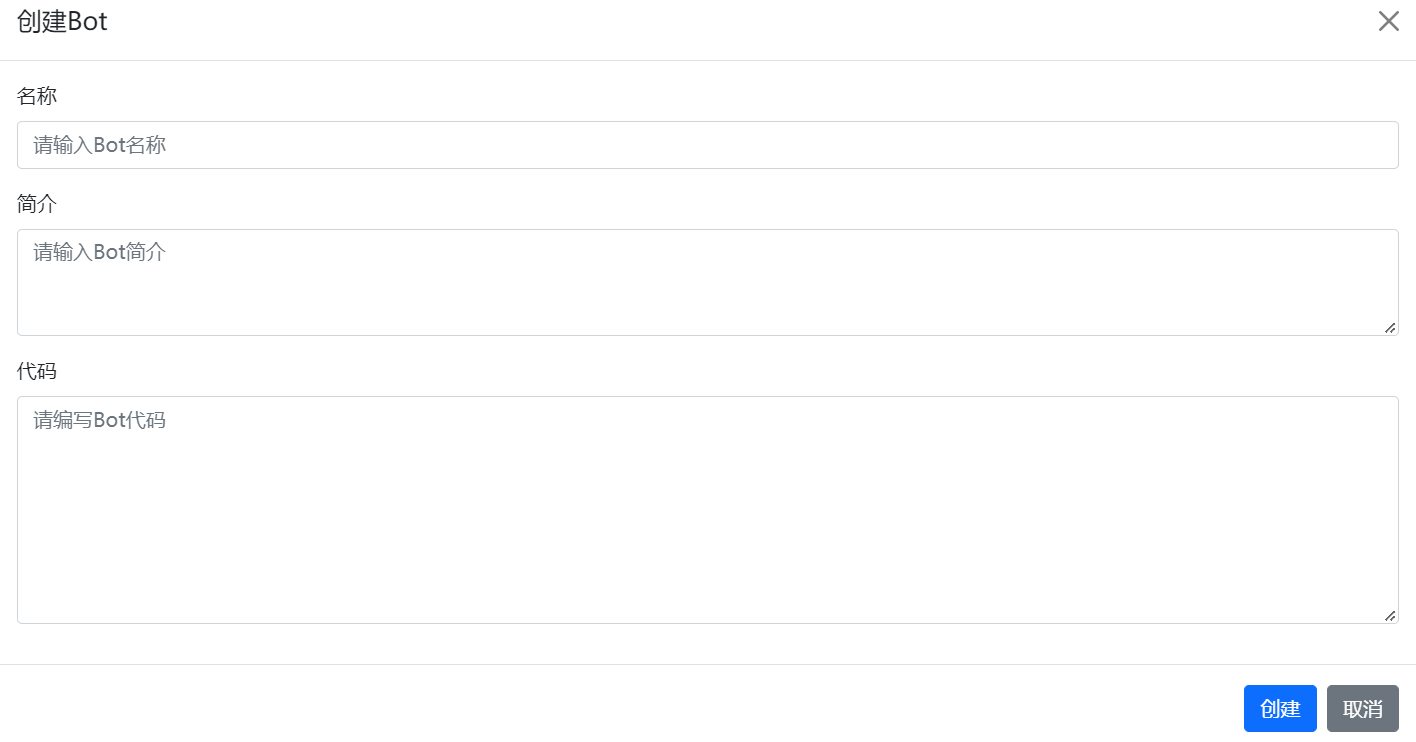
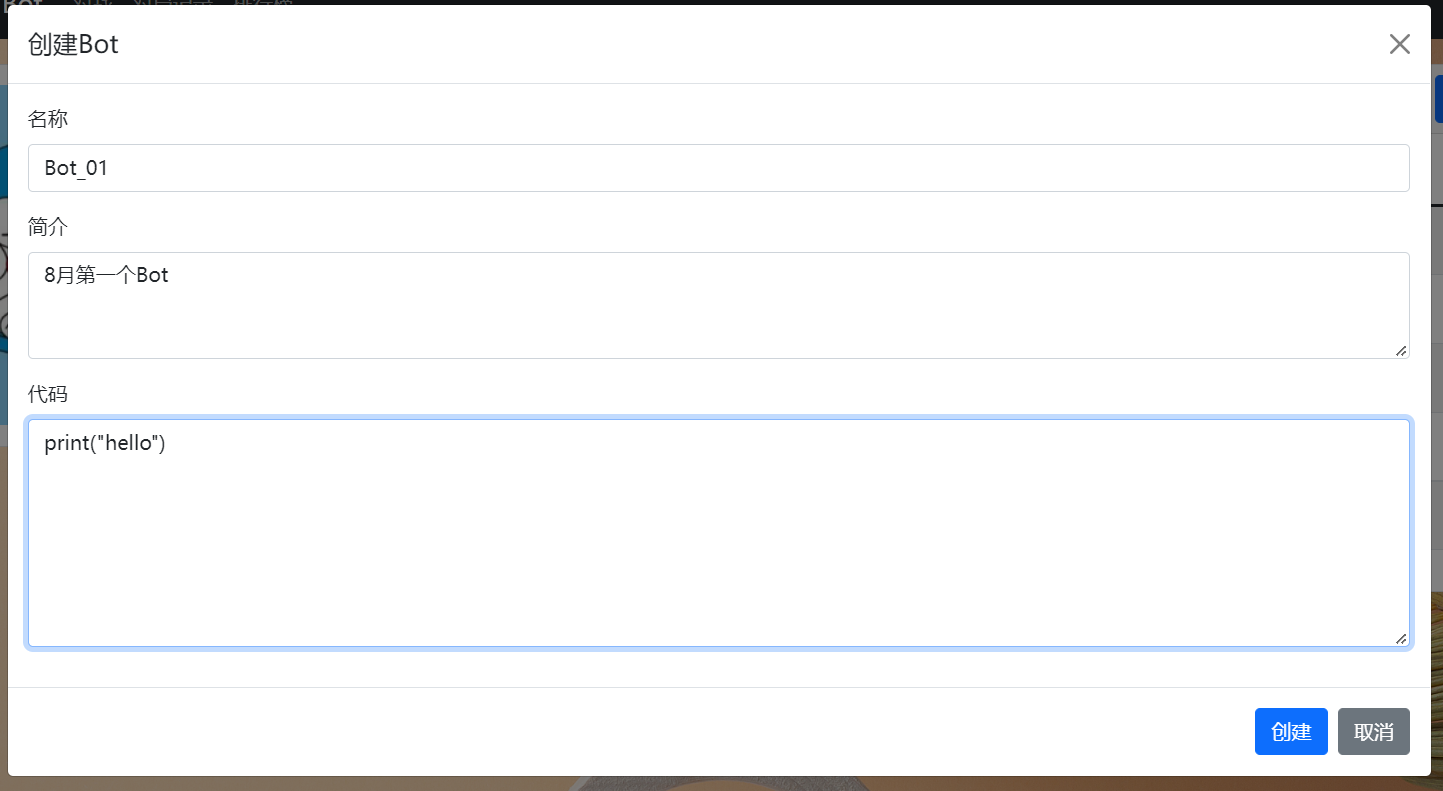
创建Bot
设想是点击创建之后,可以有一个悬浮窗,我们在悬浮窗中创建。
用到Bootstrap的Modal组件
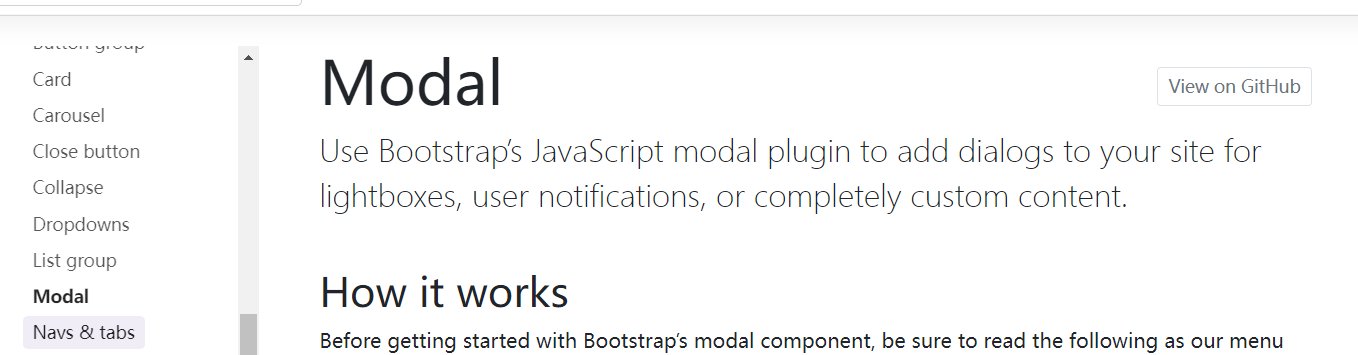
使用其中一个demo进行修改
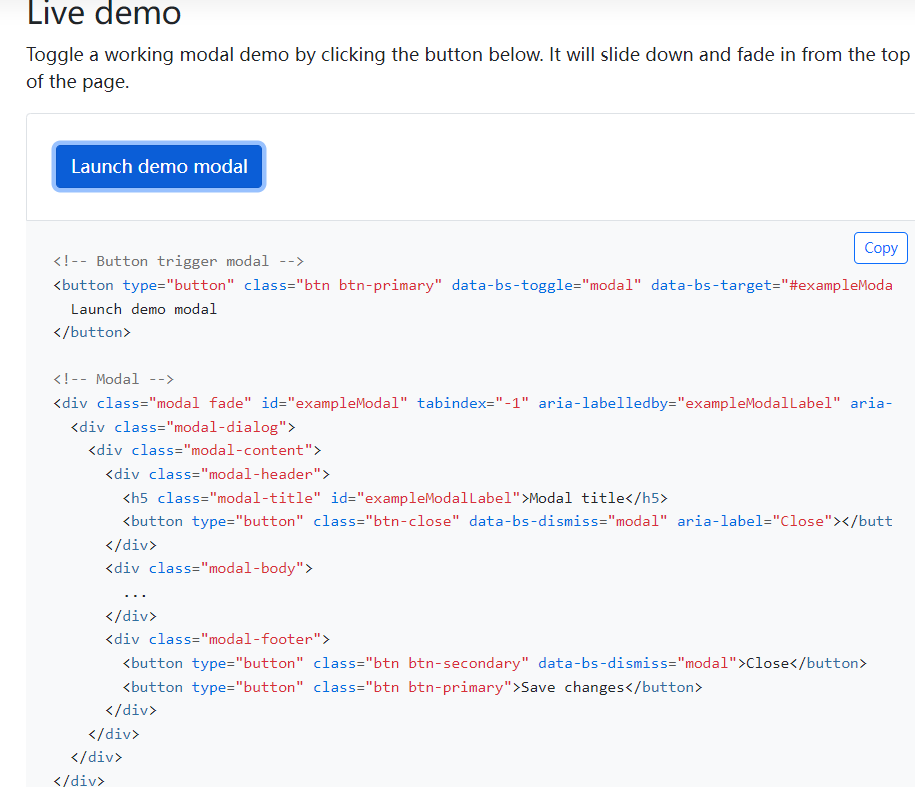
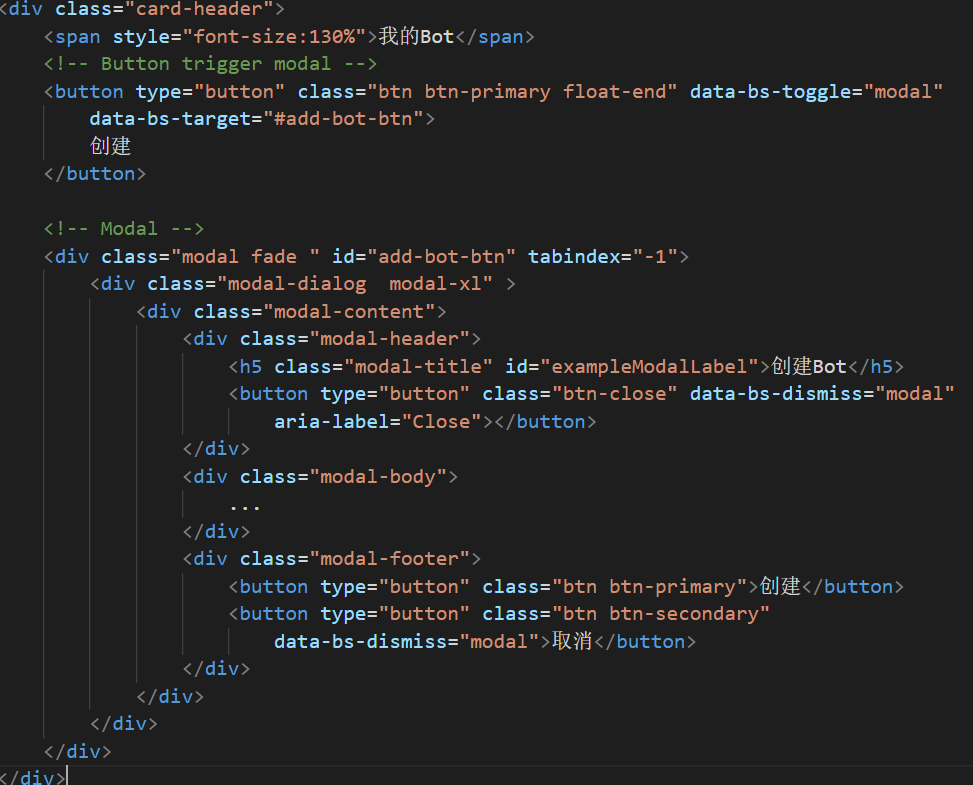
效果如下:
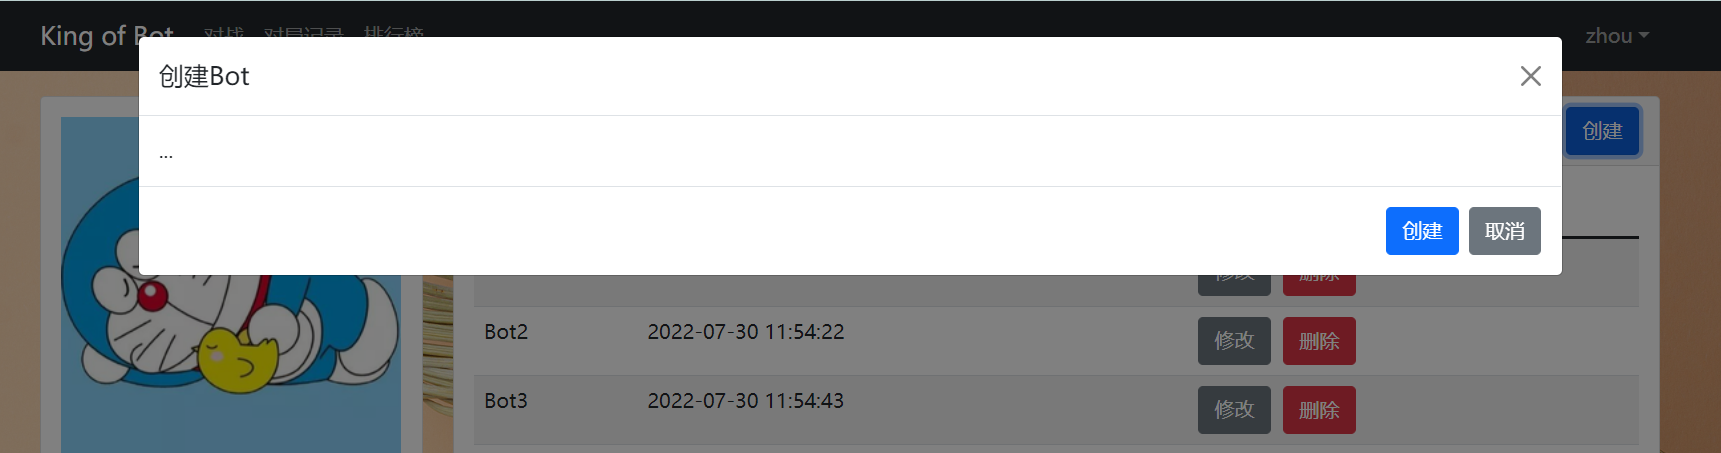
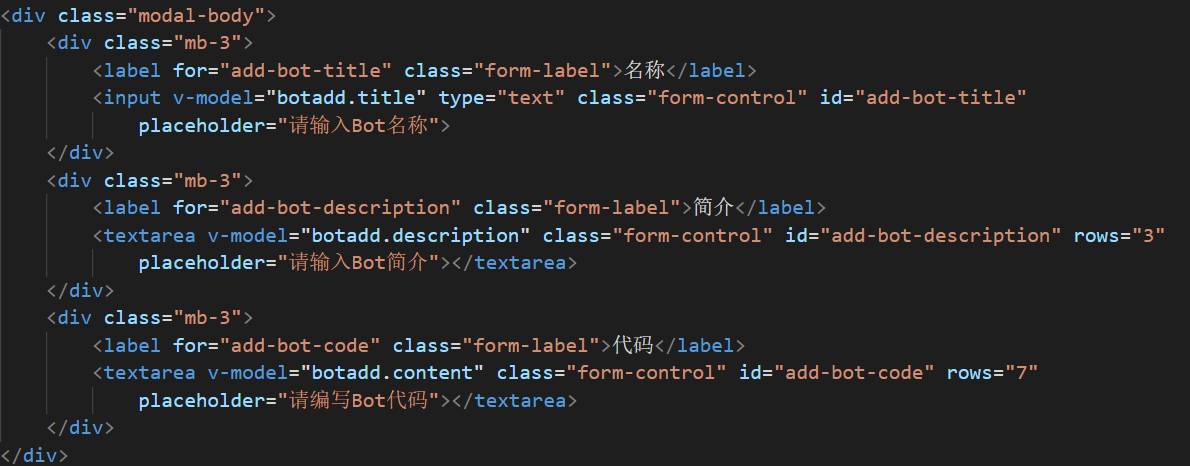
现在需要继续在里面添加Form表单
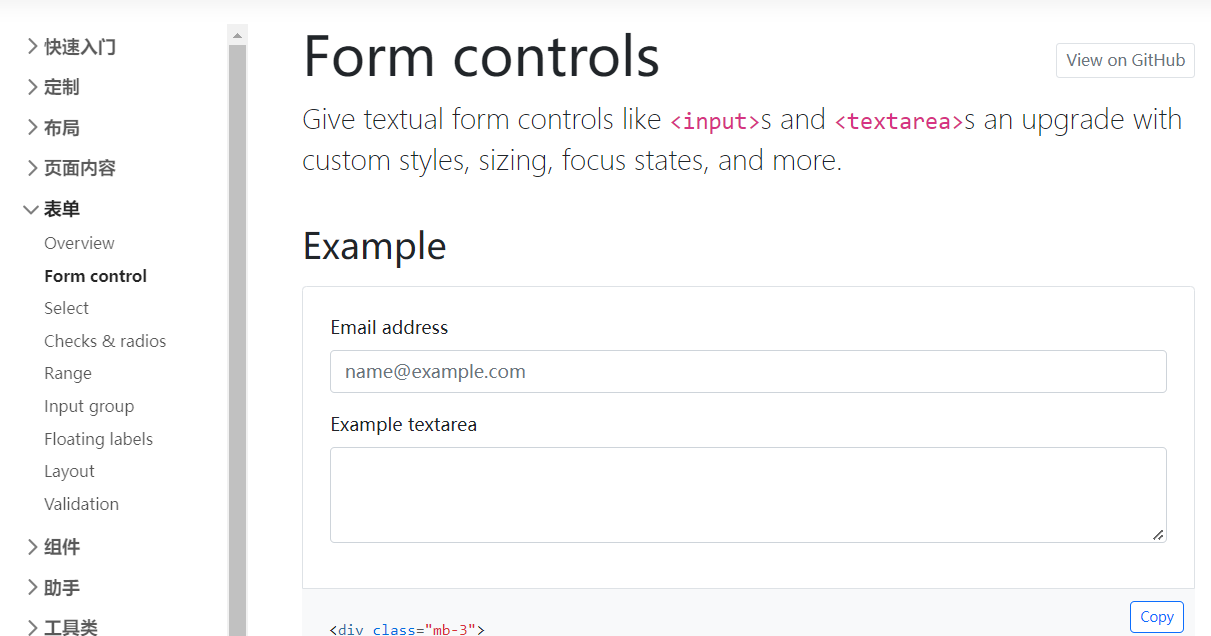
效果如下:
在script中,借助reactive定义一个Bot对象
1
2
3
4
5
6
7
8
| import { reactive } from 'vue'
const botadd = reactive({
title:"",
description:"",
content:"",
error_message:"",
});
|
并在前端通过v-model将输入的内容与对象的属性绑定
在点击创建的时候,触发add_bot函数,定义如下:
1
2
3
4
5
6
7
8
9
10
11
12
13
14
15
16
17
18
19
20
21
22
23
|
const add_bot = () =>{
botadd.error_message = "";
$.ajax({
url:"http://localhost:3000/user/bot/add/",
type:"post",
data:{
title:botadd.title,
description:botadd.description,
content:botadd.content,
},
headers:{
Authorization:"Bearer " + store.state.user.token,
},
success(resp){
if(resp.error_message === "success"){
refresh_bots();
}else{
botadd.error_message = resp.error_message;
}
}
})
}
|
注意:凡是没有放行的url,也就是需要确保登录正常才能访问,在提交请求的时候,必须要添加授权验证信息:
1
2
3
| headers:{
Authorization:"Bearer " + store.state.user.token,
},
|
目前只有登录和注册页面放行:
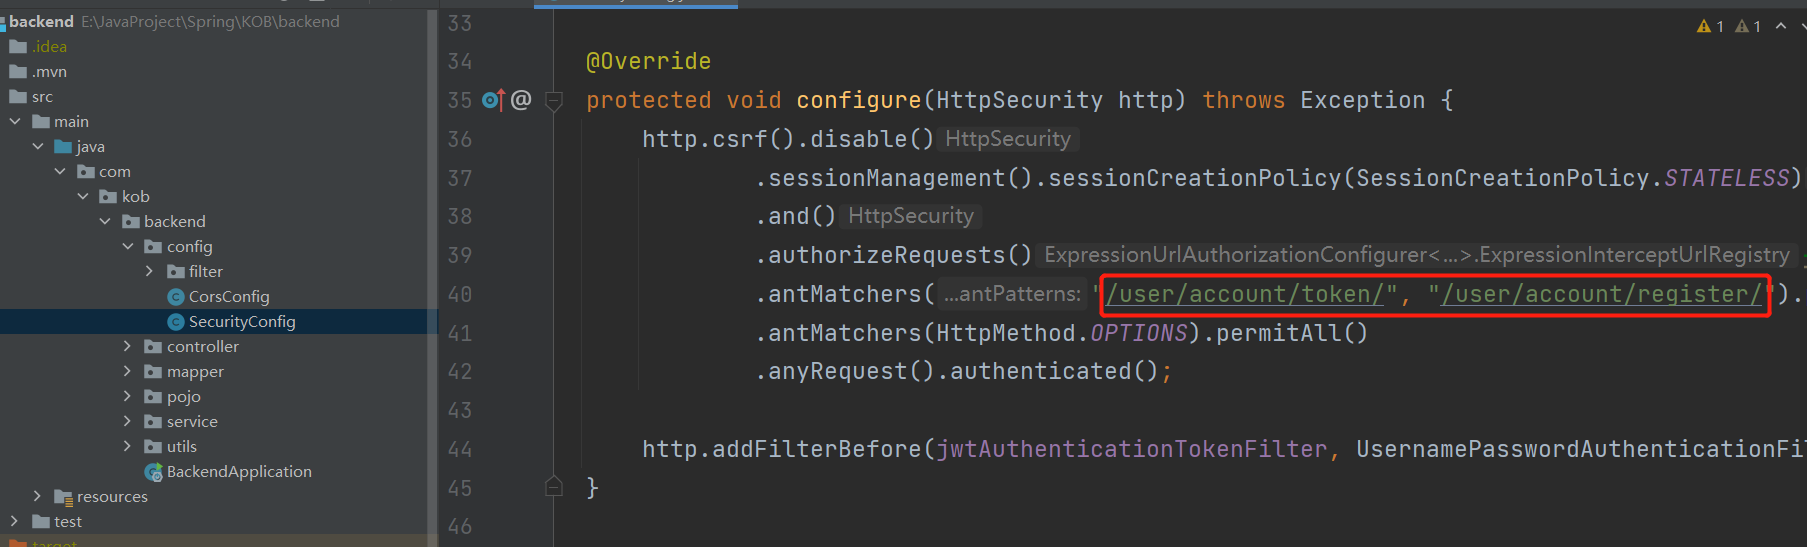
只有对这两个url发起的请求不需要添加headers
在点击“创建”按钮,触发add_bot事件
1
| <button type="button" class="btn btn-primary" @click="add_bot">创建</button
|
测试成功。
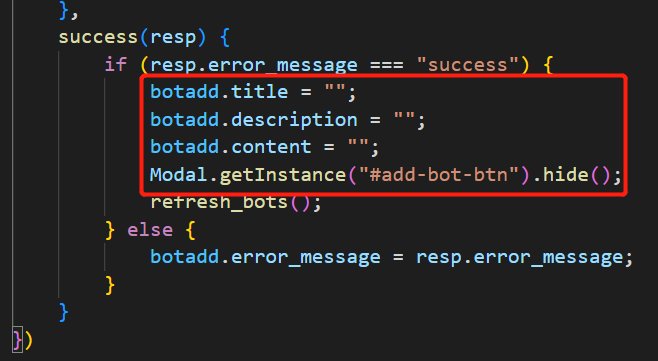
优化:创建之后
另外有个问题时间不一致:
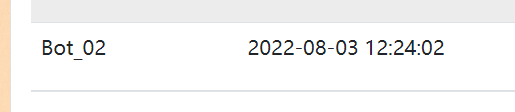

在Pojo中修改时区,然后重启项目即可。
删除Bot
定义remove_bot函数,注意带有参数
1
2
3
4
5
6
7
8
9
10
11
12
13
14
15
16
17
18
19
20
21
|
const remove_bot = (bot)=>{
$.ajax({
url:"http://localhost:3000/user/bot/remove/",
type:"post",
headers:{
            Authorization:"Bearer " + store.state.user.token,
        },
data:{
bot_id:bot.id
},
success(resp){
if(resp.error_message == "success"){
console.log("删除成功");
refresh_bots();
}else{
alert(resp.error_message)
}
}
})
}
|
前端通过@click绑定事件
1
2
3
4
5
6
7
8
9
10
11
| <tbody>
<tr v-for="bot in bots" :key="bot.id">
<td>{{ bot.title }}</td>
<td>{{ bot.createtime }}</td>
<td>
<button type="button" class="btn btn-secondary"
style="margin-right:10px">修改</button>
<button type="button" class="btn btn-danger" @click="remove_bot(bot)">删除</button>
</td>
</tr>
</tbody>
|
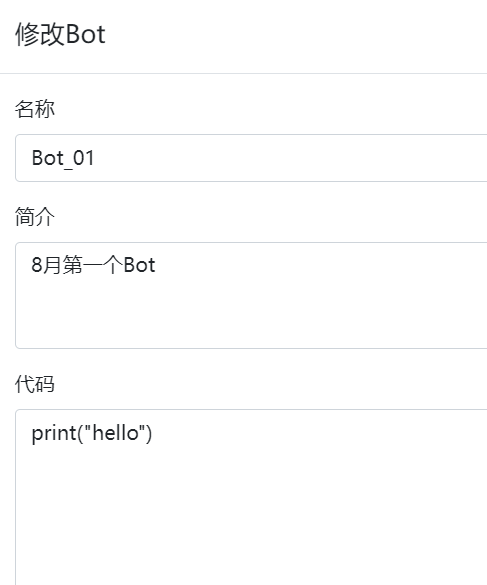
修改Bot
修改的逻辑和添加基本一致
1
2
3
4
5
6
7
8
9
10
11
12
13
14
15
16
17
18
19
20
21
22
23
24
25
26
|
const update_bot = (bot) => {
bot.error_message = "";
$.ajax({
url: "http://localhost:3000/user/bot/update/",
type: "post",
data: {
bot_id:bot.id,
title: bot.title,
description: bot.description,
content: bot.content,
},
headers: {
Authorization: "Bearer " + store.state.user.token,
},
success(resp) {
if (resp.error_message === "success") {
Modal.getInstance('#update-bot-btn-' + bot.id).hide();
alert("修改成功");
refresh_bots();
} else {
bot.error_message = resp.error_message;
}
}
})
}
|
在前端,需要将每一个bot对应的Modal框都不一样,因此需要添加一个id字段
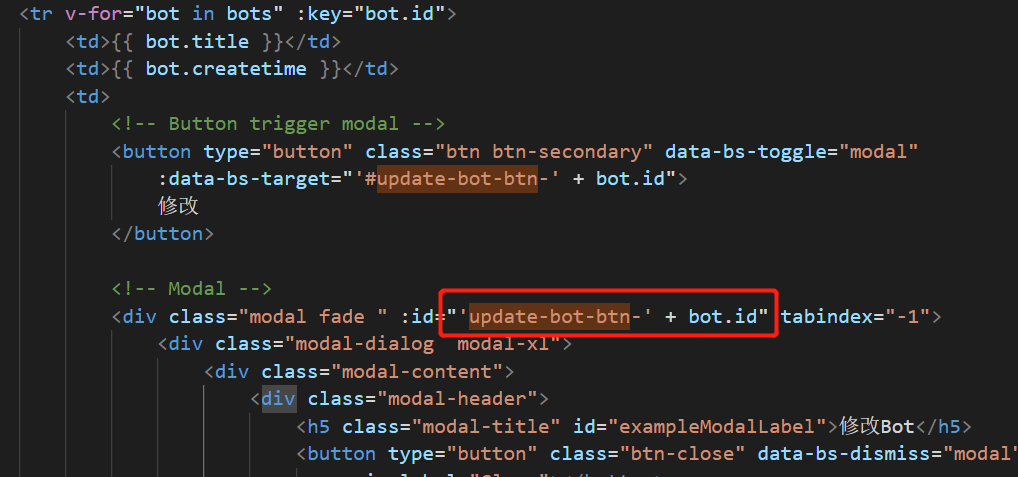
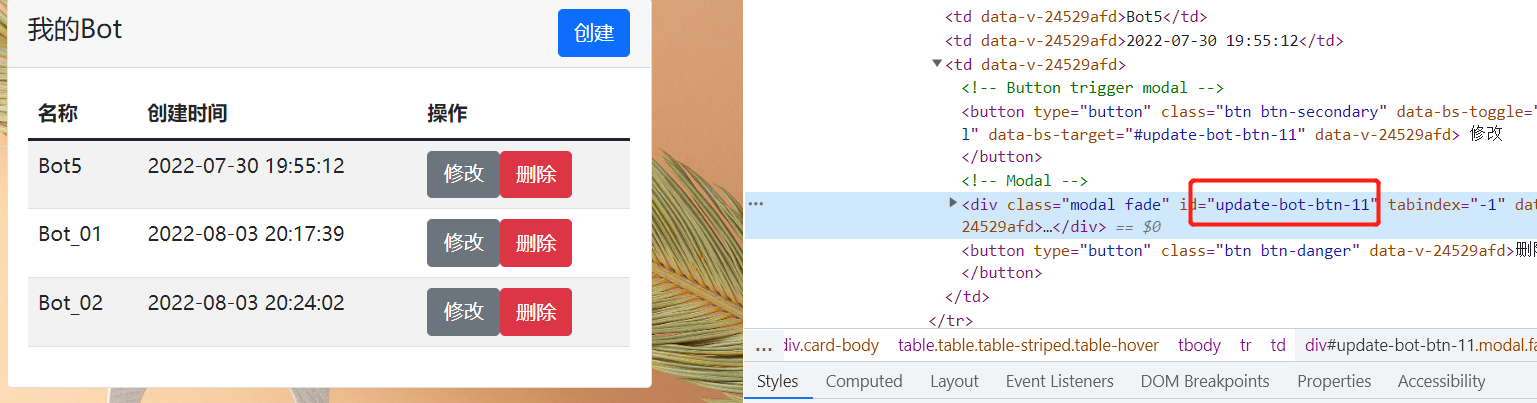
每一个bot与每一个模态框绑定起来,这样点击对应的bot之后,在Modal框中展示出相应的的内容
否则的话,不管点击哪个bot,因为只有一个Modal框,展示的都只是第一个bot的内容!
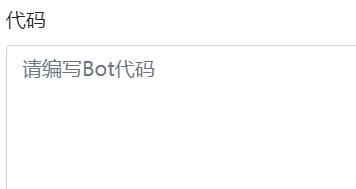
代码编辑器
希望将编写代码的区域换成代码编辑器
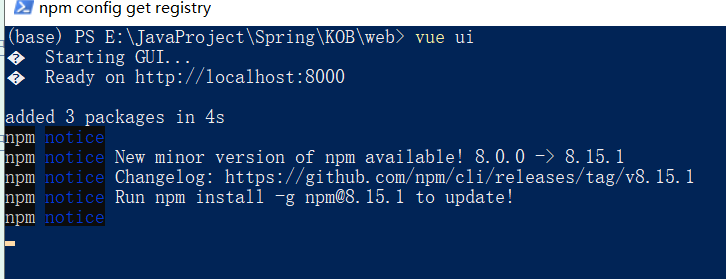
在vue控制台安装依赖:vue3-ace-editor
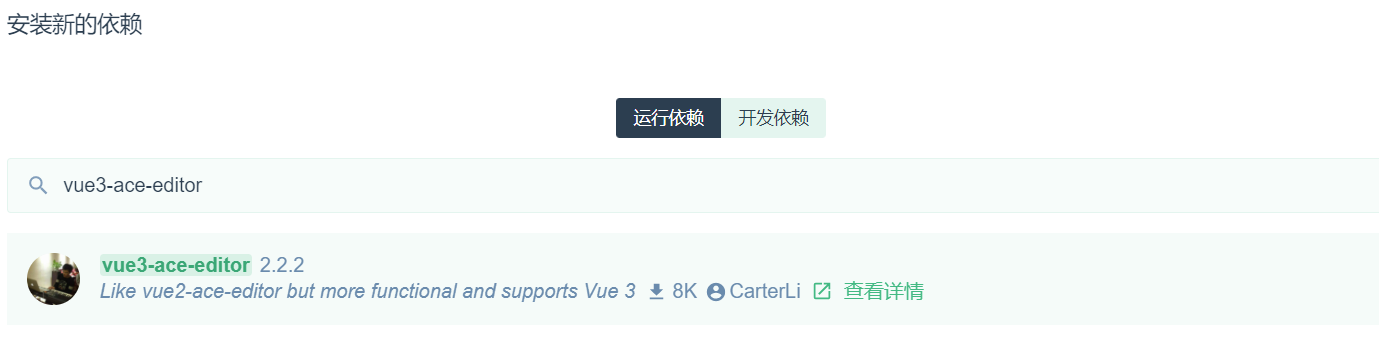
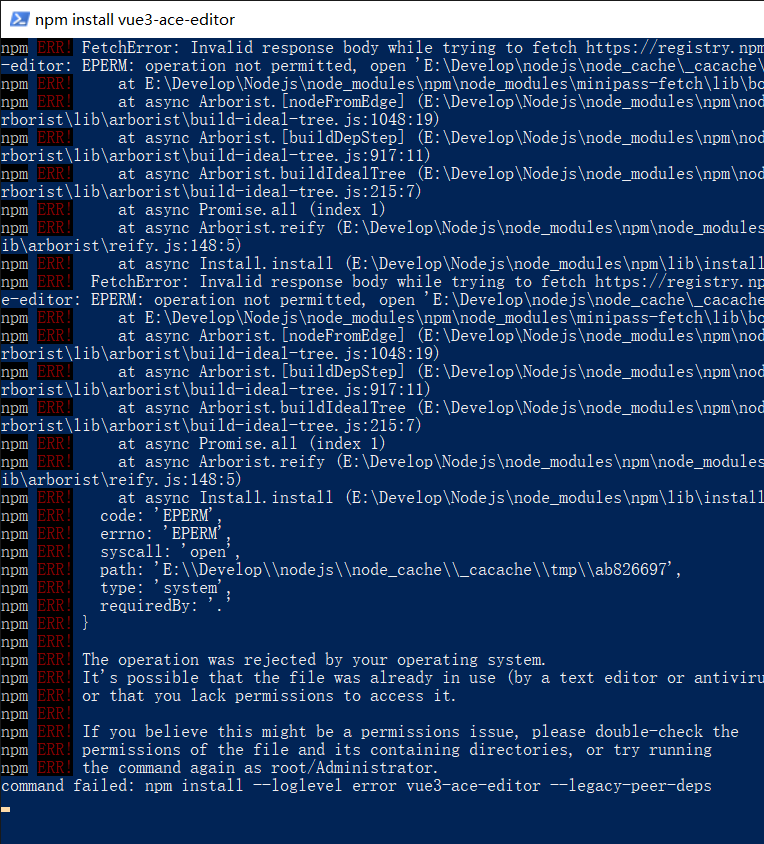
解决方法是,使用管理员打开powershell

集成依赖,并将其注册为VUE选项的组件
1
2
3
4
5
6
7
8
9
10
11
| import { VAceEditor } from 'vue3-ace-editor';
import ace from 'ace-builds';
export default {
data,
methods,
...
components: {
VAceEditor,
},
}
|
在setup中添加
1
2
3
| ace.config.set(
"basePath",
"https://cdn.jsdelivr.net/npm/ace-builds@" + require('ace-builds').version + "/src-noconflict/")
|
然后用下面这段代码替换代码区域
(对于修改而言,是v-model:value="bot.content")
1
2
3
4
5
6
| <VAceEditor
v-model:value="botadd.content"
@init="editorInit"
lang="c_cpp"
theme="textmate"
style="height: 300px" />
|
实现效果